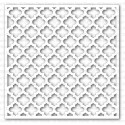
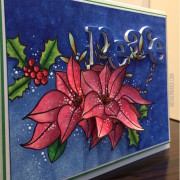
Hello Friends! I’m back with another video today. I wanted to show you how I layered two stencils and some embossing paste for my background. Do you have any stencils? It’s so fun to layer them.
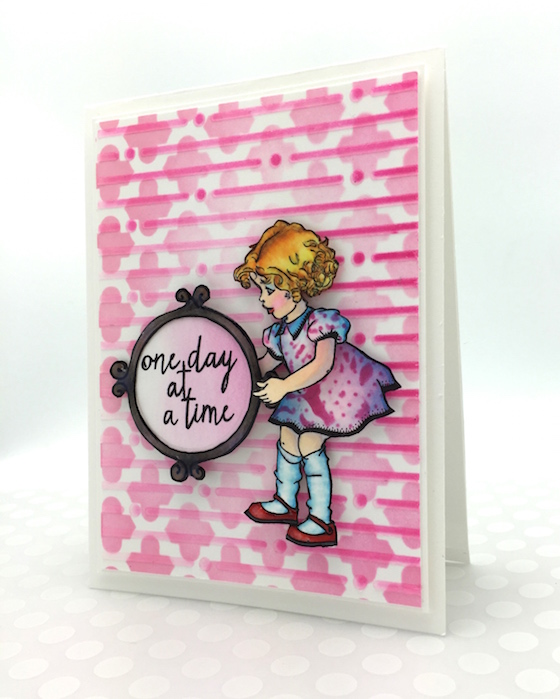
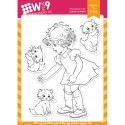
Finally I had some time to color WPlus9‘s “Pick of the Litter” . The owner of the company is Dawn and she’s so talented and so lovely. Honestly I don’t love coloring animals so I combined a Hero Arts sentiment and Lawn Fawns Flirty Frames to finish off my card.
To watch the video in HD click here.
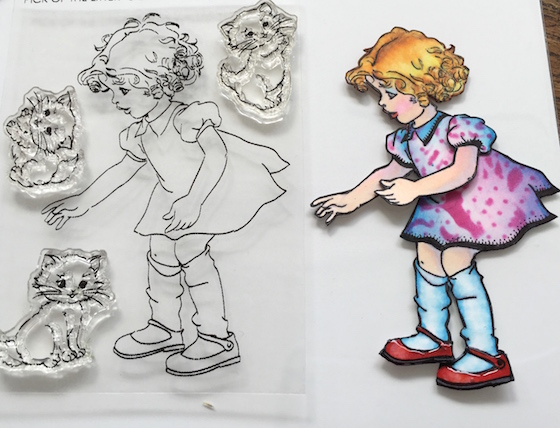
In the video I explained how I stamped the arm. I wanted to move the arm so it would hold my frame.
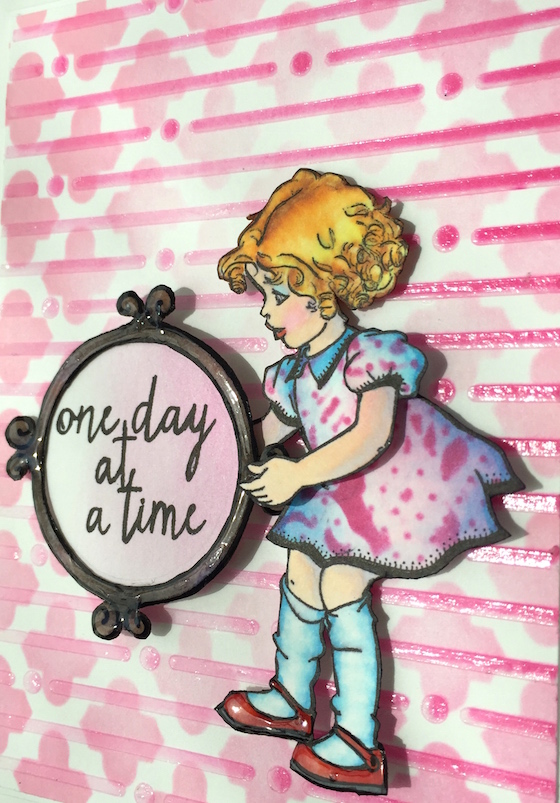
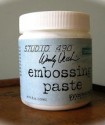
When I look at this close up I cringe a little…eek!! I just wanted you to see the clear embossing paste and glossy accents. (the lips are to bright and to much eye shadow!) In the video I share the two stencils that I use on her dress and they are in the supply list at the bottom of the post.
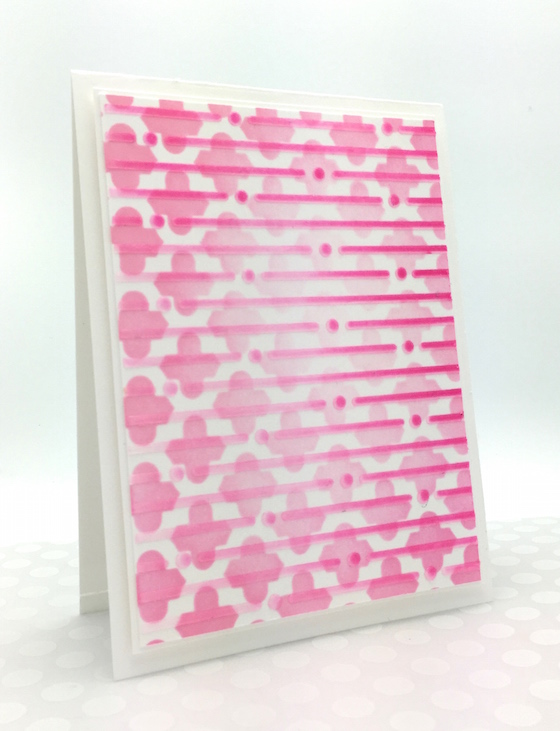
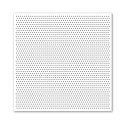
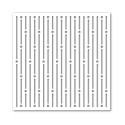
All you need to do is add a sentiment and this background can stand alone. I used Simon Says Stamps Moroccan stencil and the Dots and Lines stencil. The distress inks are this and this. I hope you give this technique a try. Enjoy your day and see you tomorrow. Hugs, Kathy
P.S. STAY TUNED FOR AN AMAZING GIVEAWAY FROM MAMA ELEPHANT!!
P.S.S If you are new to the 30 Day Color Challenge YOU CAN JUMP IN AT ANY TIME. You might want to read some of the details… Click hereto get all of the info. To share your coloring/projects for Day 21. click here and scroll down for the InLinkz button.
CARD SUPPLIES AND LINKS: click on any of the thumbnails below:


 Day 29. Winnie & Walter
 altering a background
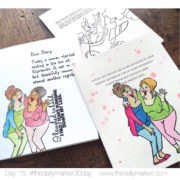 Day 15. Quick Cards & Winners


OMG OMG OMG!! LOVE this Sweet Vintage Feeling Card!! 😉 Such a BEAUTIFUL Layered Background, and I LOVE LOVE LOVE the colors that you used!! THANKS for sharing the Video too, I REALLY ENJOY them!! 😉 Have a FABULOUS WEEK!! 😉
Oh, I loved your video this morning. I am going to try the two stencil technique. The product of that was very unique. I think it makes a perfect background. About the little girl’s lipstick and eyeshadow….her mother should have been watching her more closely. Hehe! Kathy, please keep doing the unedited videos. They are wonderful. I like to see the whole process even the thinking out loud. Thanks for today!
Thanks so much Sharon…like that about her mom not watching closely lol 🙂
Great video. Love that stenciled background.
Awesome background and love how you made her to hold the sentiment. Awesome!
Thank you for the video! What great tips! I’ve used stencils and embossing paste but have never thought to layer stencils! Can’t wait to go upstairs and see what cool patterns I can make with my stencil stash! And I love what you did with the little girls arm to hold the sign! As for The little girls makeup…I just think it looks like she was playing with mommy’s makeup!
Oh Lynndee I like that idea of playing with makeup…Im going to go with that! 🙂
OK I need some clear embossing paste now!!! Great card!
Thanks for commenting again Cheryl. I am struggling to keep up.Will email you now and then Im going to delete your comment to keep your email more secure. 🙂
LOVE this layered stenciling technique, thanks for the video tutorial!
Beautiful card. I just love, love the background. I love using stencils but never tried 2 with embossing paste. Love the look and color you made. So makes for such a lovely background. Thanks for sharing the video.
Love that background, Kathy. I knew there was a reason why I bought some translucent embossing paste some time last year. I guess the time has come to actually start using it.
Marianne x
Lol boy do you think ahead Marianne 🙂
I’m loving all of your wonderful videos, Kathy! It’s like sitting with you while you craft; how cool is that? i haven’t been able to keep up with the challenge; first I got busy then I got sick but you’ve inspired me to start having fun with my craft supplies again! thanks so much 🙂
Awww Nancy thanks so much that warms my heart!! So happy to hear that you are feeling better and might jump in? One day we can sit and craft. Big Hugs 🙂
Kathy, Great video again, love the little girl she looks so vintage, I LOVE vintage stuff. You are so hard on yourself pointing out the lips and eyes, they look awesome. WE ALL think you are so talented and awesome. Think of how many people you have inspired with this 30 day challenge, I can’t believe how many blogs I have seen it on, so cool.
Thanks so much Tracey!!! 🙂
This is such an adorable stamp set! I love how you did the double stenciling and moving her arm! TFS!
How cool! Love this!
Oh this is just WOW! Love it ♥
I didn’t know about the clear embossing paste. I have to get some! Adorable card.
This 2 stencil technique is terrific Kathy, I’m going to give it a try. Love your vintage look card.
I really like that Kathy. and those stencil are very nice. I like the embossing powder on the lines of the top stencil. Pretty clever…..LOL
I really enjoyed this video, Kathy…Thanks so much! Your card is absolutely beautiful…I love how you paired this darling little girl with the frame…so clever, and of course your coloring is amazing!!!
Thanks so much Kathy,I love to watch your videos as you’re so relaxed and informal-makes me feel like I’m in the room with you. I’ve learned so much watching you do the background the stencils and distress ink,and would love some of that awesome embossing paste! Your card is stunning,lovely little girl holding the sentiment,gorgeous.xx
Absolutely beautiful is your card x
Super gorgeous background such an great idea!
Kathy, I love how she turned out, it really has that vintage photo thats been hand coloured look to it. My mum has some photos of when she went to the ball and the photos are hand finished with coloured added to the cheeks and lips and dress and it is such a beautiful look. Wow I had never thought to use double stencils, more tricks to try. So enjoying this
What a cool background. Getting to love these stencils more and more. Love the vintage feel of this card. Little girl is so cute.
Awesome background!! Thanks for video tutorial Kathy!
What a great idea to layer stencils!! I love your results, Kathy, and that little girl is too cute! She reminds me of someone from the Dick and Jane books I learned to read with…….I’m not much for cats, either, but may have to have her just for her……
I really like this. It makes such a nice background. Colorful and adding texture like this looks so easy. Cannot wait to try it. Nice idea..TFS
this is gorgeous!
Great tips with the stencils. I will have to give this a try. Always wanting new ways to use these on cards. Thanks.
I am going to faint!!! CUTENESS OVERLOAD!!! 😀
What a fun background. thanks for sharing.
cute card, again…. Like the background technique
I like how you created the background!
What a great video and technique! I’ve never tried this before with two stencils and I’m new to stencilling anyway – have only done it once or twice. Love watching you and your creative process! Thank you! The little girl is adorable – I’m a cat fanatic so I think this stamp set is sweet!
love love love this technique. Enjoying watching you create too!!
Great technique. Oh, that stamp set is so darling. I love that little girl and that kitty. Thanks for sharing.
I love that layered stencil. What a pretty gentle look.
Thank you!
Thanks for video! You are a fabulous creator! So many ideas!!!! As usually I ‘m shoked!
Clear embossing paste…who knew! That’s what I love about about challenges. Someone always knows more than you but is willing to share the news and techniques!.Thanks
Love this double stencil technique, thanks for sharing!!
It’s so interesting, Kathy!! And what a great backdrop to that lovely little girl.
This technique gives fabulous depth. Thank you for sharing.
The background looks great. So glad you found the other arm 😉
Love the soft look of the stenciled background!