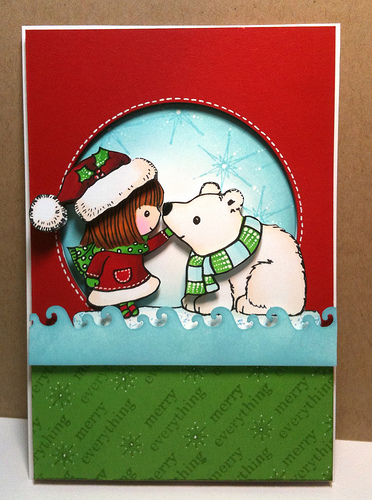
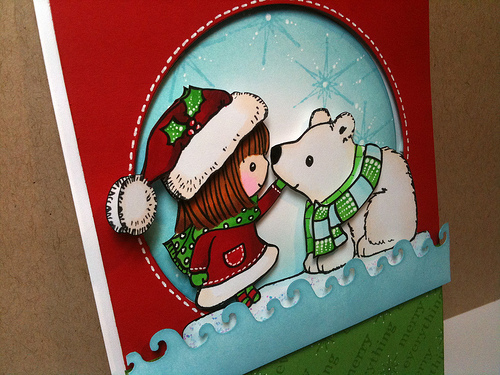
Ta da…this is one of Penny Black’s new stamps for Christmas called Snow Kiss. Don’t you just love it!!! I am so in love with all of their new releases and can’t wait to share them all. This stamp won’t be available in the stores until the mid to end of August but, you will still have plenty of time to make those homemade Christmas cards.
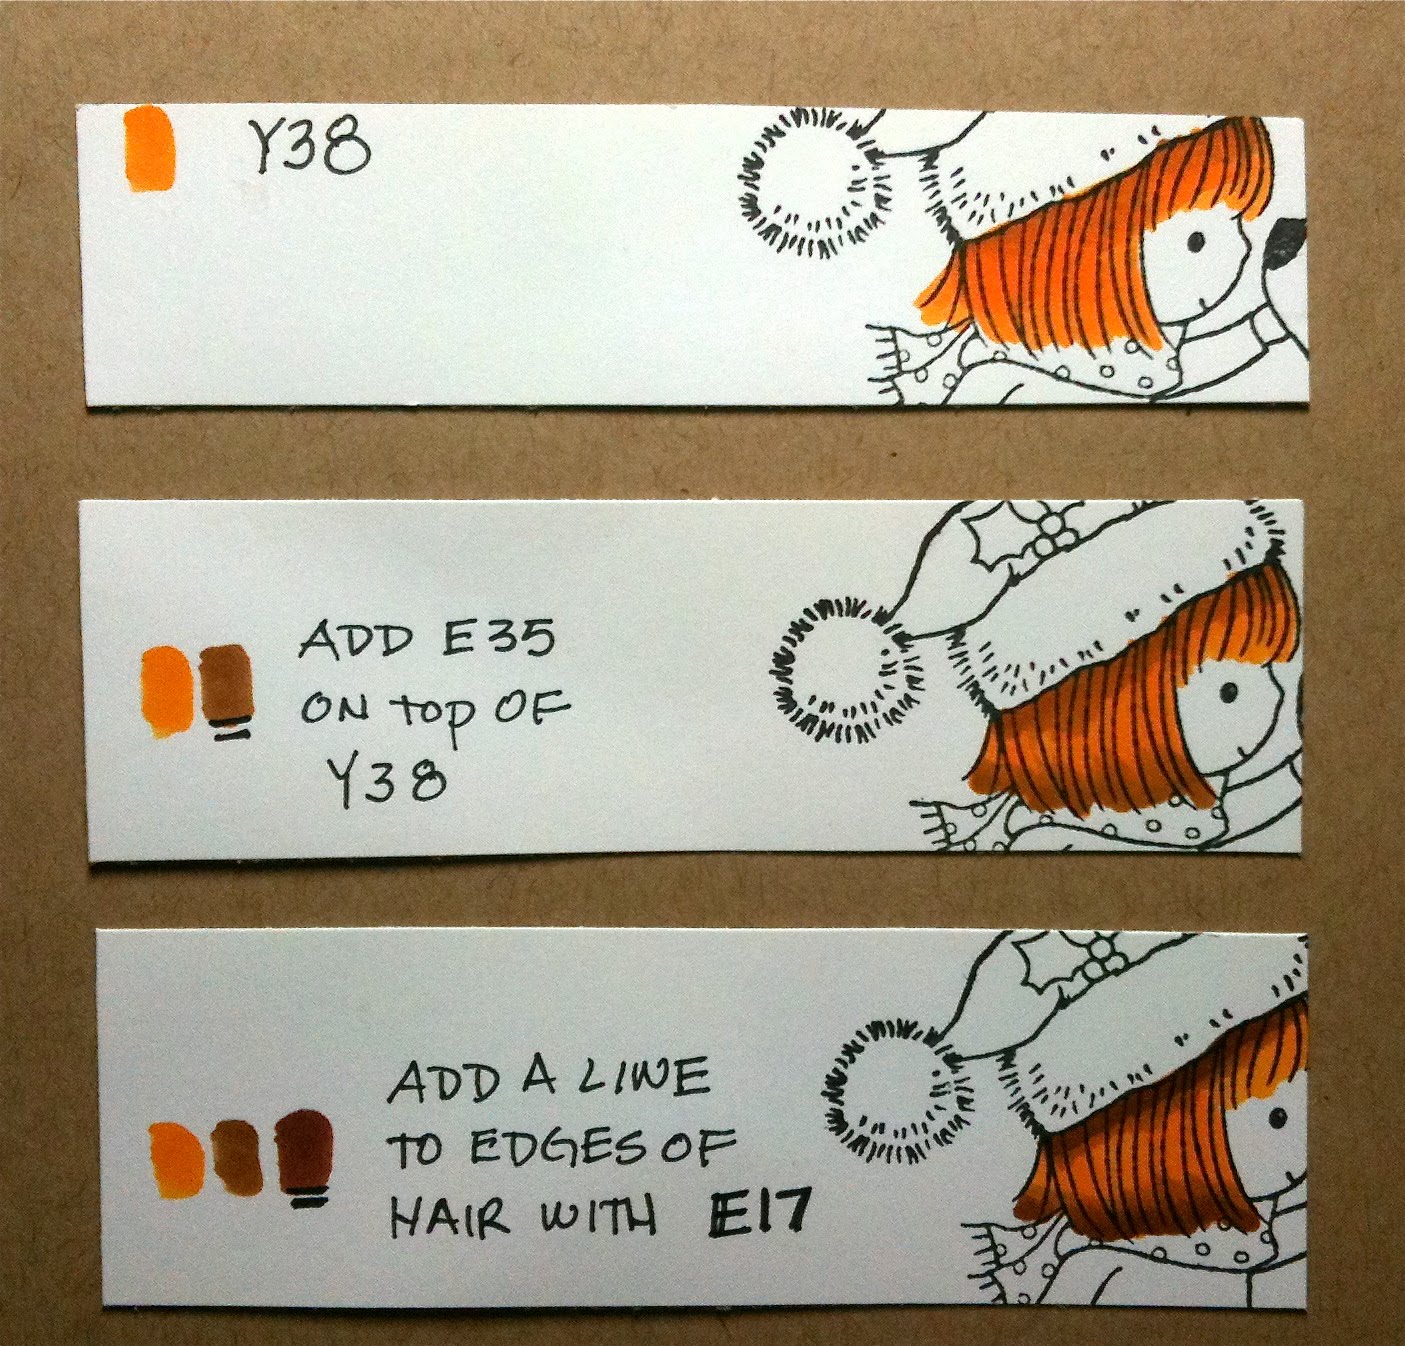
I hope this this helps with how I colored her hair. One of these days I will have to learn how to do a video. If you have questions please let me know.

The background was stamped & distressed in tumbled glass by Ranger. This is the set I used on so many of my cards that you will be seeing and it’s in the background on this card.
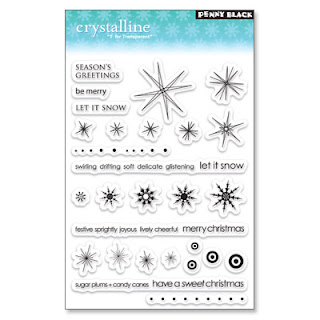
This set can be purchased now here. First I punched a 3″ diameter circle out of the red cardstock and set aside. I punched a larger circle in white and stamped with the crystalline set and distressed in Tumbled Glass then added some white dots to the “snowflakes”. I stamped the image two times in Tuxedo Black Ink and color with desired Copic markers.
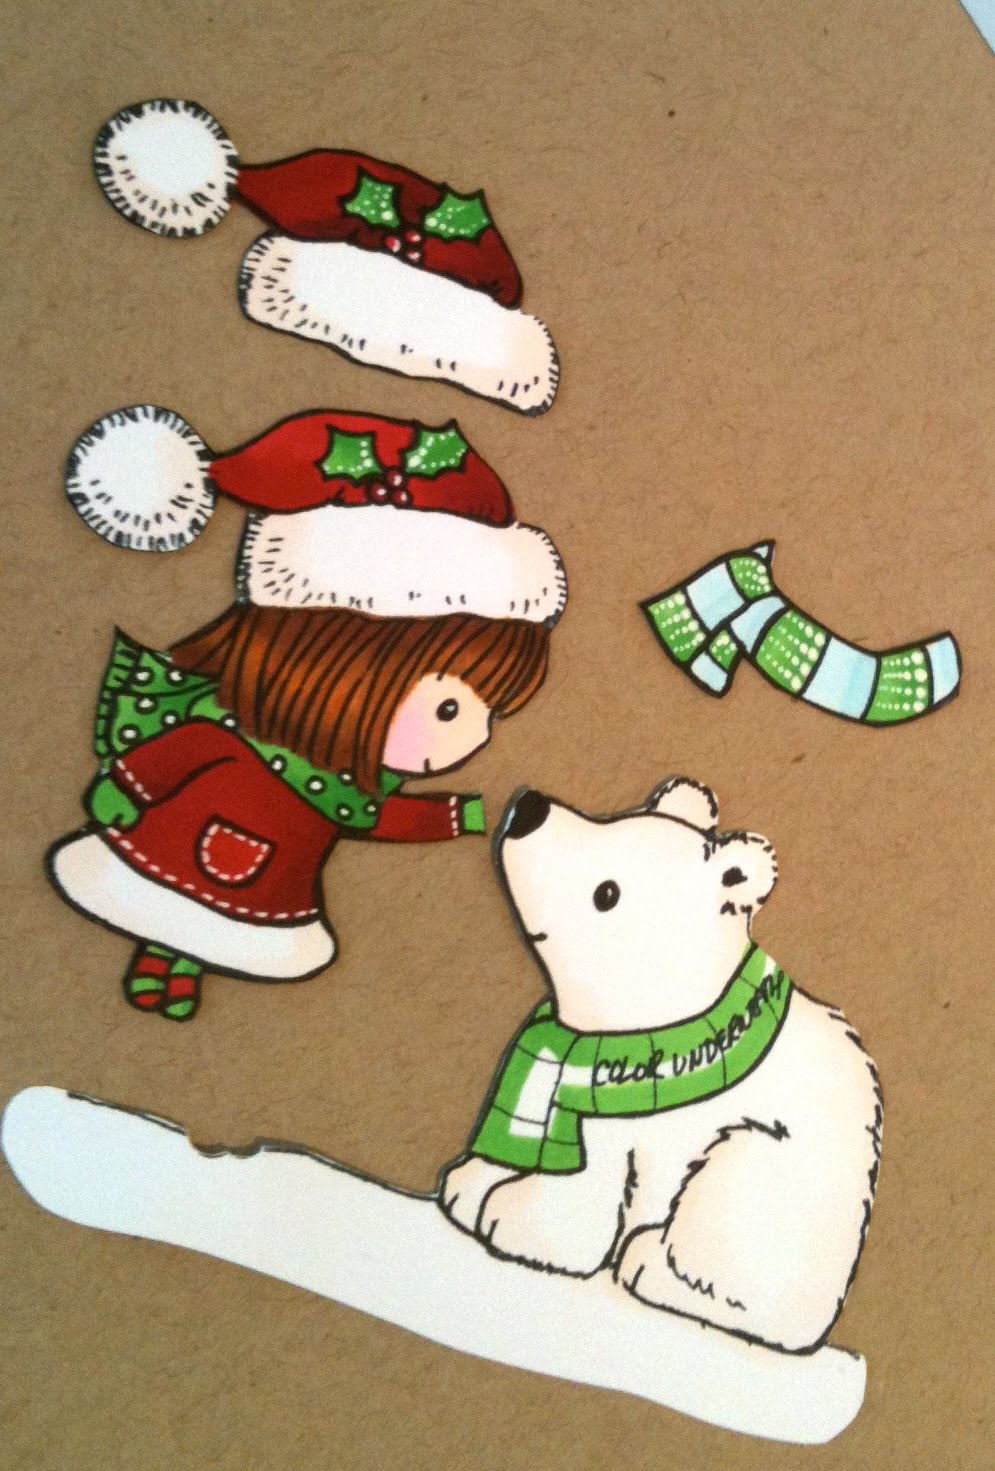
For the face I used YR000 and the cheeks RV00. Greens are YG07 and YG67. Reds are R29 & R39.
To highlight the bear I used YR000, E17 & E33. This photo above shows that I cut all the way around the girl because this way it’s faster to cut out the negative space. I like to color under the images that I will be adding dimensional foam to give the card a more finished look (for example see the scarf. When finished I added white pen accents around the circle, and the Mimi’s coat, holly,berries, and the bears scarf. When finished add Glossy Accents to the bears nose, holly and the berries. The water punch is from Fiskars.
I’ll post my few photos from CHA tomorrow. Have a great night 🙂
 Hero Arts 45th Anniversary Blog Hop w/ Gina K. Designs
 Winners We Be Announced ….
 Simon Says Stamp Mystery Boxes


Loved seeing all the steps to your card! Gorgeous!
Having seen this card in real life, I can say just how cute and beautiful it is!!! Glad to have seen you at the show. Awesome make and takes!
Kathy this is amazing. Thanks for showing the steps. Fabulous. I got some of last years Christmas cling on sale in Feb to use for this years Chrissie cards – suppose I should start on them soon!!!!
Darling images on this card, such cute stamps!
Love that bear – and will be glad to see your pics!
Your picture tutorial is full of MAGIC!! Who needs a video when you can see all these clear step by step coloring instructions!! Thanks for sharing your inspiring work and tips!! Sending happy hugs from Michigan (having fab time shopping..)!! Karen says hi 🙂
Hi Kath! This card is so adorable! What a charming image and I love the snowflake background! I, for one, would LOVE it if you did videos! Or. . . .I could just come and see you, sit next to you in awe, and just watch you create! I’d love that even more! 🙂
Aww so cute! Love your coloring as always. These images are adorable! Thanks for the tut!! Great to know! 🙂 🙂 🙂 PS: I dont know if you ever got my message before but the alignment of your blog is off. Just thought I would let you know.
This is adorable and thank you so much for the hair-coloring tutorial!! I have to practice with my copics!! Hugs,
Vanessa x
Amazing! I love all the incredible detail you give your projects. Thanks for the how-to also, I’m new to Copics so I really appreciate all the great info!
bless you, my friend!
Fabulous stamps, I NEED them !
This is such an adorable card Kathy. Thanks for step by step tutorial. No need of videos, these are perfect too 🙂
Thanks for leaving such sweet comments on my blog.
Aww this is so sweet! Such an adorable card Kathy! Love the tutorial 🙂
wow…the card is sooooooooo beautiful and loved the tutorial…
What a cute card. Thanks for stopping by my blog.
** Kate **
Fabulous card Kathy, so sweet, love it. I also love the wonderful tutorials that you add too, thank you for sharing. Hugs!
wow! your cards are always amazing and this one is no exception, Kathy!! thanks for the step-by-step. too! you are such an inspiration, sista!! looooooooove this!!
Awesome card, love your colouring style, thanks for popping over to my blog, you too have a lovely blog
Ruth x
Oh Kathy, your card is absolutely ADORABLE!! The new images are so cute and as always wonderful colouring, design and details! Thanks for the great tutorial too!
Great card, so bright and cheerful. Thanks for the tutorial on coloring, too. If I ever get my hands on some (illegal for sale here in Norway) copic markers, I’ll be able to apply what I’ve learned from others like yourself!
gorgeous!! Thank you for showing how your coloured her hair with copics, this was really nice to see. Such a great design!! 🙂
I can’t believe all that you have done with this card. Your cards are gorgeous to say the least and I love how bold and bright that they are and how they jump right off your blog. I love your tutorial and would so love to know how to do this with copic markers. I need to get some first! LOl! Thank you so much for the inspiration and for all that you share here.
aaaahhhh how cute is this new PB image…beautifully coloured too…I love how you made it 3d
Mina xxx
Wow..Kathy ..this is awesome!
Thanks for sharing your coloring secret 🙂
Gotta try for my self 🙂
Hugs,
Fabulously festive and absolutely stunning! Love the colouring and your kind tutorial, thank you so very much!
Thanks for playing at Stamp Something, hope to see you back next week!
Hugs
Annika
like your card, you are amazing! thanks for sharing the coloring process!
Thanks for the Copics tutorial! It’s so neat to see your colouring step by step!
Thanks for the tutorial Kathy oh yeah I have not so much copic colors also I will never get a result like you made 🙂 but many thanks dear and love ly christmas card… I love your red and green here soo vibrant….
Thanks for the tutorial and it helps a lot! And your colouring is just gorgeous! Love it!