 |
| Hello Friends, How was your weekend? Weekends just never seem long enough don’t you agree? Today I want to share with you a speedy way to create a moon with shapes and markers. |
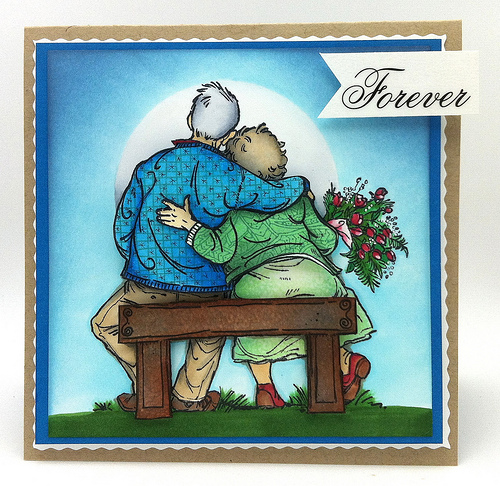 |
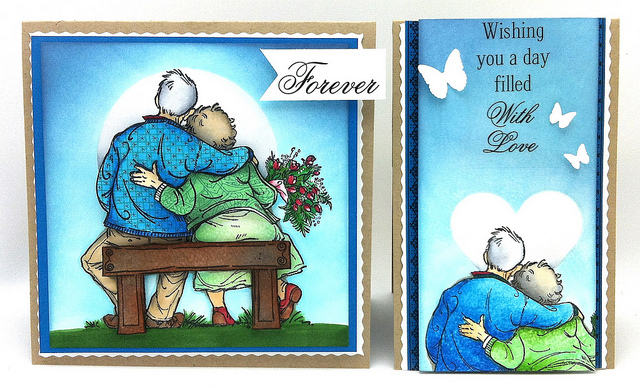
| This was my husbands Valentine card. The sentiment is from SRM Stickers and if you haven’t tried them out… now’s your chance because they are on SALE here. The inside of the first card reads “& Always” |
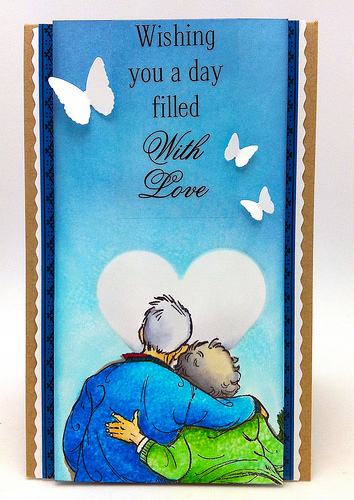 |
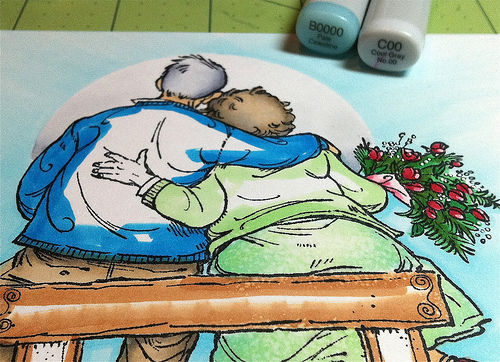
| This is my quick card and below I give a little description about the texture on the loving couples sweaters. By the way this stamp is called “Tom & Tilly” from Penny Black and I was so excited to ink it up when I first saw it. |
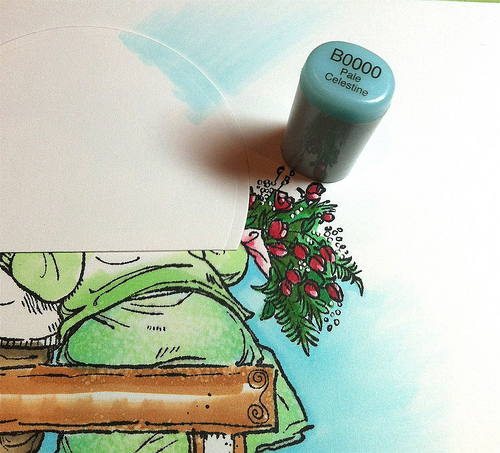 |
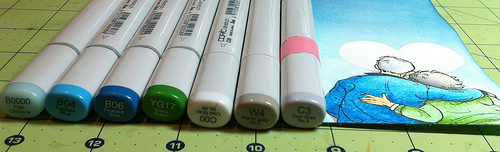
| Let’s get started on that moon. Die cut or punch a circle out of scrap paper. Position the circle where you want the moon. Take a light blue Copic marker and sweep the marker over the circle starting inside the circle. |
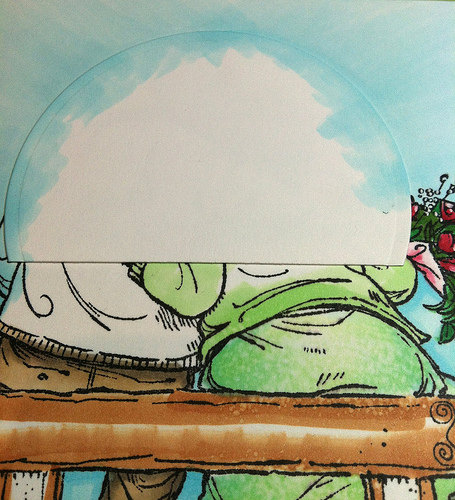 |
| This is how it looks when you are finished. |
 |
| To highlight the moon or to give it some glow use yellow or grey. I added grey in the corners of the moon pulling the color up into the moon but, not all the way. |
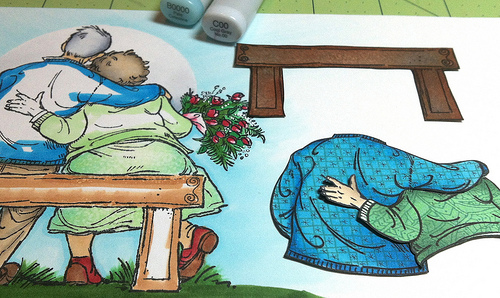 |
| This photo explains why the only portions of the image is colored on the left. I love dimension so I like to take these extra steps but, on my simple card the dimension is with the white butterflies. |
 |
| After coloring their sweaters (I adding a little shading) then, I stamped on top of the sweaters with this and this. You may notice that I drew tiny “x’s” in the squares on the blue sweater with this Copic multiliner marker. |
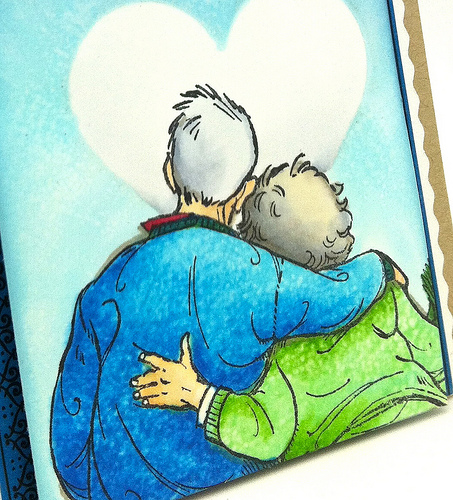 |
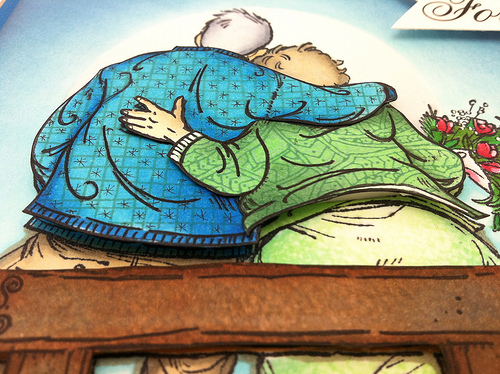
| This is my heart shaped moon created with this Spellbinder heart. For these sweaters I colored them the same way as the other card. Once the ink was dry I used this on a rag, dabbed in on top of my colored sweaters. I also used this method on her skirt on the other card. |
 |
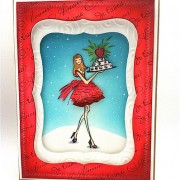
| Before you go the new Penny Black London Collection is availbale in most stores. This is the card I created a few posts ago and you can buy it right now here. Let me know if you have questions and THANKS for taking the time to stop by. Hugs, Kathy |
CARD SUPPLIES:
|
|
|
|
|
|
|
|
|
|
|
|
|
|
|
|
|
|
|
|
|
|
|
|
 Happy New Year !!!
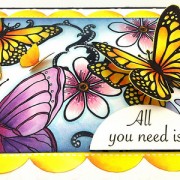 a masked collage and a winner
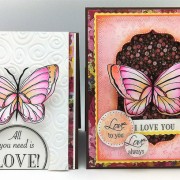 Do you use a Dove Blender pen to water color a image??


very beautiful card! thanks for showing how you made the card.
Love the card!love how you created the moon,thanks for sharing,
hugs
Doreen
Two wonderful wonderful cards! Such a cute couple, and you put so much detail into these cards! I love the different textures in there clothing, and I love the couple with the heart behind, so romantic and sweet! Thanks for sharing!
Katie B.
Top notch cards! Love them. Thank you for taking the time to explain exactly how you created them. You are putting so much details into any little thing. Love the way you created the sweaters of the old couple.
Such beautiful cards Kathy!! I love them both! I will have to try that technique with the markers…. love it!!
Oh, I am so glad I didn’t go to bed yet! Once again, you amaze me, Kathy! Such fabulous techniques you use in your coloring, and I know I’ve said it before, but I am SOOO glad you share your talent! Love, love, love both cards! Hugs to you! 🙂
Fabulous cards Kathy. I have Mo’s digital one of this stamp… Just love how you have added the dimension on your cards.
Awwww… So sweet!
Fantastic tutorial! And I totally adore your card, I know your husband would have loved it too, our guys know just how much work goes into these creations!
I LOVE it, thank you so much for sharing this with us!
Hugs, Irene
Wow, love both cards! The image is great for a Valentine’s or anniversary card an love that tutorial on how to make those shapes, TFS! Hugs, Hanneke
Breathtaking! Jo x
FABULOUS card, Kathy!! Great way to make the moon and luv the layering of the main image, and the inside with the HEART 🙂
Gorgeous job on this card, love your masking work and that stamp is so darling 🙂
omg!! Very beautiful card, Kathy. love ur masking tutorial technique to create moon.this is my favorite and my want to have stamp!!!
Two fabulous creations and l just love the finishing touches:) Sandra H
Fabulous cards, gr8 technique and thanks for sharing it with us
Kathyk
Once again your attention to detail is SO effective, Kathy! This card outshines any that Hallmark could produce!
Kathy, as usual, I am totally in awe of your crazy coloring skills! I adore how you added patterns to their sweaters and gave just that bit of dimension to them. Simply gorgeous!
Fabulous cards! Love the two different versions. Thanks for the background tutorial–backgrounds are always so hard for me.
Wow. Absolutely fantastic cards.
Thanks for the tutorial!
Moonalicious, K! Great tutorial, as always, and wow–what fantastic cards! xx
great stamps and perfect coloring!
Fabulous techniques on these 2 sweet cards, Kathy! I always learn something new while being totally charmed by your creativity…so glad I stopped by!
Great tutorial! You’ve really inspired me! HUGS!
Stunning colouring. The images are so sweet
There so cute!!! Thanks so much for the tut♥ Your cards are fabulous!
LOOOOOOOOOVE this…Such a great Card Kathy’11 xoxoxo….
Beatiful creation!
Beautiful cards! Thanks for sharing how you did the moon and the clothes. I always love the details you put into your cards.
so cute! very beautiful card 🙂
greetz doreen
Amazing – you have the best tutorials! x
Absolutely AMAZING in true Kathy fashion! I am SO wowed by your techniques, Kathy! Your attention to details in your coloring is jaw dropping – like Tom’s sweater…seriously?! Wow oh WOW. 🙂
All the detail just makes this very different & Iove the realness you created in both these designs. Thanks for the brilliant info about making the moon with Copics – I’d not thought of that at all. Love all the layers in your simpler version too – it gladdens me that simpler can include layering!
Paula (PEP)
Fab copic tutorial Kathy
Is it wrong that this card almost made me cry? It’s sooooo sweet! Thanks so much for sharing how you did it. The patterns on the sweater looks amazing! I totally want this stamp. It’s on my SSS wishlist. Hopefully they’ll get stock soon! Great card!
Great works! Love how you created the moon using Copic! Thanks for the simple tutorial!
Kathy what an amazing card. Thanks so much for showing how you did the moon. Wow is all I can say xoxo
you are amazing, girl! fabulous idea and thanks for the tutorial! love your gorgeous cards! big hugs! =)