 |
| Hello Friends, How are you?? Any exciting plans for the weekend? We are heading to the beach…can you believe summer is over ?? Which means it’s official my DD is a senior!! So many good things happening. 🙂 I have been itching to make cards with these absolutely adorable owls from Penny Black called “Moonlight Owls” |
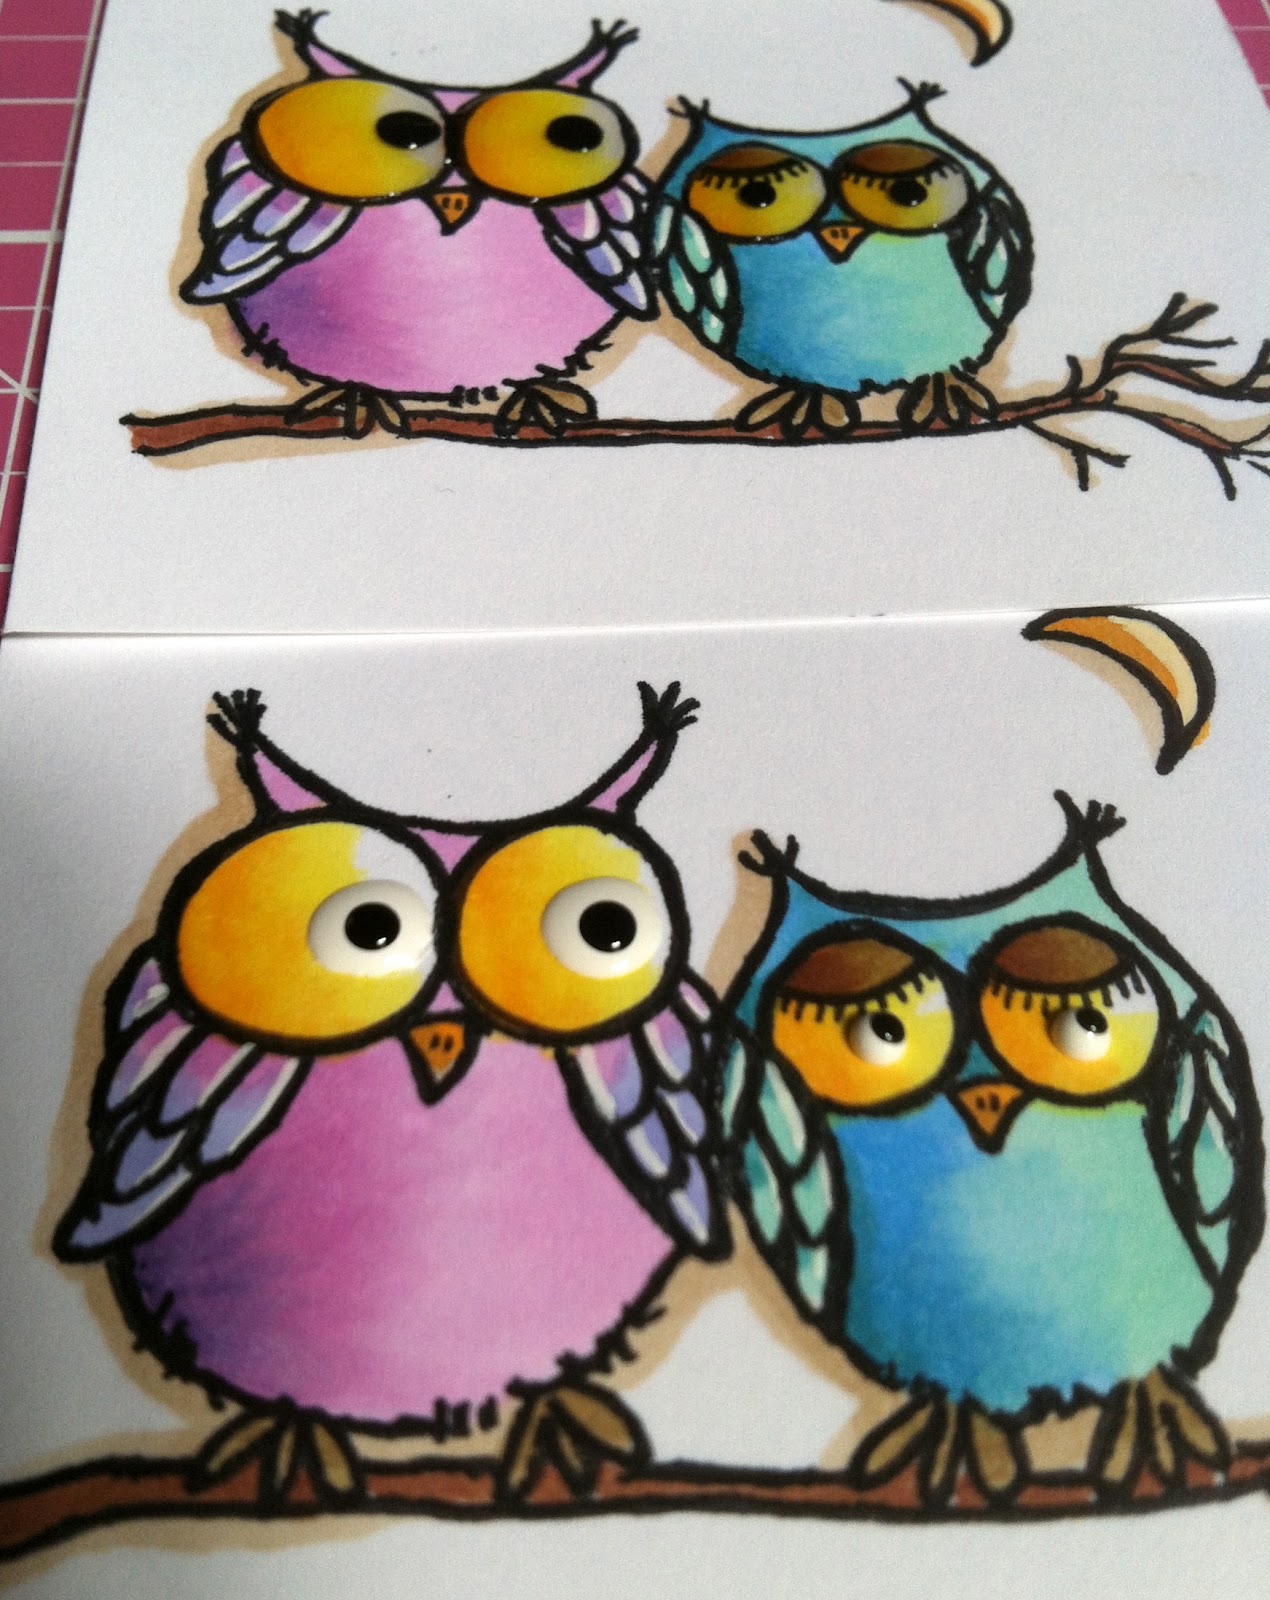 |
| On most images I alter the eyes in some way …so I thought I would share some of those details today. Almost always I enlarge the eyes with a black Sharpie marker. On the second owl I drew eye lids and lashes. I also LOVE to use Glossy Accents and or Enamel Accents on the eyes. The second pair of owls above I added white enamel accents and waited for them to dry. After they were dry I added black enamel accents ON TOP of the white. So dimensional |
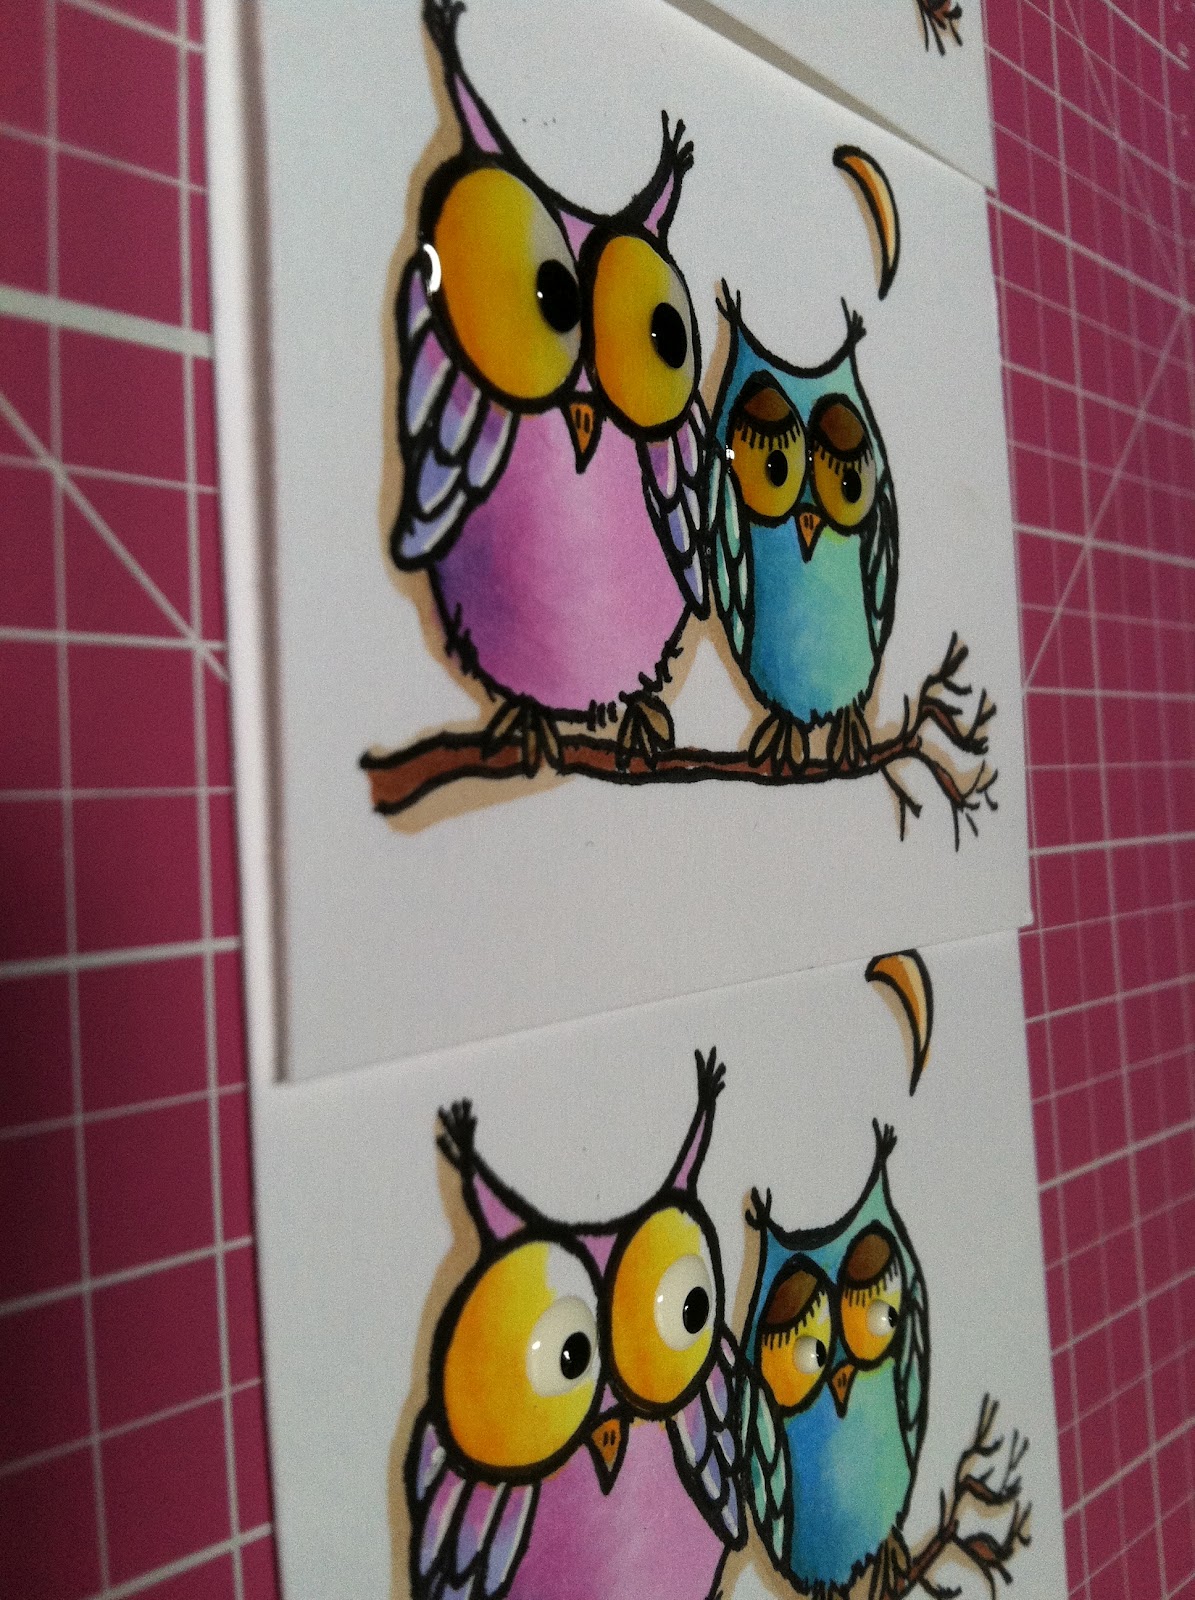 |
| The owls at the top of this photo (above) I applied a thick coat of glossy accents. The next day I added black enamel accents ON TOP of the glossy accents. You have to be careful and practice on a piece of scrap first…be sure to get all the air bubbles out too. THIS IS MY FAVORITE…today! |
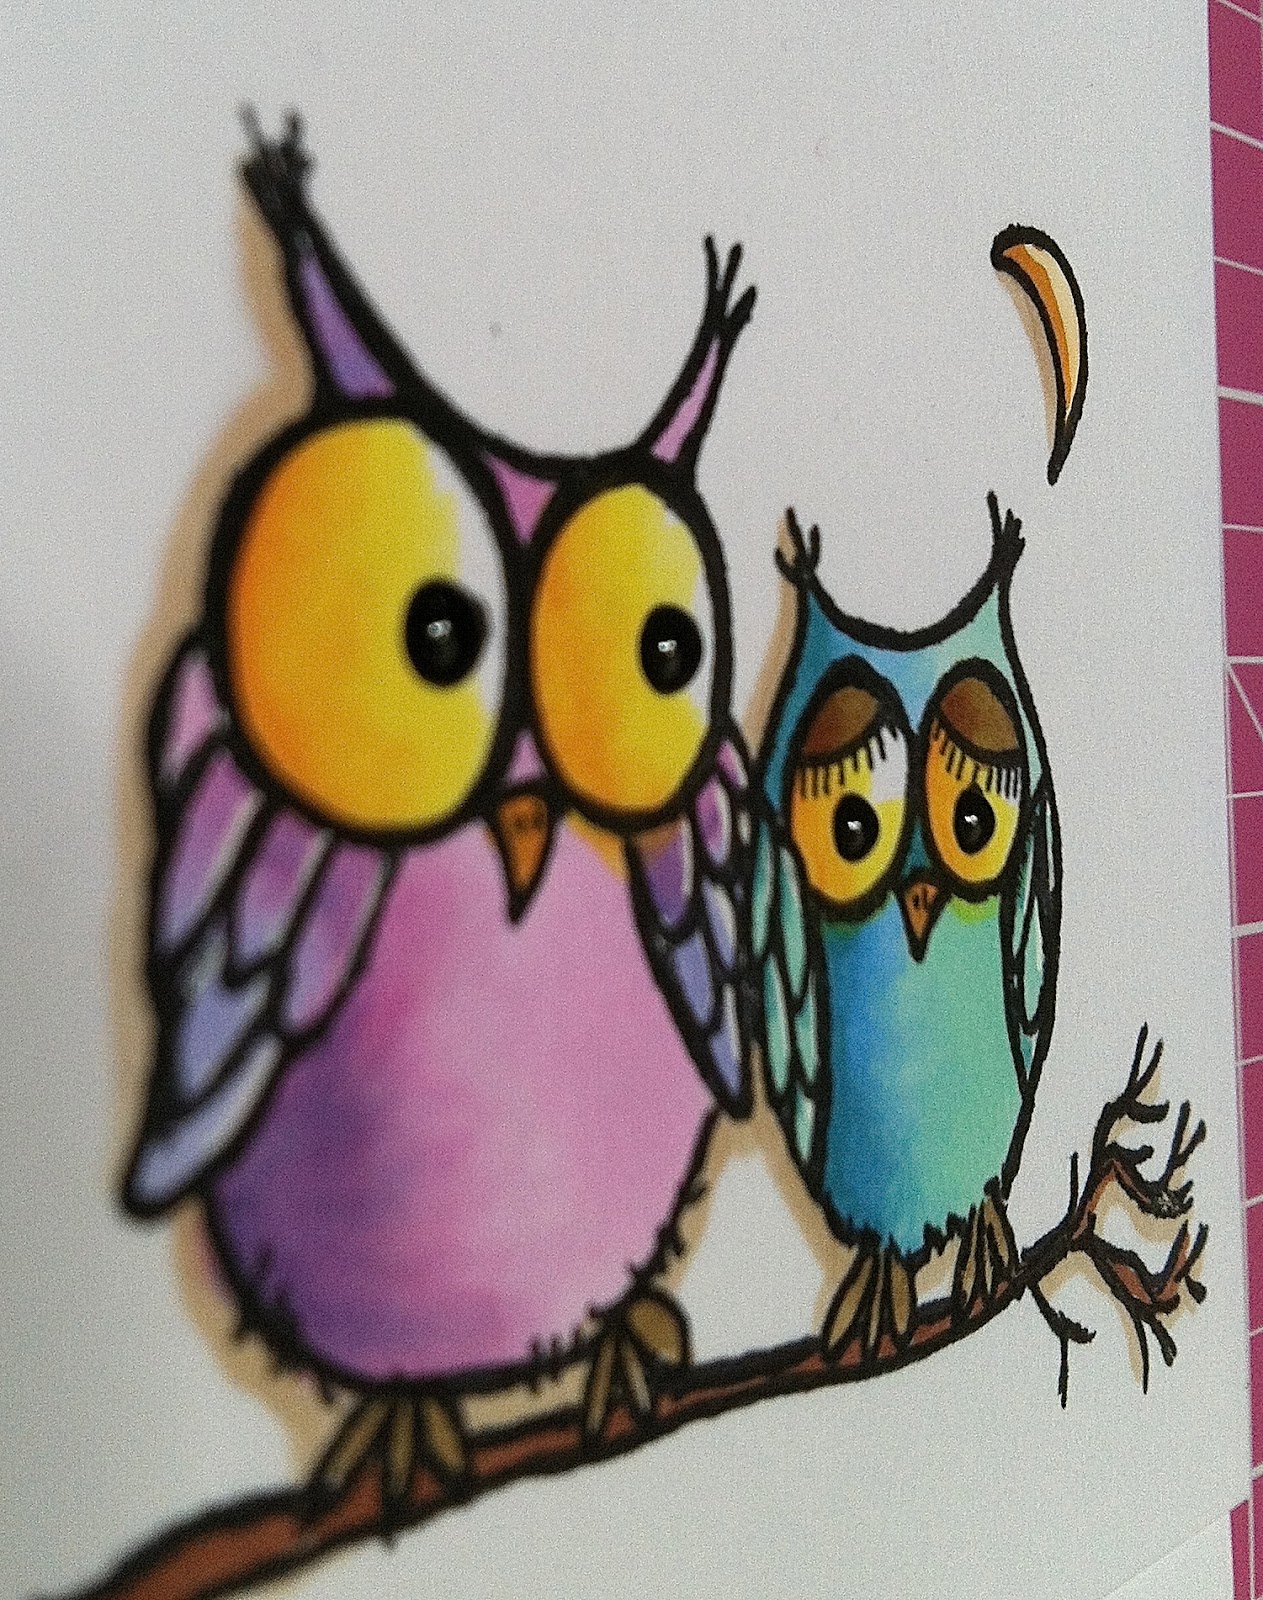 |
| In this photo all I did was add the enamel accents. Don’t get me wrong…I love this look and use it often but, I love the layering of the liquids. Which is your favorite? Many thanks for your visit today and hugs, KathyP.S. the STAMPTEMBER activities begin Sept 1 at the Simon Says Stamp’s blog. Have you seen SSS’s exclusive stamps & dies?? Check them out here. |
 copic tutorial for die cut divas challenge
 a blunder, a tutorial, a giveaway and winners announced
 Dimensional Window Cards-Video


Kathy, all I can say is this..you are AMAZING! The eyes are just amazing. WOW!
I agree with Judy. Yo are amazing. You really made that stamp SHINE. Stunning coloring and accents. xxx
I can see why you were itching to create these. They are just toooo adorable!
Great ideas for using glossy accents and the enamel…love the glossy accents with the enamel on top.
Can’t pick a favorite, Kathy, they’re all so cute! Love the attention to detail you show us!
LOOOOOOVE them….So Dang Cute!!
wow I think they all look amazing..your coloring is awesome and seriously love those eyes..
I love them all! It’s such a joy to come visit you here to see what you’ve created – always so inspiring! Happy weekend, Kathy! 🙂
The combination of the liquids – but I think variation is the key here for they’re different looks. Thanks for the brilliant tutorial – love the colours of the owls. You give me much pleasure in the way you alter images & make them so individual.
Paula (PEP)
Wow Kathy, They are totally stunning x
These are great Kathy. Love them all really. The enamel is fun though. Great way to show us the differences. Love you!
Personally, I love to add a bit of shine to parts of my card so I if I was absolutely forced to pick a favorite, I would likely choose the glossy one!
Hi Kathy,
They are all great! But I love the white eyeballs with black pupils on top and the whole eye filled with glossy accents and pupil added on top or vise-versa. They are so much fun. I’m just in a whirlwind today. I want to be crafting and doing videos of crafting. LOL But I’m fighting with my FB page, they must be having some issues. Be sure to go over to LifeStyleCrafts blog and enter for a chance to win some of their new dies, they are giving away 2 dies of your choice, they are having computer issues today too, must be the rain. Hopefully lots of crafting tomorrow, I’ve got some holiday crafting to come up with and play with my new dies from my bday orders. I’ve got to get a bday card made for my dad! Have a Great Weekend.
of the three images at top, I like the one on the right the most. that enamel really does make the eyes pop
The glossy accents is my fav though they are all adorable.
Incredible technique! Love how you layered the liquids!
These owls are the CUTEST!! I love the colors–so bright and cheery! You do such amazing work, sista!
Adorable owls and great tips on making the eyes come to live! You are amazing!!! MISS YOU!
Love those little owls! The way you treated the eyes really made a big difference. I think I love the white and black enamel accents the most 🙂 Thanks for sharing!
Oh how adorable your owlies are!
I can’t pick a favorite cause I love each one equally :o)
Fun inspiration here (as usual), Kathy
Ahhh, how darling! Too Cute!!
So that’s how you do it….I don’t know to let the white dry before applying the black. Duhhhhh. Guess that’s why the stuff went to the back of the stash pile, as I wasn’t using it correctly.
Laura
These owls are a “hoot” Kathy! Great variations!!
All three are ABSOLUTE stunners Kathy – fab. Love what you do with their eyes – so adorable.
Amazing colors!!! Such a cute image too. I will add your blog to my side bar if it’s ok. I like to see more of your coloring, and i don’t want to miss it.
Hugs Nataliya
Oh Kathy, I love them all but I agree with you as to which is my most favorite
I love them all – they are so amazing! And, such personality when you add the details! You are one talented gal, Kathy!
Cute! I gotta say my fav is the clear glossy accents with just the black marked on top.
Wow Kathy – absolute perfection in your creation. Your coloring is amazing. I love how you used the glossy accents and such a cute idea to add eyelashes. Stunning!! Love the owls – they are sooo cute!!
Just had to become a follower of your amazing blog.
Hugs and smiles
Laine
PS – My favorite is the first one however with that said – I am amazed at how you created the eyes so perfectly on the second one too.
Hugs and smiles
Laine
Stunning how added all the extra touch to make those eyes stand out, Kathy!
So cute! Love them all.
Love these sweet and adorable owls and even more I LOVE how you colored them!
I’m also a huge SSS fan and have had a blast buying some of the newest goodies, my latest package arrived today! YIPPEE!!
Keep up the great shares!! 🙂
Lisa
how stinkin’ cute! All are darling. I like the gloss and black enamel best.
I’ve just been going through some past projects and just wanted drop a quick note to say how wonderful they are – very creative and inspiring. I have some new ideas for cards and I love using my copies although I’m very new at it so you are a huge help. Just wanted to say thanks 🙂
Thanks Kat. So nice to hear that you are using the categories and I can’t tell you how happy that makes me. Thanks for taking the time to tell me too. Hugs, Kathy