
Hello Friends, Happy Tuesday! Today I have some tips using alcohol markers or any markers.
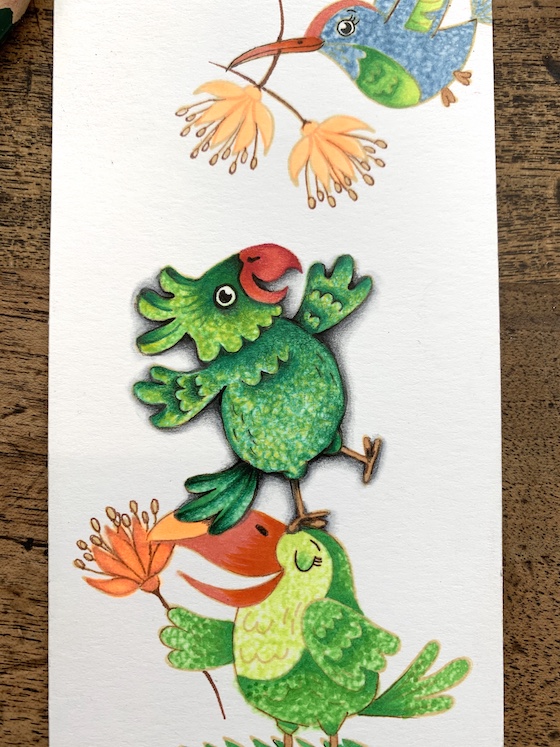
This is partially colored and hopefully I will finish this up for tomorrow. If you don’t have Copic markers and are debating on buying markers that aren’t Copics (I also love Altenew markers) I think it’s best to build a collection slowly. My opinion less is best especially if it’s the best tool or medium.
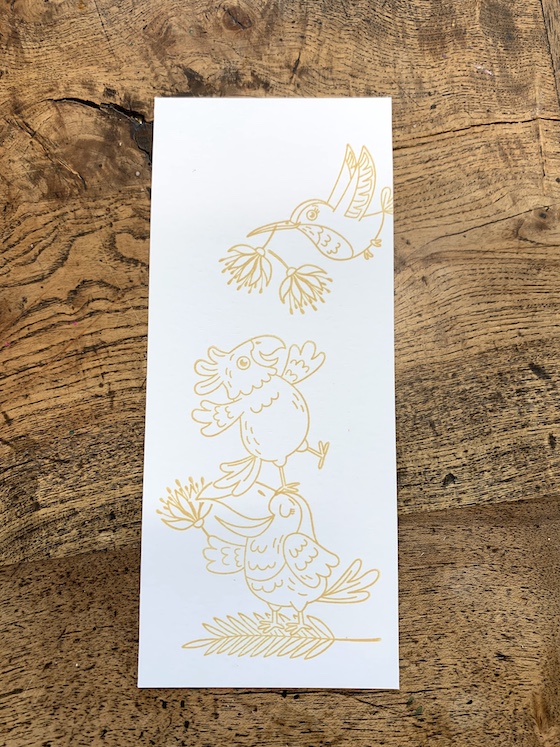
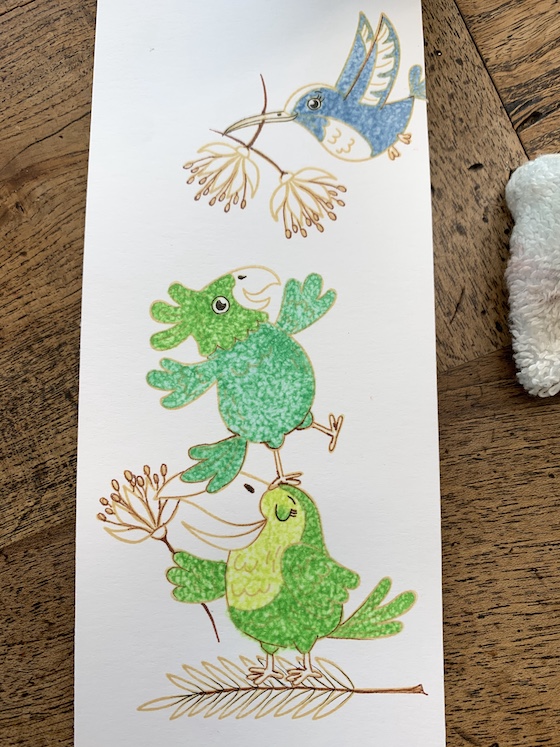
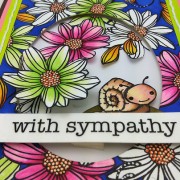
Birds of Paradise is such a sweet and happy stamp set from Honey Bee stamps. I just had to ink these sweeties with Warm Glow and create a whimsical scene. Just a little masking and I was ready for color.
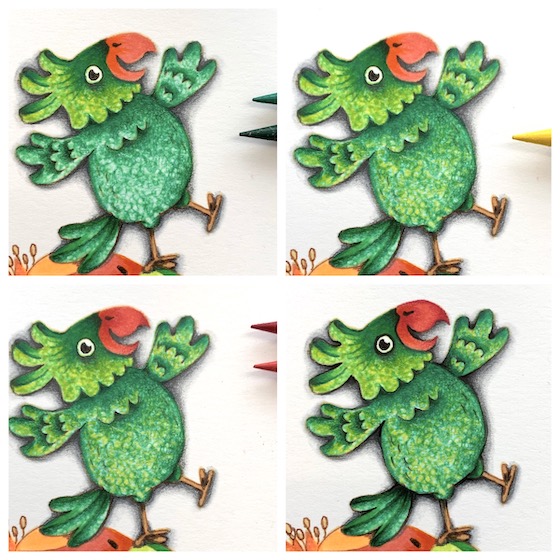
Start top left to right, bottom left to right.
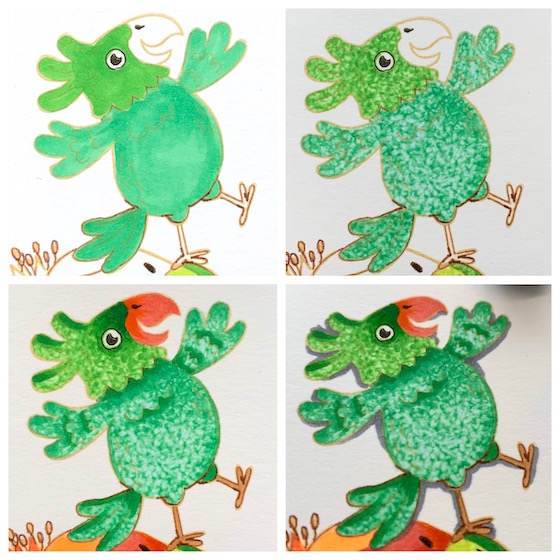
1. Add your first layer of color with alcohol markers. A heavy weight paper like 110lbs. will yield you better results. I outline a few areas with a brown marker.
2. With a nubby rag I put a quarter size amount of the Copic blending solution on a rag dabbing the rag onto the image. Hold the rag down on the image for 2 or 3 seconds. Instant texture!! If you heat set your image that sets the texture. (basically you are transferring the texture from the rag onto the image).
3. Use a darker marker to darken some areas.
4. Outline parts of the bird with a grey marker. I choose a side of the bird … any side (I don’t pay attention to where the light i s coming from) The grey is on the left side, in the nooks of the image and under the arm, beak and under the bird etc.
Start top left to right, bottom left to right.
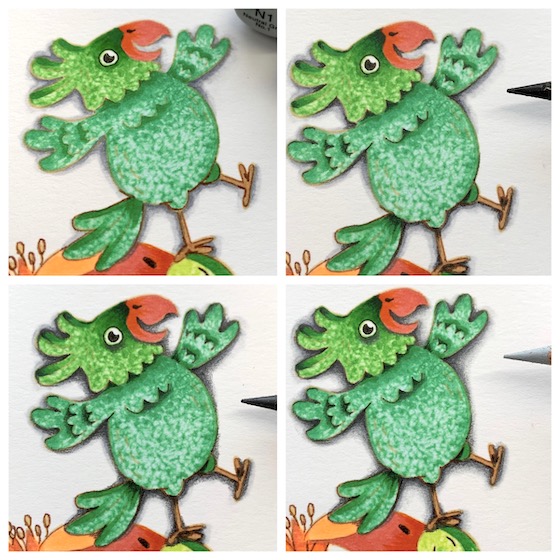
1. Use a medium grey and color on top of the darker grey to soften the line. If you have a harsh line add another lighter color.
2. Take a black pencil with a sharpened tip and add black to the nooks & crannies.
3. Take a dark grey pencil with a sharpened tip and add more grey to the same areas with the pencil.
4. Use a medium grey pencil (sharp tip) and use it to smooth out the grey halo.
Start top left to right, bottom left to right.
1. Add more color building up the layers with a dark and medium green. If you scribble around the texture created from the rag it looks really cool.
2. Add yellow or a contrasting color.
3. Add more color building up the layers with a dark and medium red to the beak.
4. Using a sharpie marker outline the nooks & crannies making these areas even darker.
If you use the rag technique it’s best to do this before you color anything else. In other-words do this first not last.
These techniques are nothing new and I use them all the time. I do have videos and cover this more extensively in the OCC class I taught.
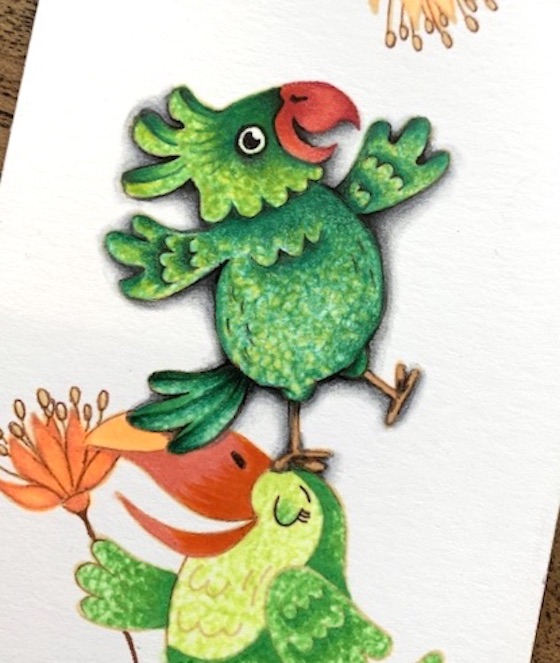
I am excited to finish this up for tomorrow and thank YOU for your visit. See you tomorrow! Hugs, Kathy
P.S. To share you coloring ON MY BLOG click here to link up.
There are 2 other ways to share what you are coloring. If you want to join a community of coloring enthusiasts I recommend Instagram or FaceBook. FaceBook and Instagram are both places to connect with the coloring community and great places to share what you are coloring. Please Tag me,Kathy and use the hashtag #thedailymarker30day. Children #thedailymarker30daykids.
P.S.S. If you have any questions about the coloring challenge you can refer to this post . If you want to get my posts in your mailbox you can sign up here or subscribe to my videos here.
 what to do with those smudges
 Make your own doily & more winners
 We Have A Winner


This was a lot of work to share the steps, Kathy! But so appreciated – I love seeing your bird come to life!! Guess I missed watching the day of OCC class where you covered doing the texture first – must remember that! Thanks for the inspiration!!
Hope you will check it out!
It looks like there may be a shortage of the colorless blender solution during Copic’s ink refill changeover?? Hope you are stocked up!
Hopefully they will restock quickly. We are seeing some of them come in stock different places
Soooooo Super CUTE!!!!!!
Thank you
WOW ! Thank you for sharing those step by step pictures, tons of work on your part but much much appreciated by us. It was almost like sitting with you doing each step x Hadn’t seen these gorgeous birds, going to see if my store has them in as they are adorable & my collection is yet to have any. Keep safe & happy x
So glad the step by steps were helpful
These birds are terrific. The rag technique is a smart idea to add texture. Thank you for sharing your step by step instructions with pictures.
You are welcome!
What a fun card! I love your marker and pencil combo, can’t wait to see it completed!
Thanks
This is such a happy rendering – something we all need these days. Thanks too, for your explicit instructions! You are so generous and supportive of all your fans.
We do need happy!
These stamps are so fun! And your colouring and tips are great – thanks Kathy!
Thanks
Great tutorial!
Thank you
Fantastic coloring, thanks for sharing so much of the details, it really helps me understand how you accomplished the final look. I always forget about the blending solution and rag technique.
It’s a fun technique
I love step by step tutorials with pics! This awesome Kathy! Thanks for sharing!!!
You are welcome
These are great instructions on how you add so much more to your coloring. The details definitely make the difference. Can’t wait to try them out on my current project.
I recently completed a no line watercolor piece and tried to add depth with a colored pencil (Prisma), but the paper was so textured that the penciling left marks rather than blended in. How do you add pencil to watercolor paper?
The key is to have a very sharp pencil so it can get down in the textures.
Super cool to see the step by step photos! Love these vibrant and colorful birds!
So glad the pictures were helpful
Thank you for your advice and support. I’ve learnt so much from you. ❤
You are welcome!
WONDERFUL effect!
… I tried this some time ago but just couldn’t get the same effect, maybe I used too much alcohol or held down too long => NEED to try it again NOW 🙂
Thank you very much Tracy. Yes, try it again!
What an eye for detail. I’ve got your color challenge camp in my basket now. I’m looking forward to your class.
Hope you enjoy it!
Your coloring is magical. ^-^
Thank you Lynda
Wow! What a transformation!! Thank you for all the tips, the grey marker adds a lot of dimension!!
Thanks so much for stopping by