
The dots of Copic colors next to the flowers are the order in which I applied the color on to the flowers.
Yes…I fell in love again but, this time with the new distress paints! Seriously I love them & they are so easy to apply to stamps 🙂 This new background stamp from Penny Black is begging to be colored in. Maybe next time I’ll do that.
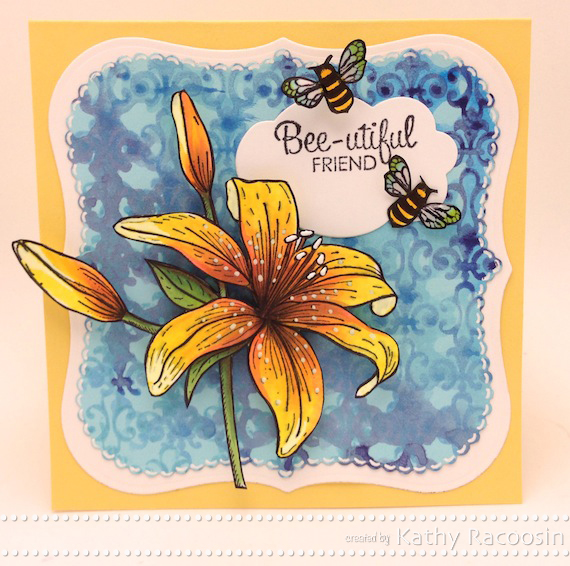
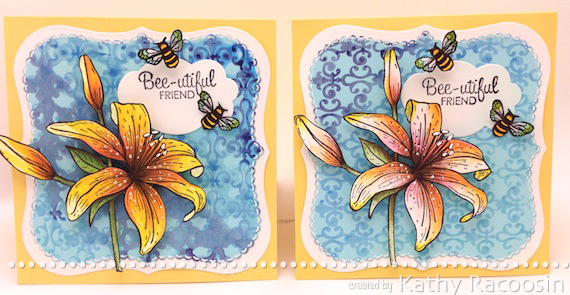
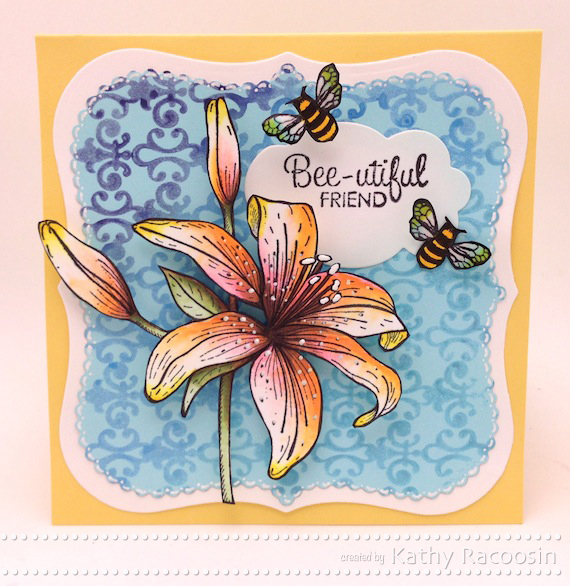
On this particular background I experimented by adding water to the stamp after I inked it with the distress paint. I sprayed the stamp heavily. Once it was dry I stamped it again using the same combo of distress paints and DIDN’T spray with water. (The first cards background water was NOT used at all on the stamp.)
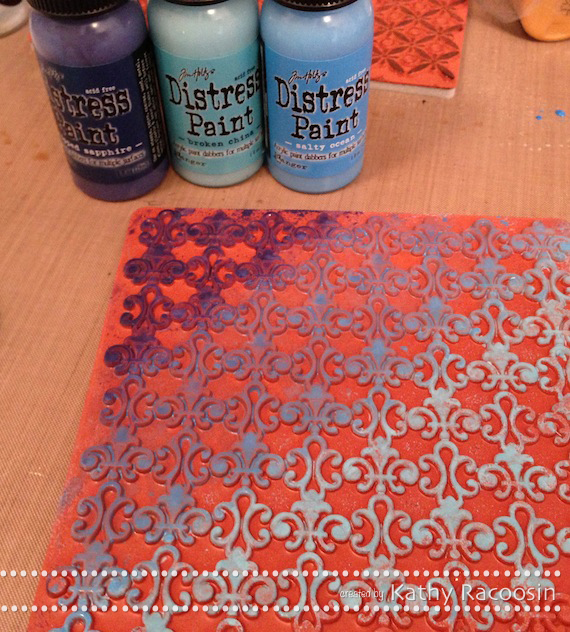
These are the three glorious colors that I used. At the bottom of the post I have the individual colors linked in case you want to see them. All you do is dab with the paint and stamp.
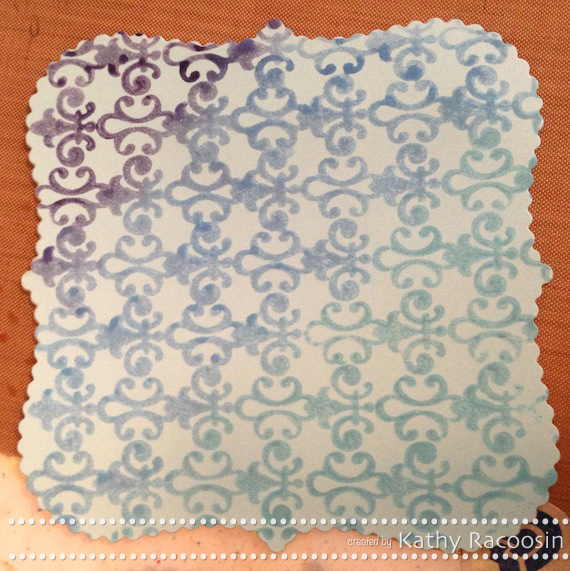
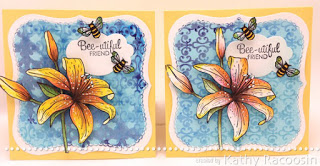
Love how they blend so nicely and the three colors gave me a nice gradient look on my background. This Spellbinder die is so delicate … I added some white scallops around the edges just cause I have to.
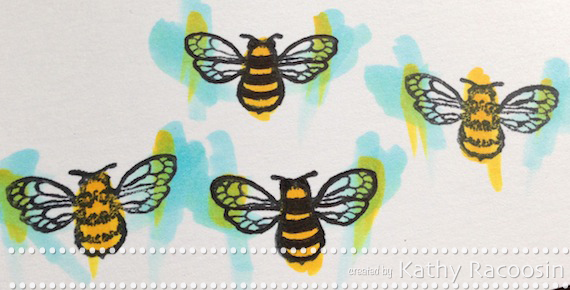
This “Sweet as Honey” stamp set from Penny Black is great for so many occasions. The three sizes of bees are perfect for so many projects. For my bees I wanted more prominent stripes so I made the black lines on the bees more bold. I added Glossy Accents to the wings.
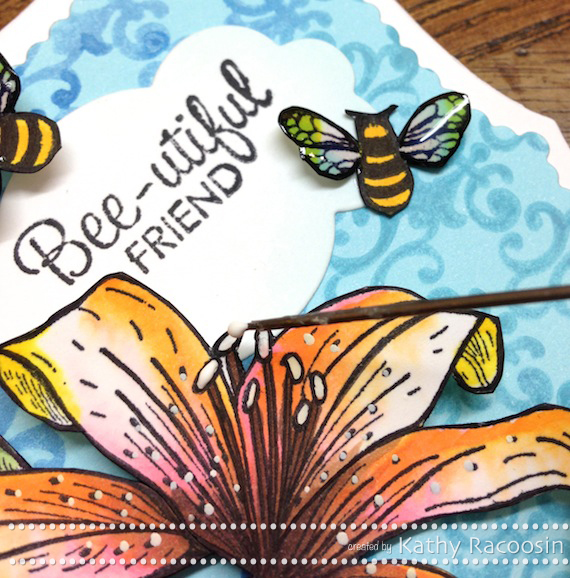
If you have ever had trouble adding Enamel Accents to your images I think this tip will help. Pour a medium size blob on some scrap paper. Dip a paper piercer or a needle into the enamel accents then touch the tip down ever so lightly onto your image. You will love the added dimension that the Enamel Accents gives but, allow time for it to dry. The sentimet cloud is this die cut from Simon Says Stamp & it always seems to be the perfect size from my cards & so many wonderful pieces in the set. Let me know if you have any questions via email. Thanks for your visit today I am always grateful. Hugs, Kathy
CARD SUPPLIES AND LINKS:


 December Card Kit GIVEAWAY
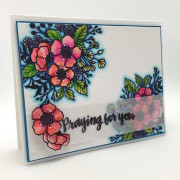 Day 4. my mixed media
 basicgrey blog hop … giveaway


Love the card and tutorial. Thank
you.
I am printing out this entire post as it is filled with great information!! I have seen enough to know I must have those distress paints!! Your cards are gorgeous! Love the hint about the white enamel … it can be very scary to squeeze it out of the bottle onto your almost finished card!
Kathy, these cards are so beautiful! I love the added white enamel dots – thanks for the tutorial, too.
Your cards her are sooo gorgeous Kathy, and thanks sooo much for the tutorial too. It is soo cool and it seems sooo easy to use, that I better give it a try too.
Wow, amazing cards! Hugs, Hanneke
Thanks for the great tutorial – especially the tip for the enamel accents
Beautiful card Kathy.
Gr Elly
So beautiful! 🙂
Fantastic cards, Kathy! LOVE how both backgrounds turned out and thanks for the enamel accents tip! 🙂
These are beautiful and lifelike lilies. I like the pinky one best…thanks for the enamel tip.
AWESOME!!! Superb colouring on the Tiger Lilies!
the coloring on those flowers is stunning!
Thanks Kathy for sharing all those wonderful tips and ideas. I love that lily and your coloring skills just makes it so real. Gorgeous!!
Wow! Gorgeous coloring on those lilies! Thanks for the tip on using Enamel Accents. I’ve always had trouble with it, so haven’t used it much lately. I’ll give your tip a try!
Thanks for your tutorial. Your colouring technique is truly awesome!
Thanks for such a lot of helpful info – I agree that Tiger Lily is just beatiful. Love the effect the blue gives for the background & both the bees’ wings & the enamel accents for the flowers are glorious details.
Paula (PEP)
Love this. Thanks for sharing.
These cards are amazing. Love the background and your coloring of the lilys and bees. So gorgeous!
Eret xx
Beautiful cards,thanks for sharing!!!
Stunning cards Kathy – love them both!
beautiful Kathy – thank you for all the tips!
Sandra ltb
so festive these cards! Love the colours on both flowers and the bees are perfect on these cards! Thanks for the tip with the enamel!
The colouring on the card is perfection itself. Love the distress paints!
As always, your cards are amazing! I love what you did with Distress Paint, Glossy Accents on the bee’s wings and those lovely white Enamel Accents! GORGEOUS. 🙂
Thanks for all the wonderful details, very interesting. Just beautiful work.
Such a beauty! I love your lilies and the great background with the distress paints. I have them all and love working with them! So many great qualities to them.
Wonderful cards Kathy, thank you for sharing all the details with us
Fabulous post. I’m saving this one! Your card is brilliant!
lovely flowers you are so talented thank you for the tutorial,
Bee-utiful card! Amazing coloring. Thanks for the tip on the enamel accents.
I knew I wanted that stamp…now there is no question! Many thanks for the tip about applying glossy accents. I needed a way to control it better.