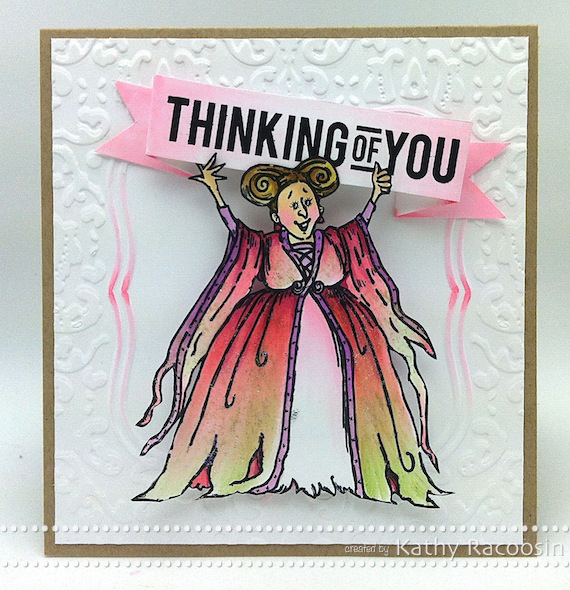
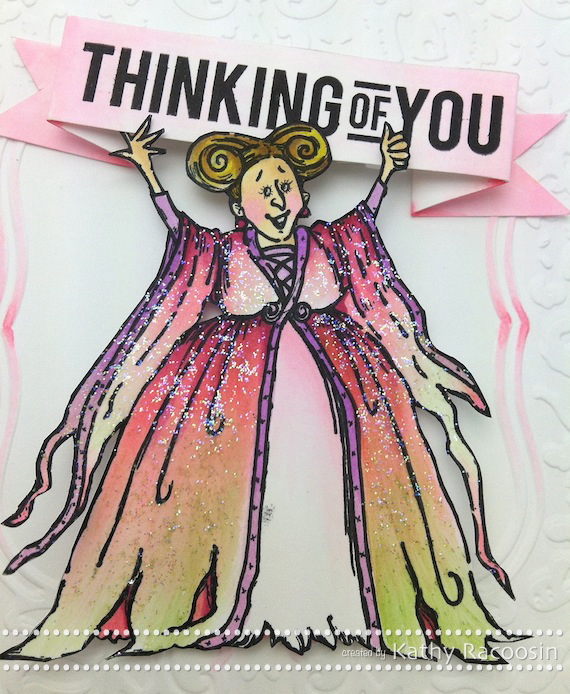
Hello Friends, Just a quick share. Last week I used this witch for a Halloween card and wanted to turn her into a fairy instead. (scroll down to see the Halloween card with the same image). Use this ultra thin marker to make eyelashes to give her some softness like fairies have.
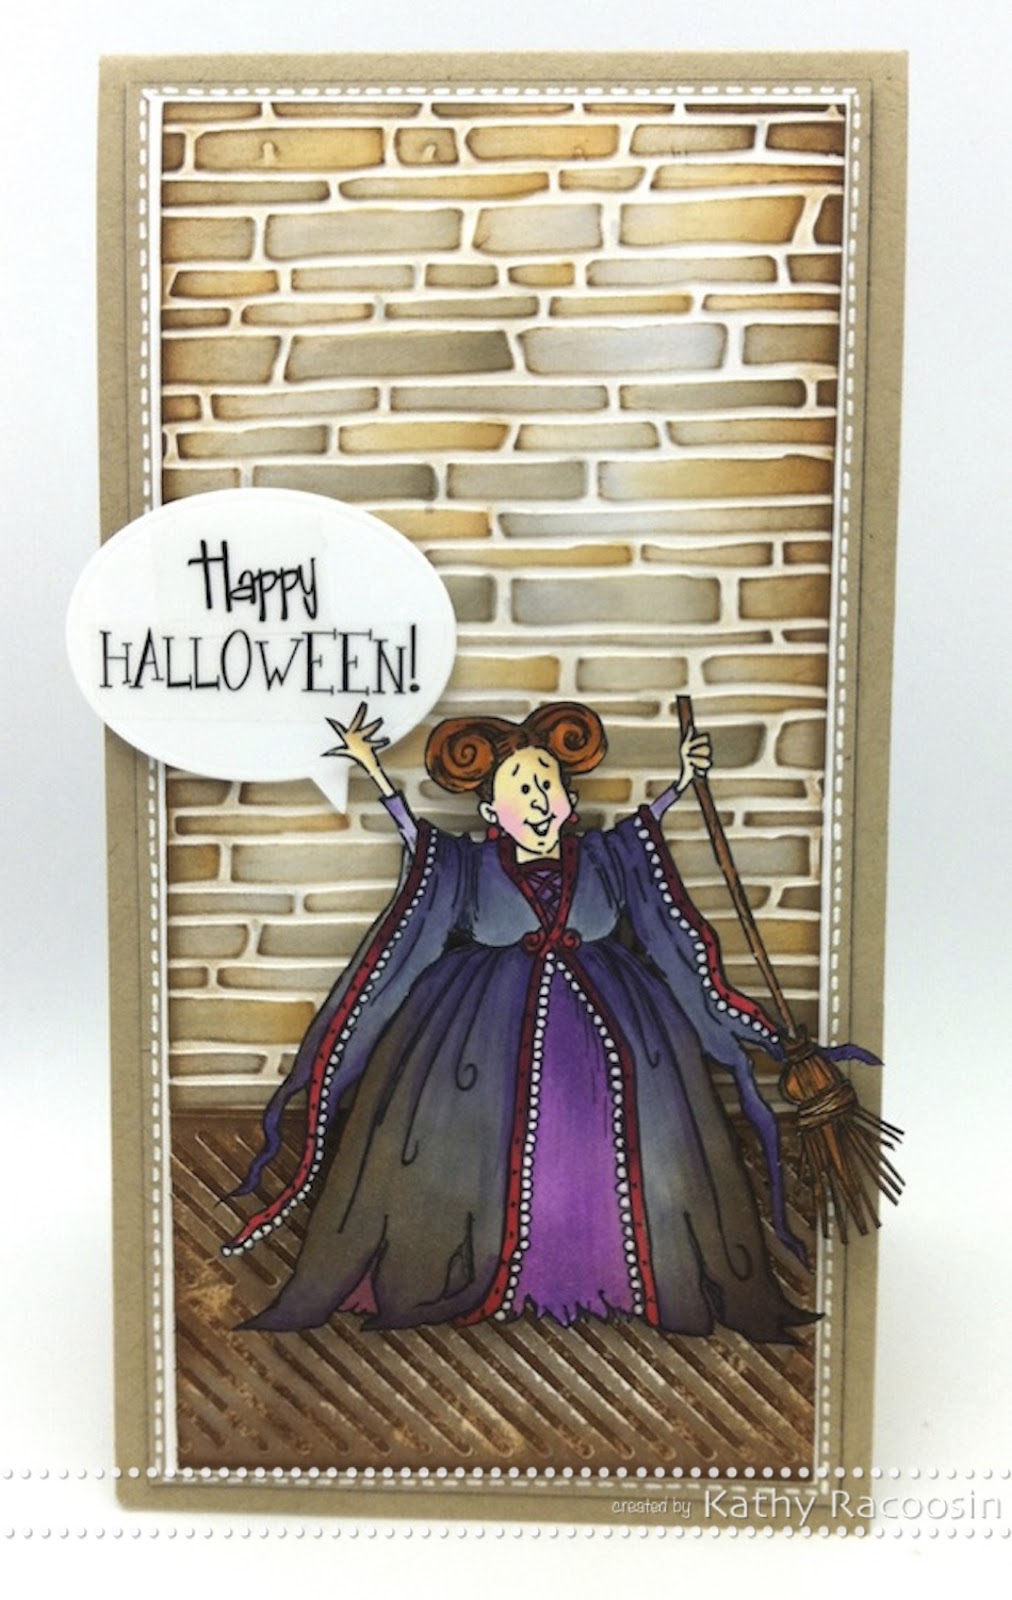
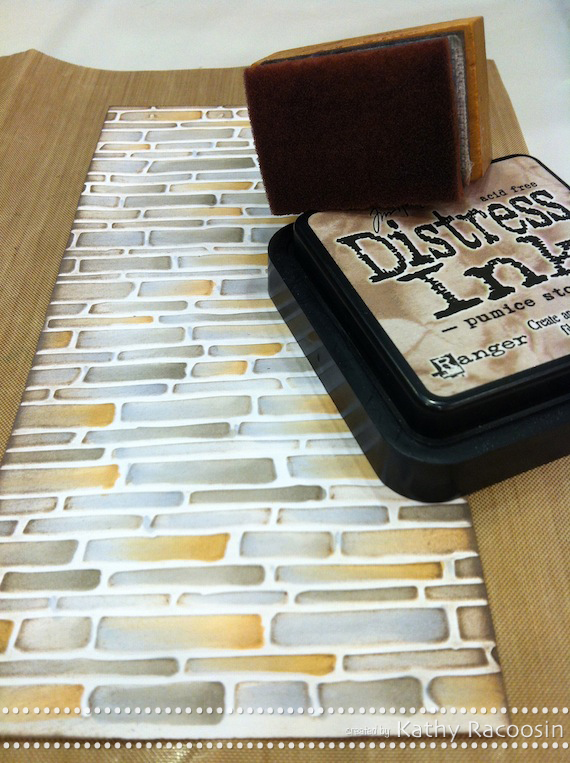
I love the deep embossing when I use the Spellbinders embossing folders. Did you know that they are reversible? This brick “folder” is perfect for so many backgrounds. It’s super easy to color with any neutral alcohol markers. I used some warm and cool greys, a few beiges and a yellowish color. Don’t worry about blending because you will add some distress ink with Pumice Stone to add highlights to the wall.
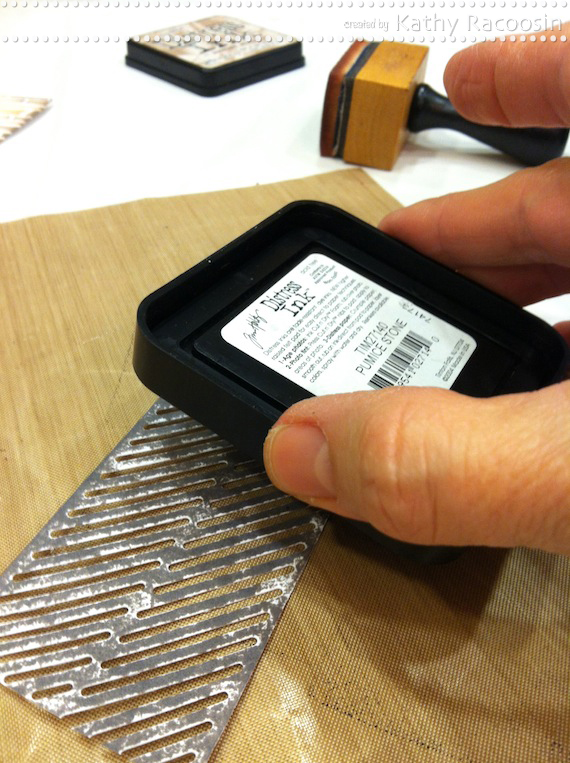
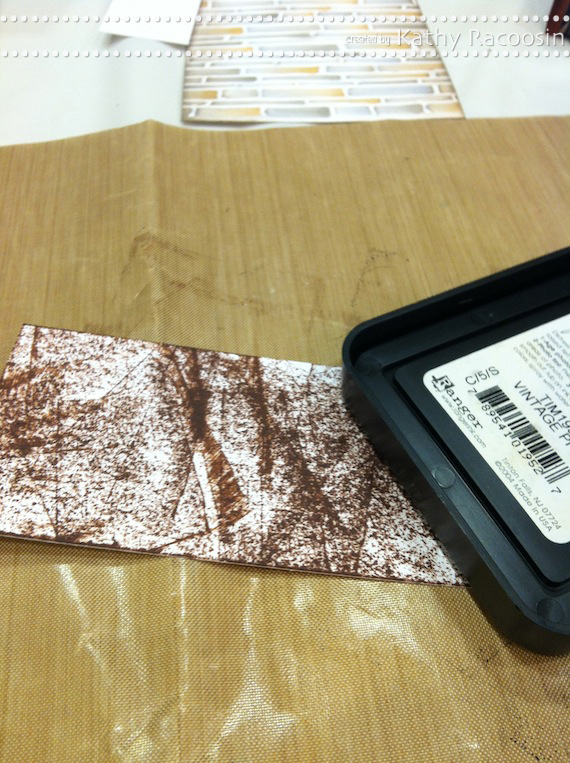
I wanted a darker color under the air vent die. Stamp with Vintage Photo directly onto the paper strip again.
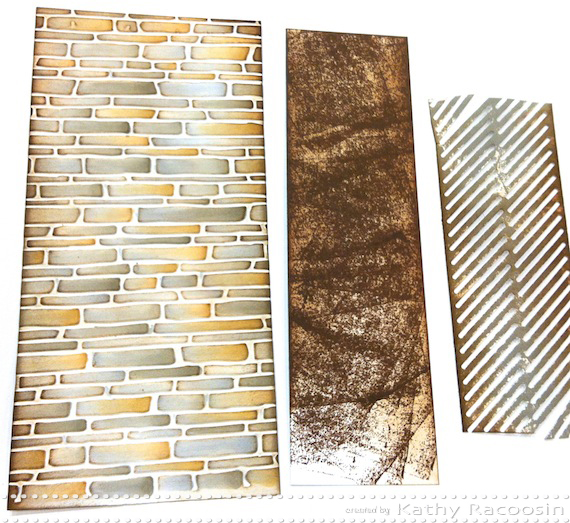
Add some distress ink with Vintage Photo to all of the layers on the edges with the distressing tool .
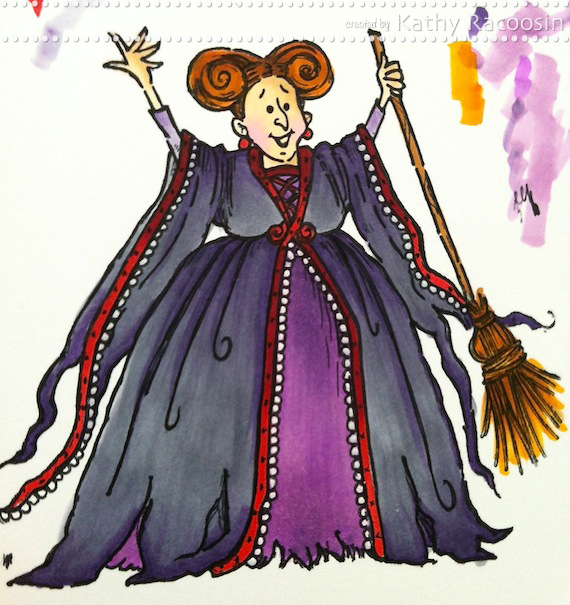
Cut out the image and add some distress ink to Penny Black’s witch called “Hocus Pocus” to make her more “witchy”. I also added some white pen detail alongside the red trip on her dress and sleeves.
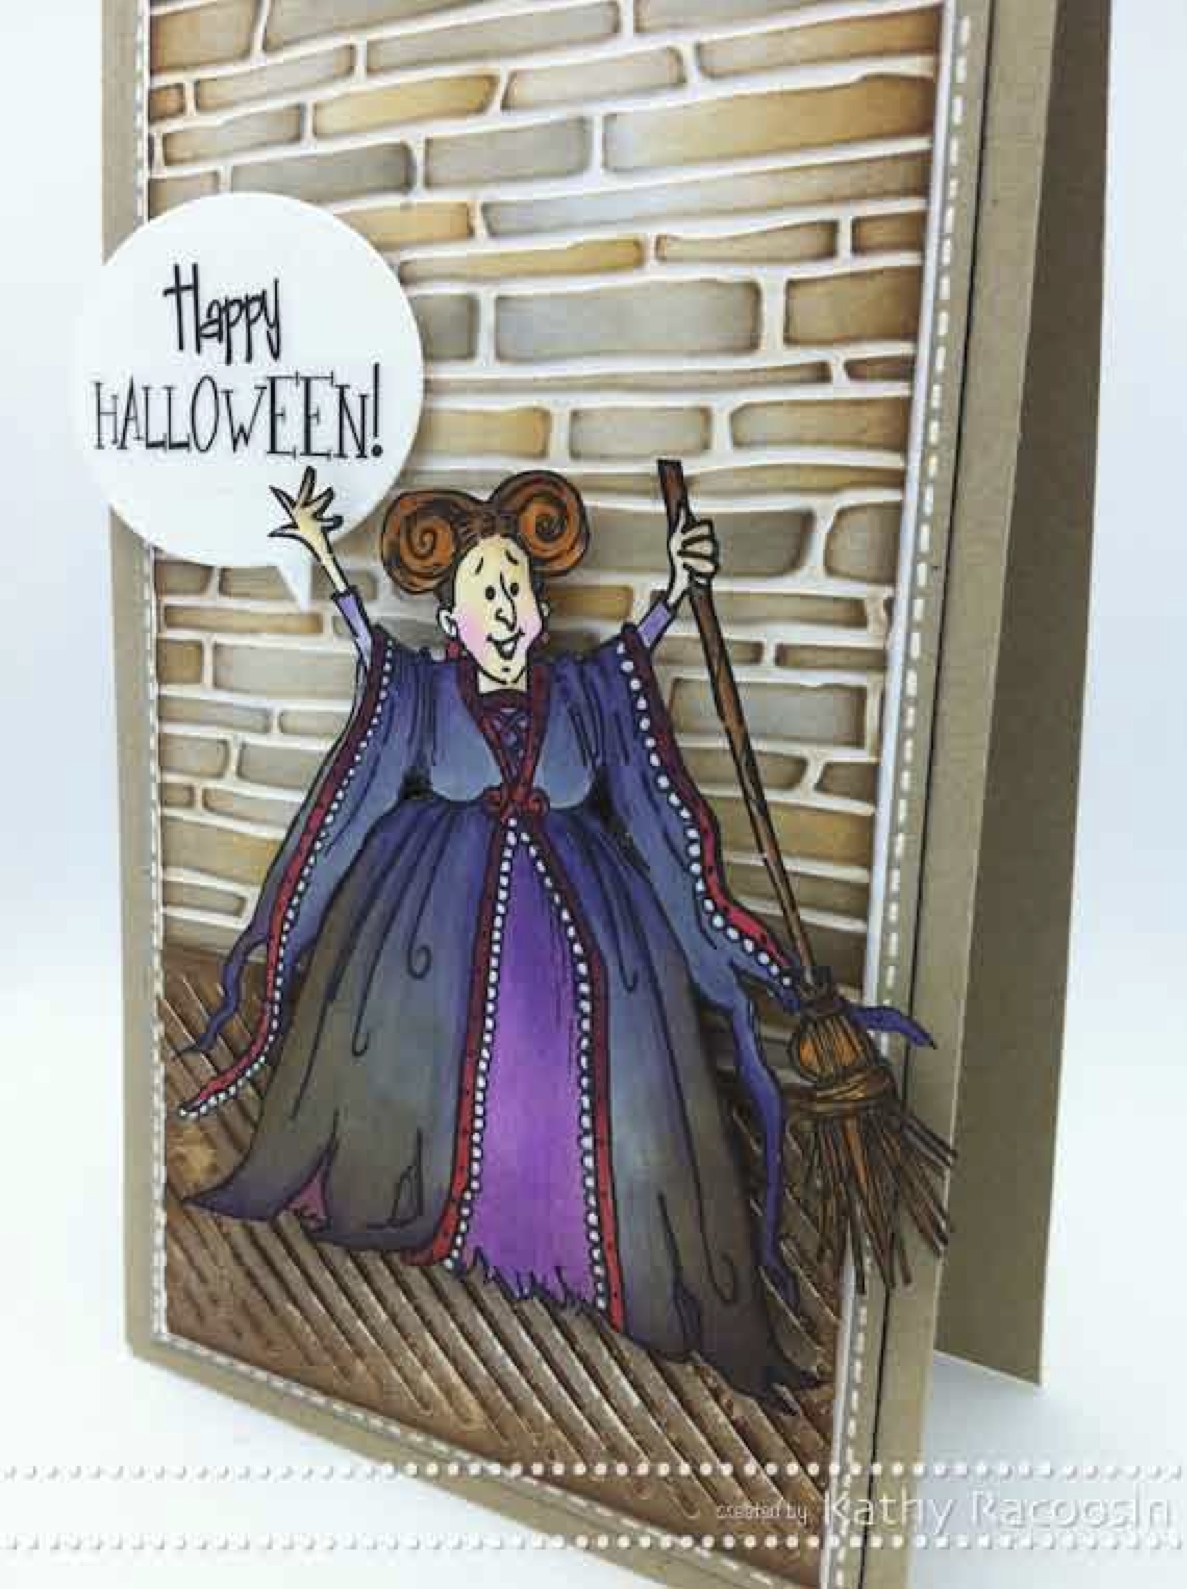
The sentiment was from SRM stickers. I love how you can cut the words to fit your needs. These talk bubbles from SSS are the perfect size for my cards. I suggest when die cutting always cut extra to have on hand. Off of topic here…Have you refilled your Memento Ink Pad lately. It makes a huge difference you will be amazed and it’s super easy. All you need is this. Thanks for your visit today and I hope you are good. Hugs, Kathy
        |
 create an accordion panel for your card
 Penny Black’s NEW Background Stamps
 Wreath Cards


Kathy, you have changed up this stamp wonderfully. I thought you made a fab job with the shaded colours on her dress… I’d never have realised it was a boo boo… looks quite amazing. Love the embossed background.
So much thought & the results are striking – love the detail of altering eyelashes. My favourite bit of all is the bricks panel with your whitework on both the witch & the bordering. Suoer the way you incorporated the embossed background through colouring into streamers from the banner in the first. Goodness hope that makes sense……
Paula (PEP)
Amazing cards – love how you pay so much attention to details, Kathy! You’ve transformed that witch into a fun fairy and made it look so easy, too!
That air vent die is perfect for the floor; need to put that on my (ever-expanding) wish list.
Thanks so much for sharing these added photos!!!! INCREDIBLE!!! I think I need the brick embossing folder now….and maybe air vent die too! Love how you made the witch into a fairy! The green actually looks terrific on her! Accidents become great ART sometimes!!!!
Such great cards! I love that you were able to get different looks with her. She is a pretty witch and a lovely fairy!
Love her as both a witch and fairy!
The green on the fairy’s dress gives it an iridescent feel! Love it when you can use one item in different and unexpected ways….Thanks!
Great how you turned the witch into a fairy! And that green on her dress is beautiful!
Gorgeous! I have to say that the green was a very serendipitous addition. In fact, it was that combination and subtle change in coloration that drew me to the card in the first place! I can see that it might not be how you pictured it, but it is beautiful.
And the witch card! What great use of dies and textures and colouring. Beautiful!
Thank you for the wonderful instructions on changing a witch to a fairy. I love all the little details and the green works well – would never know it wan’t intentional.
Thank you fro your kind comments on my blog
You are so incredibly talented. Thanks so much for sharing your tips on how you achieved this design.
Lisa D.
ps.s I happen to like the green on her dress. It adds something to the overall look. Some of the best things can come from accidents.
thanks for all the tips!
Sandra ltb