 |
| Hello Friends, How are you today?? I hope you had a good ole America barbecue to celebrate yesterday …that is….. if you live in the USA! I have two cards to share with you that I created for the Penny Black Blog along with a mini tutorial. |
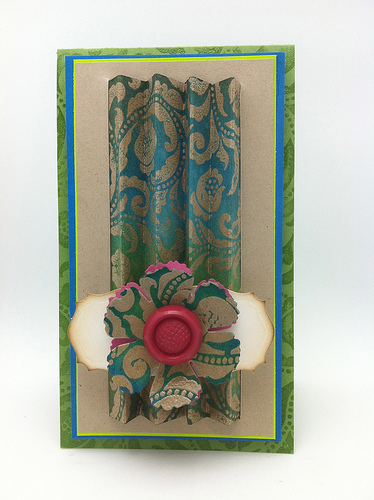
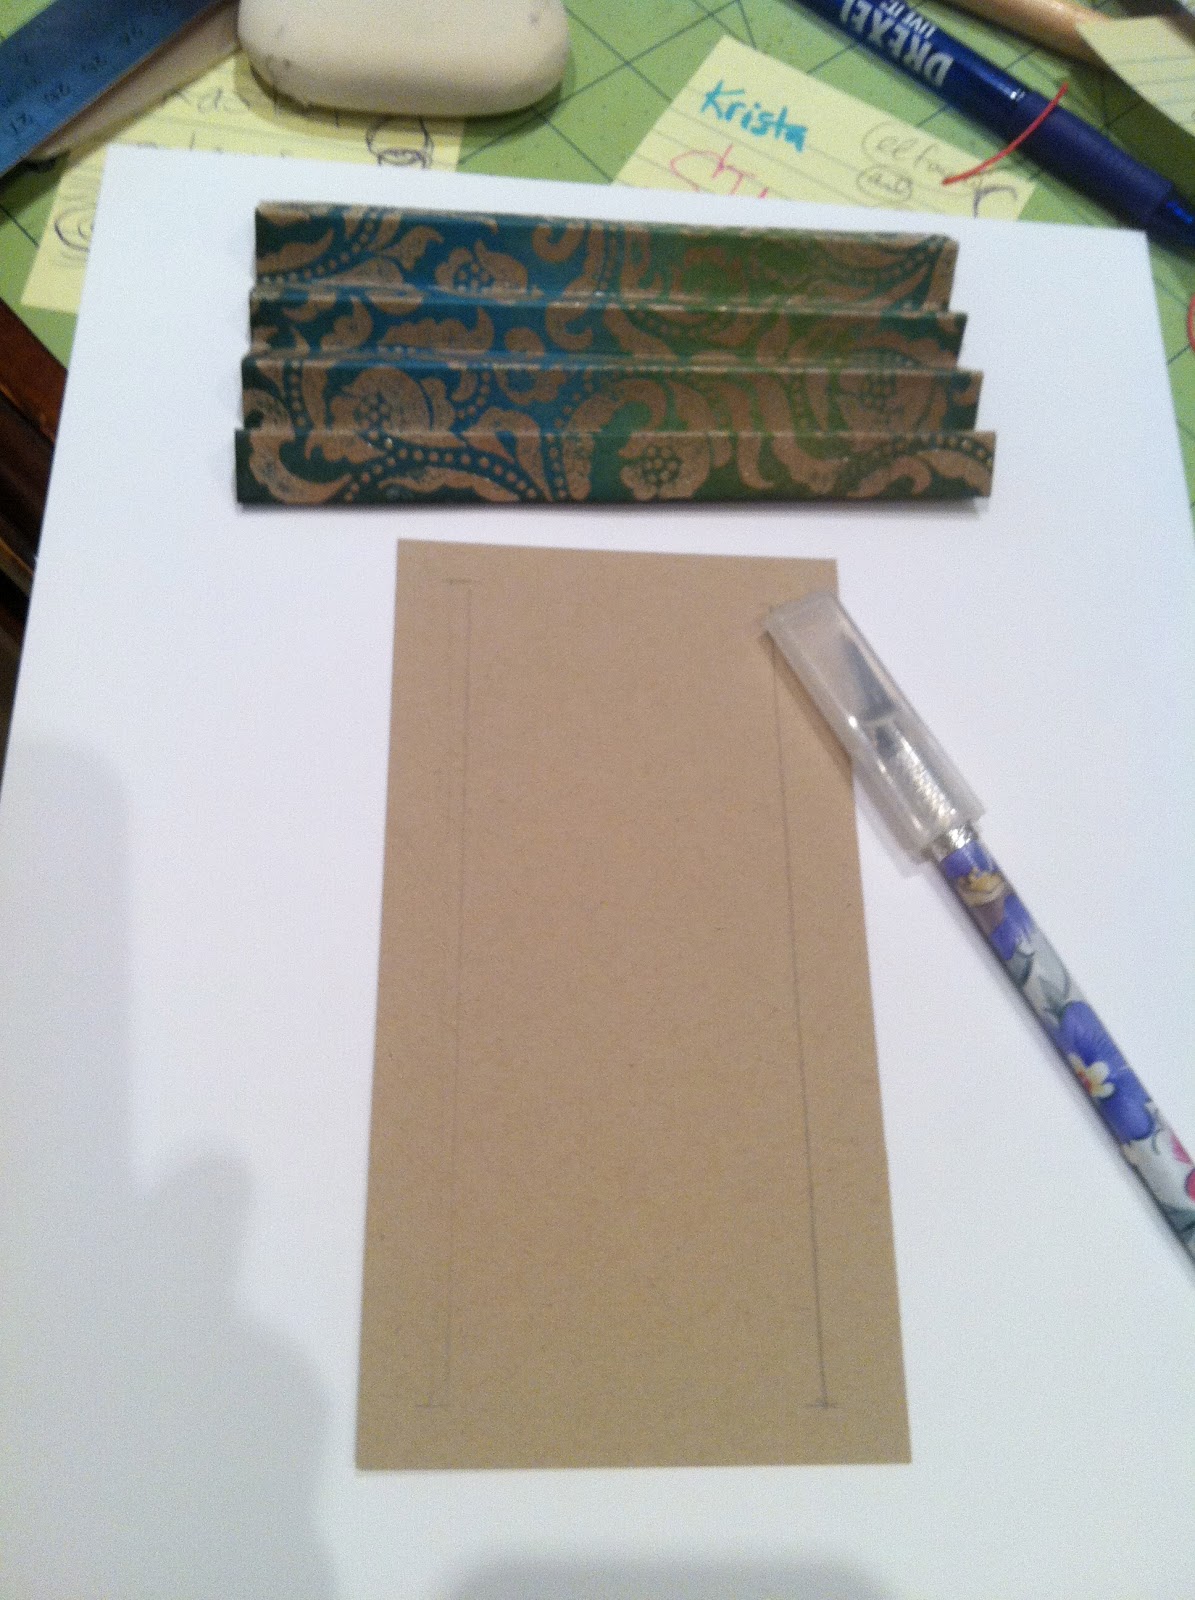
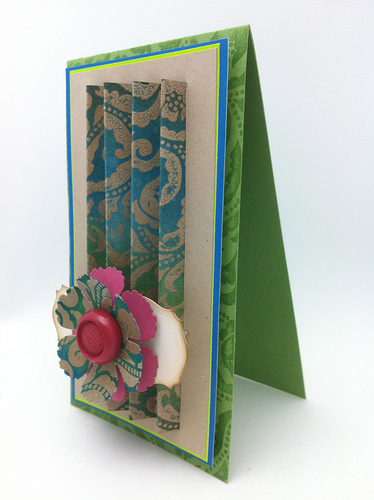 This accordian fold was embossed FIRST with clear embossing powder on this kraft paper…then stamped with this beautiful background stamp from Penny Black. (see more details below) |
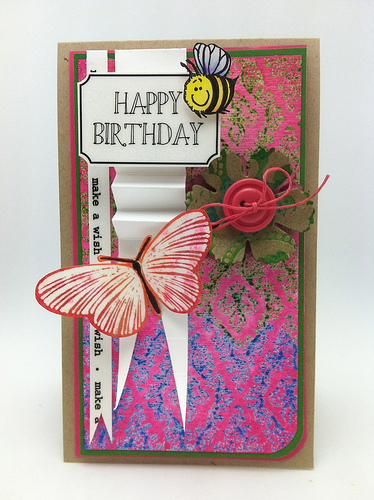 |
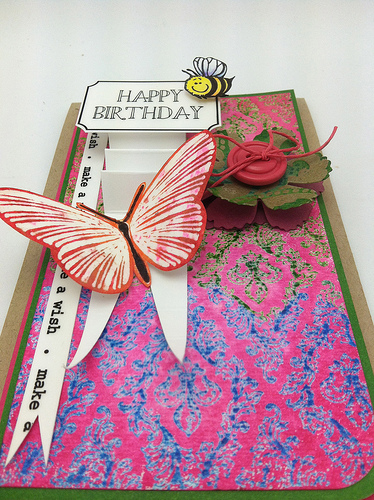
| I wanted to use another accordion fold an a quick card. This is like a pot of soup where you add what’s in the fridge or on the craft desk. The background is from this post, the butterfly from this post & the bee from this post. When I need some additional elements my trusty SRM sticker sentiments come in handy. |
 |
| Have you tried the bright and beautiful new distress inks. I am in love with the colors. {Spring and Summer in case you missed them. } Here is the new Penny Black background stamp. Love what you can create with this. |
 |
| After embossing with clear powder I added some of these new summer distress ink and spritzed with a tiny bit of water. |
 |
|
After scoring my embossed panel to create pleats to fold…. I cut slits on both sides on my kraft paper to insert my accordion fold into my card base. I added tape to the back
|
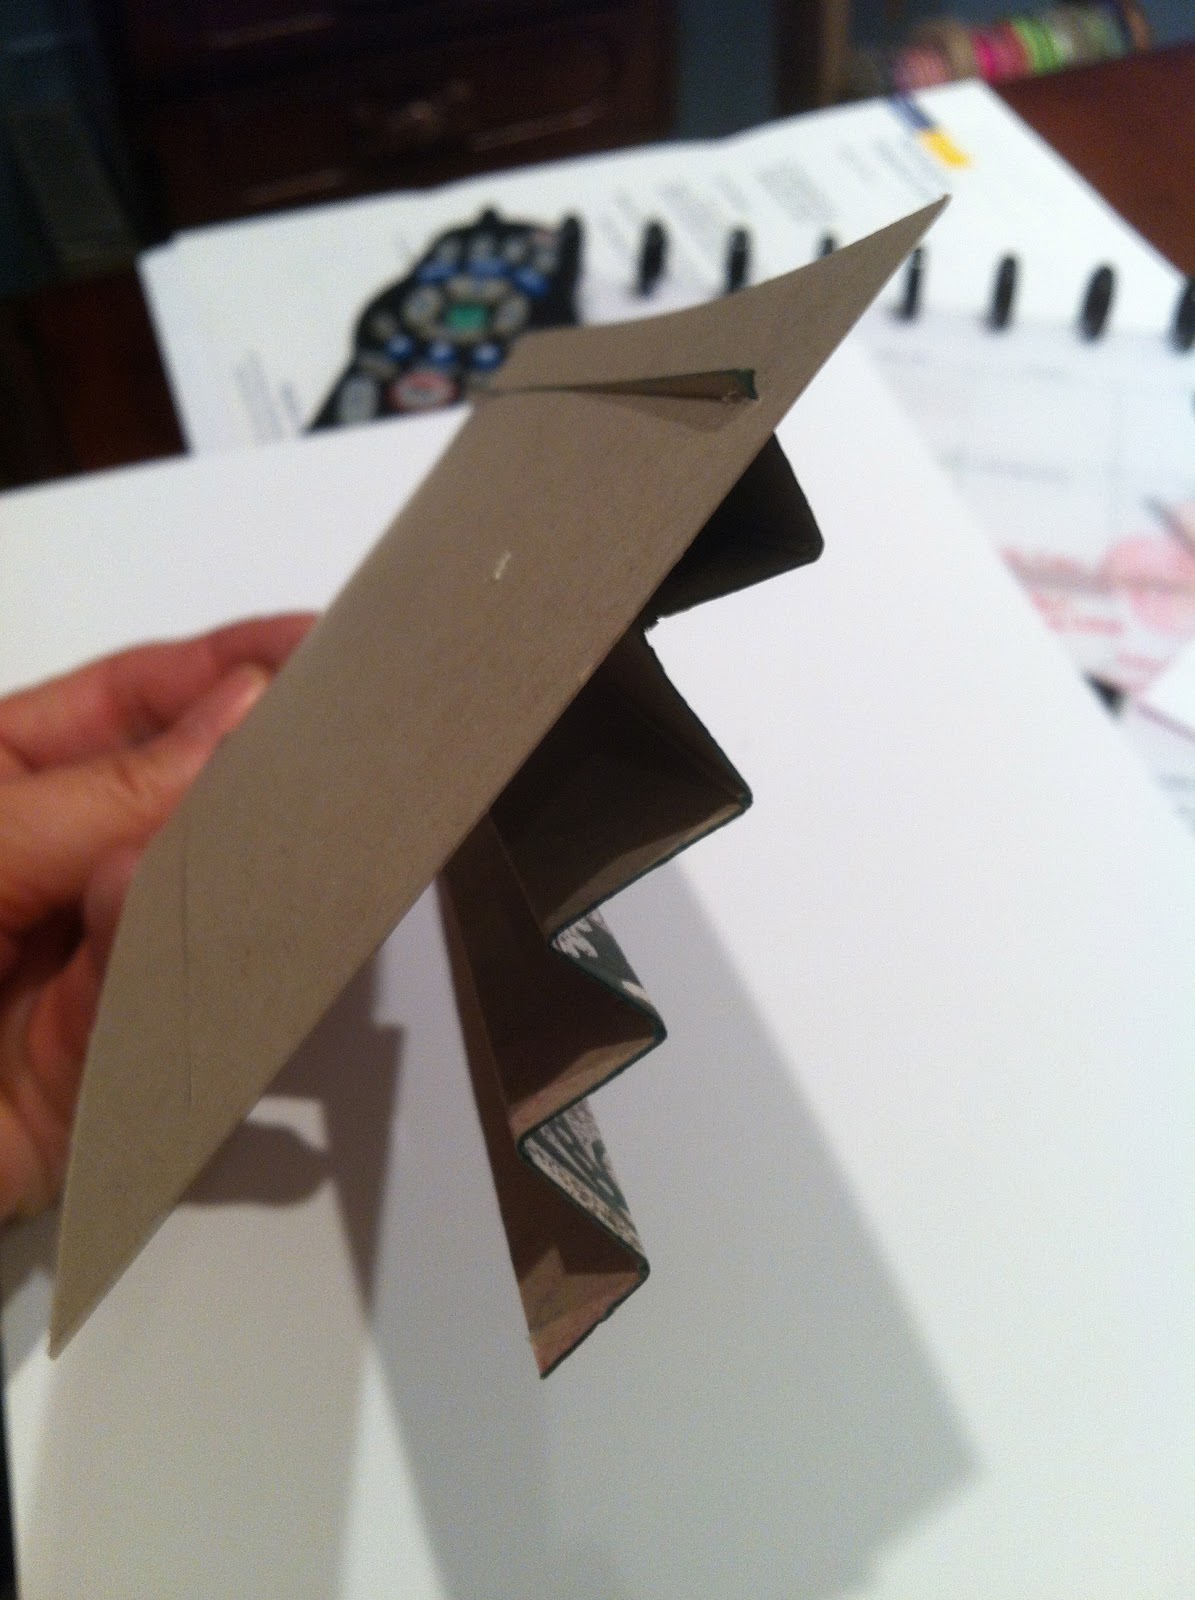 |
| Add tape to the back on the first side. The a few dabs of Glossy Accents on the parts of the accordion pleats that touch the card base. Insert the other side and tape it down. (I thought inserting the folded edges gives the card a more finished look. |
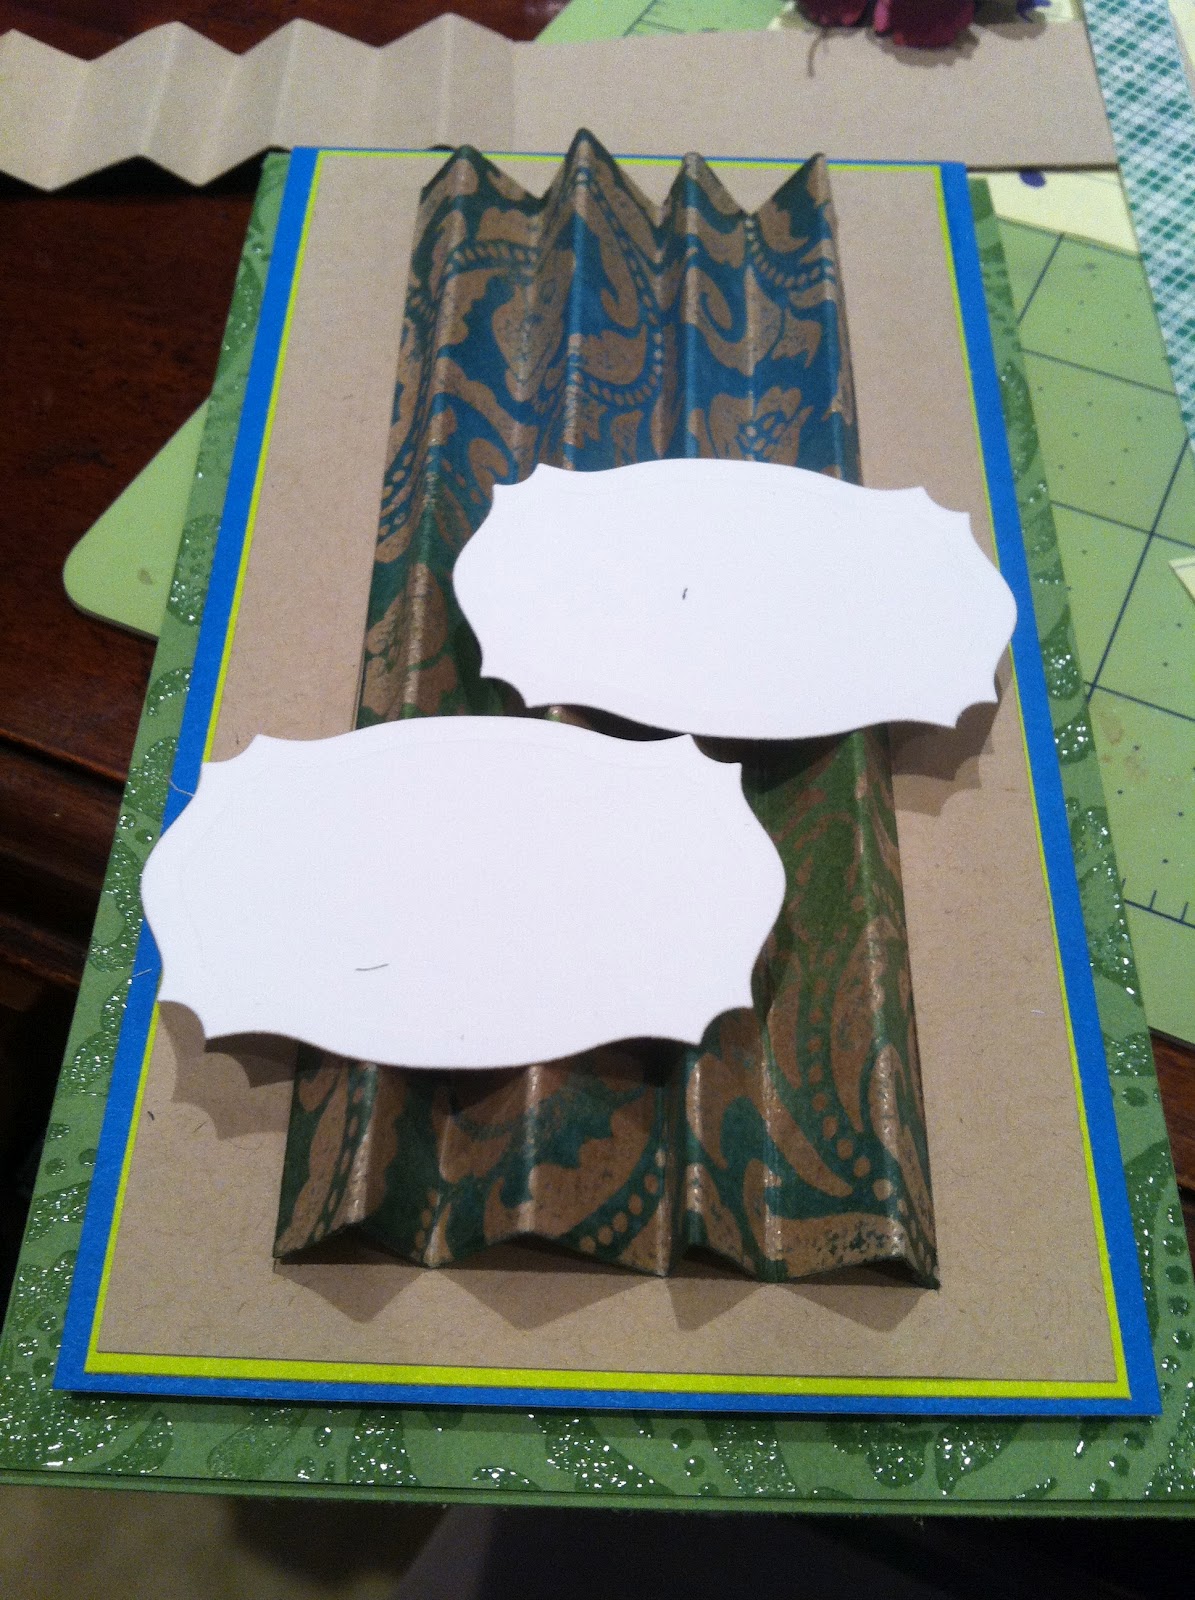 |
| I combined two of these Spellbinder dies to make on long horzintal one then added some brown distress ink on the edges. |
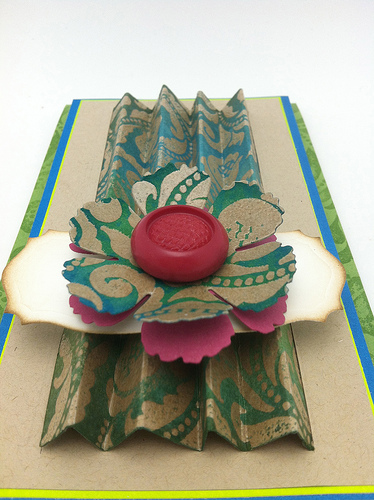 |
| The perfect landing spot for my flower. I applied the layers with Scrap Dots. Have a wonderful day and thanks for taking time to visit. Hugs, Kathy P.S. Did you notice all of the different fonts in this post….blogger wasn’t behaving tonight. |
CARD SUPPLIES:
 |
|
 |
|
|
|
|
|
|
|
|
|
|
|
|
|
|
 |
|
|
|
|
 Tuesday Tipster #3
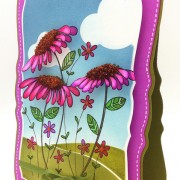 It’s blooming flowers all week & a winner
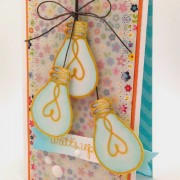 watt’s up – giveaway- winners announced


Oh you really made me smile this morning when you mentioned about the fonts (& I actually hadn’t noticed but did when you said, a huge encouragement for a perfectionist like me). Thank you so much for the tutorial – the insertion of the acccordion’s ends into the slits definitely makes this look very very much neater.
Paula (PEP)
This is gorgeous!!!!!