 |
| Hello Friends, Anything fun plans for your summer? Do you think you will have more or less crafting time? If you are wondering when I will move…so am I. Since my husband is the builder it’s slow going and now the move MAY be in late August. Still lots to do 🙂 and I try to squeeze in crafting when I can. Today Penny Black is showcasing their NEW stamps all week on the PB blog & I think you will be pleased with the new stamps! |
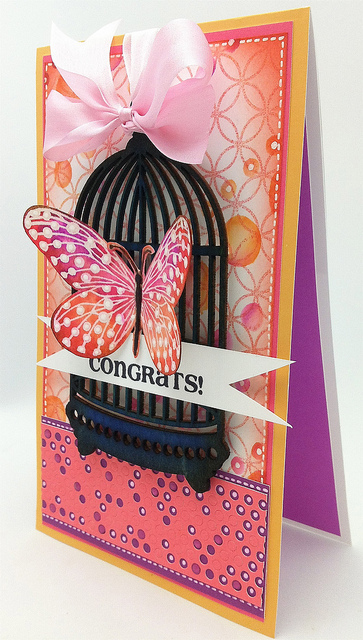 |
| I love butterflies and Penny Black’s new transparent set called “Social Butterfly” I must admit … it’s a fast favorite. I used this water color paper (that is the best I have found) and embossed the butterflies with clear embossing powder, colored randomly with Tombow and spritzed with water. Give it time to dry and cut it out leaving an edge. |
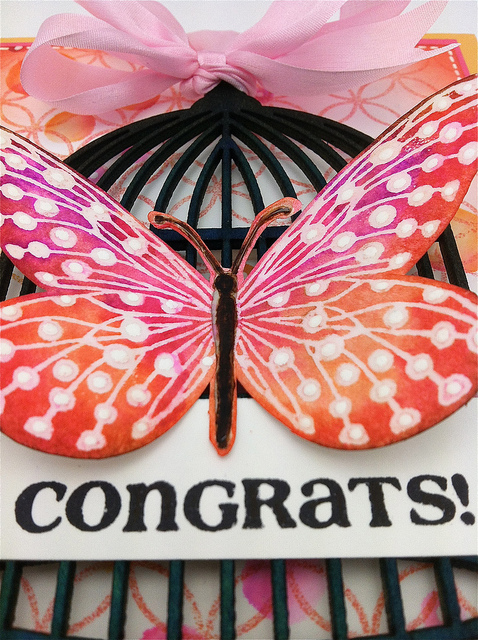 |
| After my card was assembled I added white dots to the embossing. Love how it looks. Just remember to let the white ink pool on the dot…go slow 🙂 Don’t you love These beautiful wood bird cages from Kasier? I sprayed some Dylusions on the birdcage then distressed it a bit. You can color them with markers or leave them plain. |
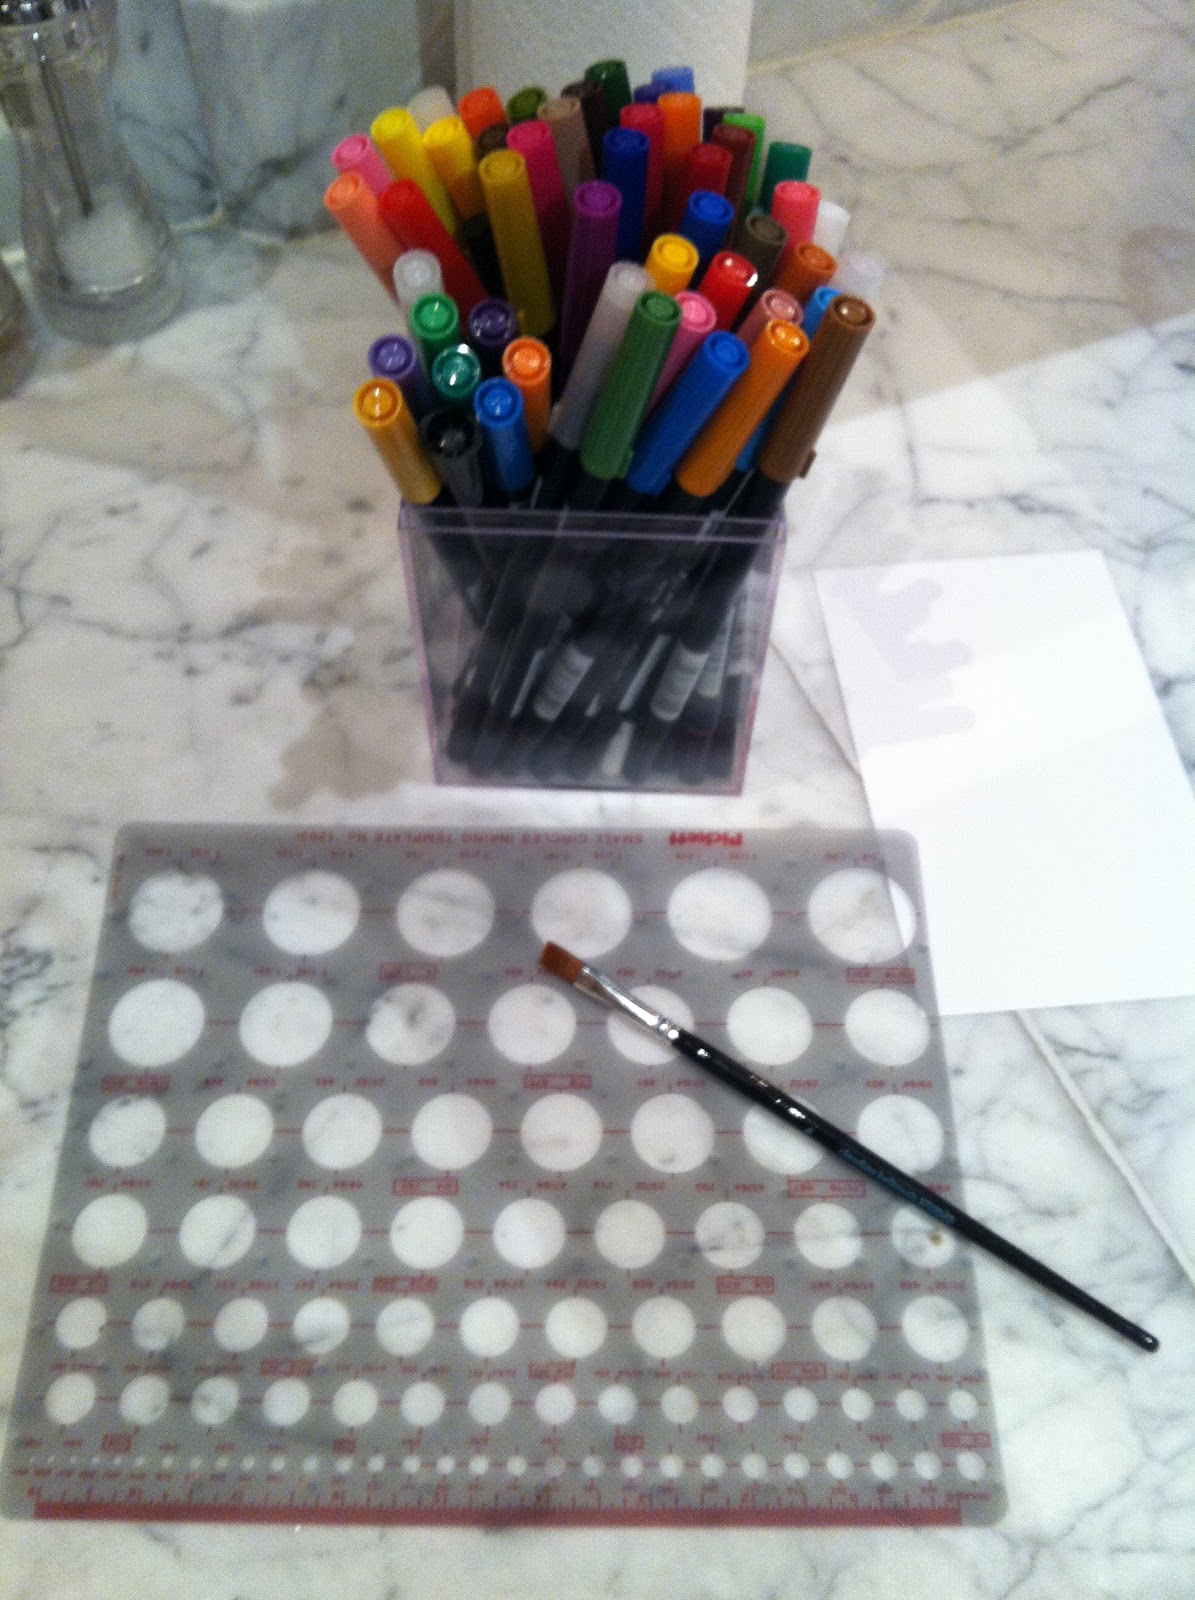 |
| I picked up this “inking template” from an art supply store and love using it on different projects. Works great with alcohol markers too. Today I am using Tombow water color markers on this paper. |
 |
| Most of the time when I use Tombow I use the blender pen that comes in most of their markers packs. I was waiting for my water to boil so I brought my supplies in the kitchen. Usually I use this but, I was to lazy so I grabbed the bottom of a bowl. In this post I have more blending info. |
 |
| After creating rows of graduated dots with my template I stamped with distress ink…. Penny Black’s stamp called “All Over Pattern” |
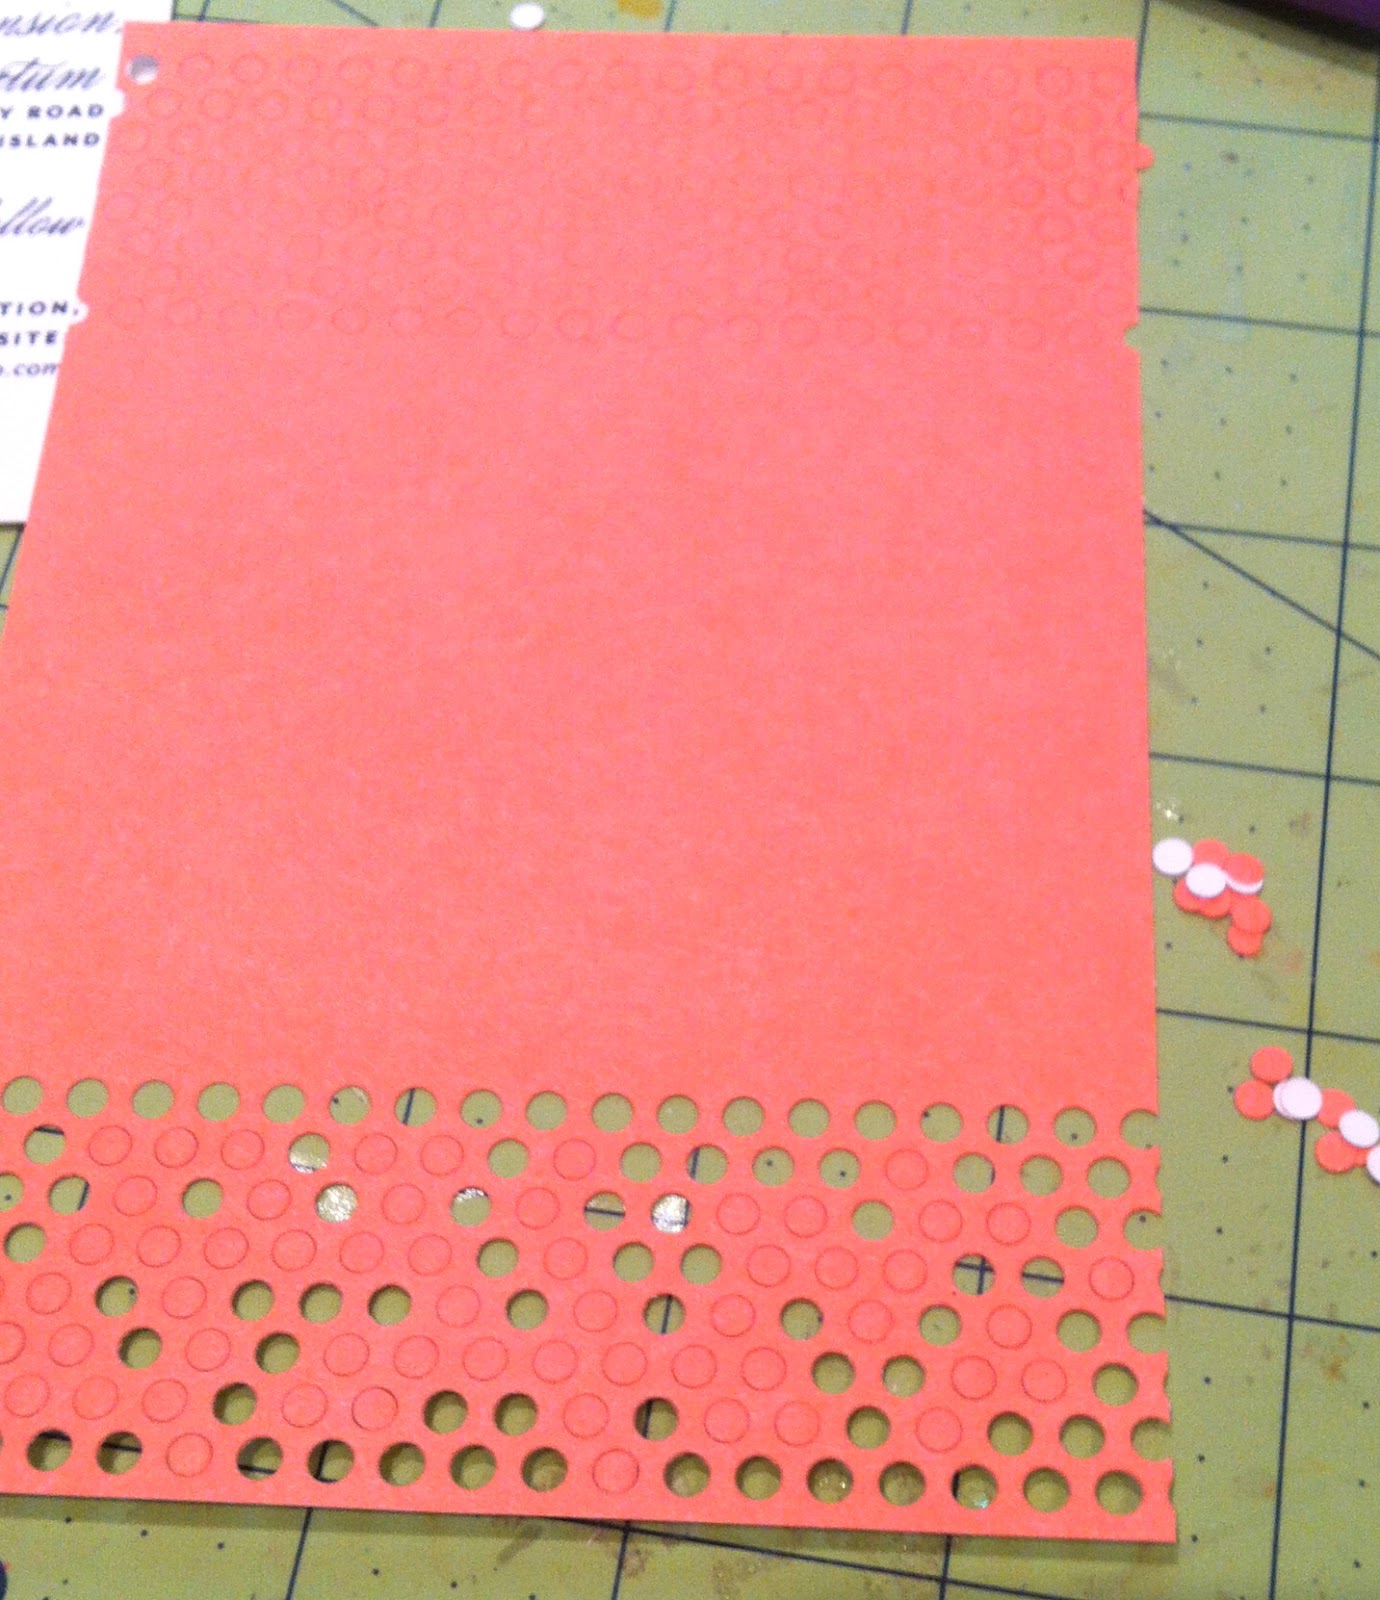 |
| I am in love with Simon Says Exclusive dies and they are fun to experiment with. If you are lucky a few dots will decide to stick around after you die cut this boarder. Carefully flip your paper over ….. trying to keep some dots IN. Here is another card with this boarder in case you missed it. |
 |
| Add some glossy accents on the back of the paper to keep the dots from falling out. |
 |
| Mount your boarder before it dries and trim. Add some white dots . |
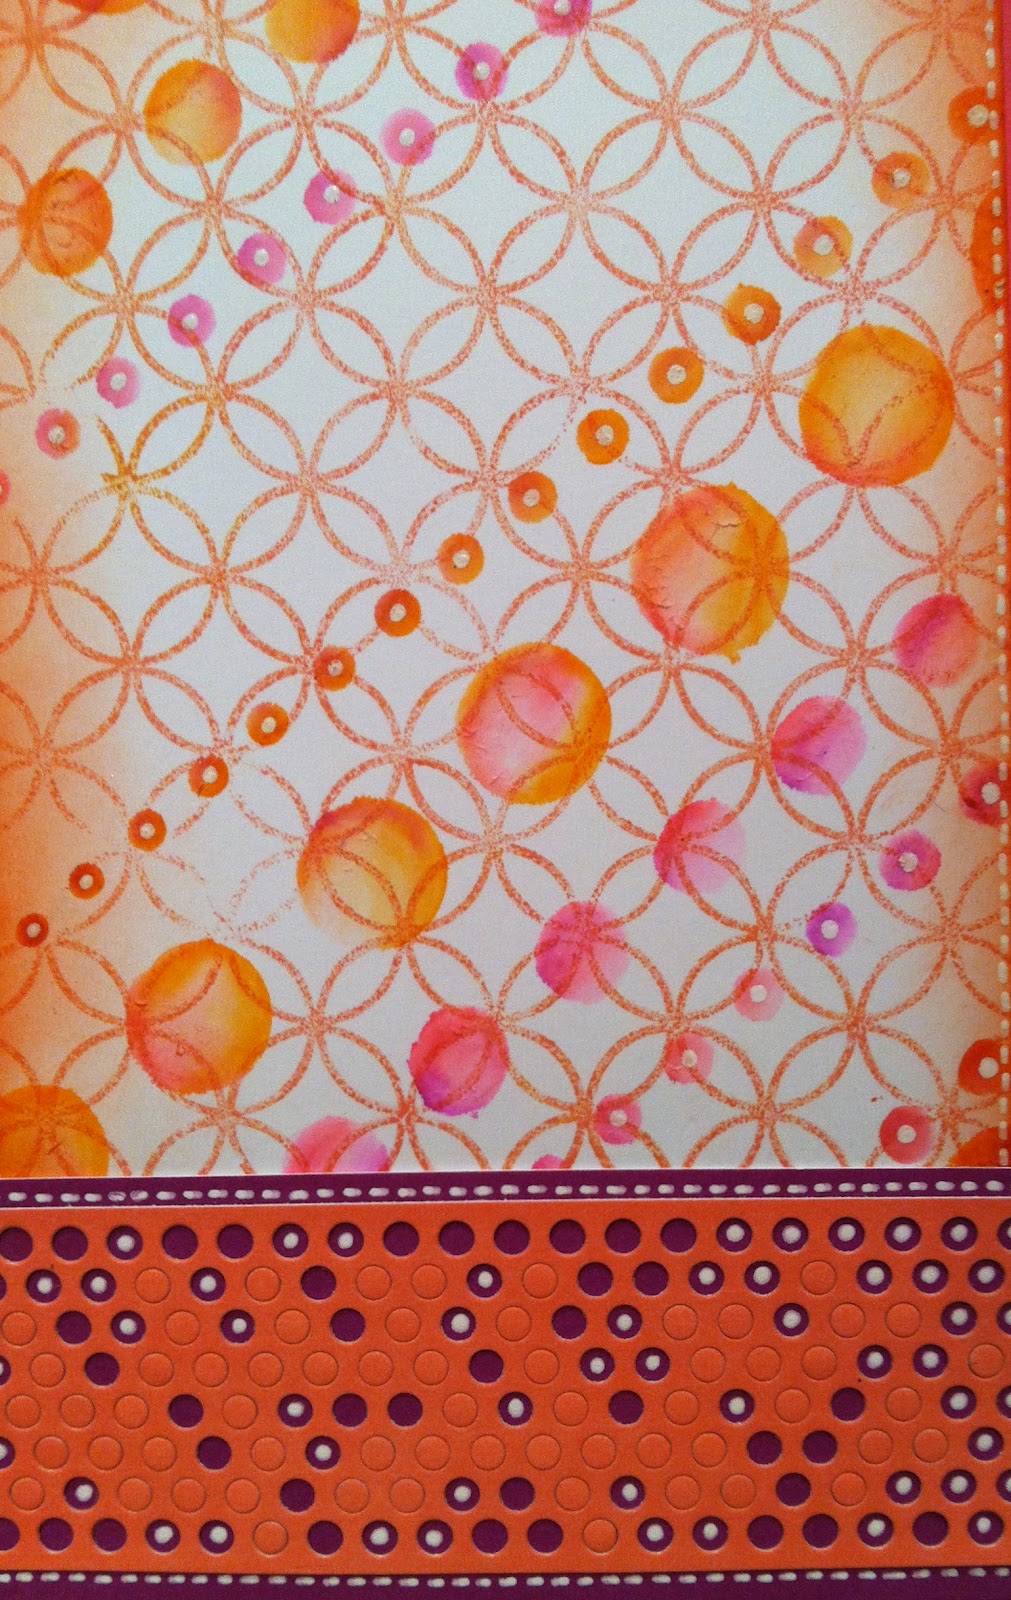 |
| Add some distress ink. If you want to keep this simple just stamp a sentiment and you are finished. I will be back tomorrow with more cards. Off to prepare. See you then, Kathy CARD SUPPLIES |
|
|
 |
|
|
|
|
|
|
|
|
|
|
|
|
|
|
|
 |
 |
 Day 18. Video – Giveaway
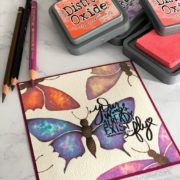 Day 2. Watercoloring with Distress Oxides
 Day 11. Spring Daffodils Digial Print


Gosh Kathy, This is so beautiful and so creative:)x
Amazing Kathy. Love the dotty part of the card.
I think that is STUNNING. Such cool details and effects…and I love your colors!
This is just gorgeous – I love the white dots!!
That black birdcage looks so awesome against the pink bg! Great use of a circle stencil and punch! Thanks for the idea~ I pinned it for future use 🙂
I know I’ve told you this before but I love visiting your blog, Kathy! Not only do I learn something each time, I am always so “wowed” by your talent! What a gorgeous card this is! Love that birdcage, and your butterfly is so gorgeous – fun idea – letting the white ink pool on the embossing! Only YOU would think of something like that! LOVE IT!! 🙂
Jaw-dropping gorgeous!! Only you make cards like this as there are no other!
How in the world do you keep coming up with such fantastically beautiful cards??? I love the bg paper you made and that butterfly is gorgeous!!! Beautiful bow, too.
So many layers of wonderful color and design Kathy!
Such a clever woman you are, Kathy! This card is a beauty and your ideas and tips are in a category all your own. Hope your move goes smoothly when the time comes. Hugs~
Stunning Kathy – absolutely LOVE it.
Soooooo beautiful!!
Absolutely fabulous Sista!
So amazing! You are amazing too!
This is gorgeous Kathy! I love that die tons. Also that’s a great butterfly stamp. We’re busy bees over here with kid activities. Little crafting time. Taking a blogging break for two weeks
Beautiful card. 🙂 Thanks for sharing your technique. Thanks for the chance to win something from your stash. I do subscribe to your blog and receive emails.
wow this is amazing!!! So much work went into this and it is beautiful! loving this butterfly stamp!
This is really gorgeous Kathy!
I’m catching up with commenting. Those colours combined with the white & your circle patterning makes this a very striking design. I particularly like the white dots accenting with the die-cut border & also your use of that pattern stamp. I hope the moving plans work out – it’s not an easy time but I’d imagine it’s a very special feeling to have one’s husband build the house you will live in.
Paula (PEP)
This is absolutely beautiful! I will be this good….one day! Thanks for sharing!