 |
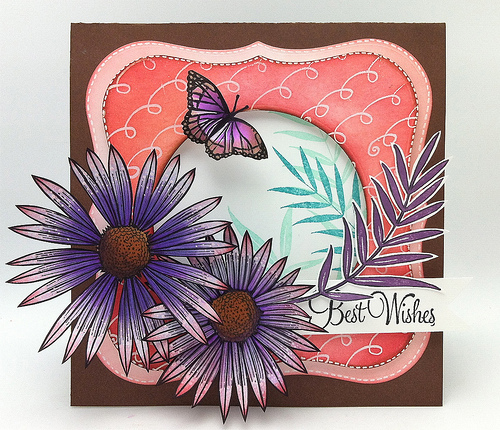
| Hello Friends, How was your weekend? It seems like it’s been forever since I have created something for the Penny Black blog. Today I wanted to share with you a easy way to make a stamped flower smaller. It’s fun to alter the same flower so they can be clustered together. |
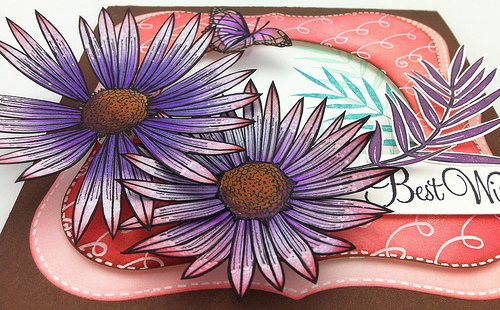 |
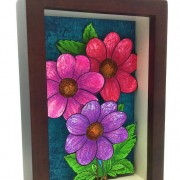
| Notice the bottom flower is thicker too? Before we get started on the the flowers you might notice the fun loopy background? I used this stamp set with some distress ink from Penny Black. Before distressing I embossed the squiggle on white card stock with clear powder embossing powder. (All supplies will be linked at the bottom.) |
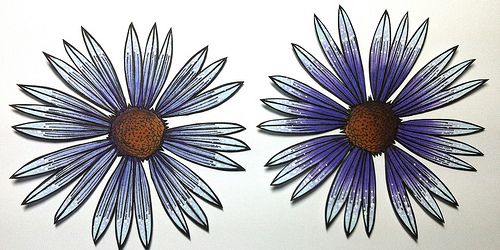 |
| I stamped two flowers & colored them with Copic markers and I added lots of white dots. |
 |
| After trimming my flower I cut it apart in sections that were determined by the flowers design. |
 |
| Attach the petals to the center of the flower with Glossy Accents. This is how you can play with the length of the petals depending on where you place the petals down to be glued. |
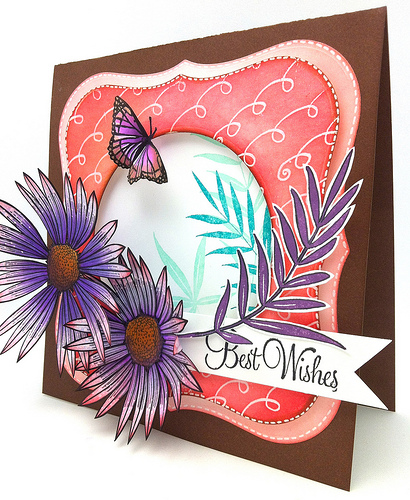 |
| Playing with the petals by bending them up or intertwining the petals gives you a nice look on your card. If you look closely at my finished flowers you will see more color on them. I added some distress ink to the petals for more color. What do you think of the purple fern?? I was feeling a little more artsy today especially with the two stamped ferns in the middle of my card. Usually I don’t give a pop of color that doesn’t relate to anything else on the card. The die is from Spellbinders Grand collection and I use it often in my Cuttlebug.Thank You for your visit! Hugs, Kathy |
CARD SUPPLIES:
|
|
|
|
|
|
|
|
|
|
|
|
|
|
|
|
|
 It’s still blooming on day three
 gift bags can be fun
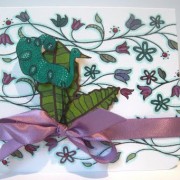 just playing


Wow, this is great, Kathy! I love how you changed the look of the flower. I like how you used that squiggle for the background, and I like the ferns. Beautiful card!
Lovely card and great combination of colors Kathy! I love your idea of altering the flower! Such a creative way to use the same stamp and have different outcome!
Love the technique! Love the colors! Love the card! I always learn something here! Thank you!
Your card is STUNNING!!!! TFS the flower tutorial. I have never thought of doing that. I need to go check out my stamps and see if I have any good flower stamps to try this with!!! LOVE the embossed squiggles!!!! Altogether GORGEOUS card!
Very nice way to make the flowers look fuller, Kathy! Love the purple fern and the squiggly background, too!
so much in details & fussy cutting Kathy! Colors are also luvly 🙂 beautiful card! 🙂
Kathy, Your card is just so beautiful! :)x
Very clever, Sista! You always have the best ideas!
Stunning card, and great tip! TFS.
As to the ferns – I think they add a super contrast to both the purple & the red: after all what is purple but a blend of the aqua & red? The background is so effective & the internal ferns give a super sense of movement to the fern on the outer section. The altering of the flower is superb & adds another element that is the same but different.
Love the brown base card & how it picks up the brown on the butterfly & the flower centres. One of your masterpieces definitely!
Paula (PEP)
Love your little “magic” in this! Brilliant idea and design!
This is so lovely!
Very pretty card, love how you made the flowers your own !
I really like not only the purple fern, but the colors of the butterfly and flowers. They look great!
FABULOUS project!
Hey, there goes a ‘light bulb’ moment for me! What a fantastic tutorial, thanks yet again!
ps. Adore the card!
Such a beautiful card – great colour combos. Thank you for the brilliant tip on resizing stamped flowers, hope I remember it, it would be so useful.
Mary Mac
the colors are absolutely beautiful!
Wow! Amazing result and very creative too, Kathy!
So pretty Kathy! I really like the pop of blue you added 🙂
Great ideas and tutorial about flowers! And I like the purple fern! You can really see movement in your card, and I like the 3 dimensionality (sp?). Thanks for sharing.
Katie B.
WOW! This is such a beautiful card!
Absolutely gorgeous! You are such a talented lady!!