 |
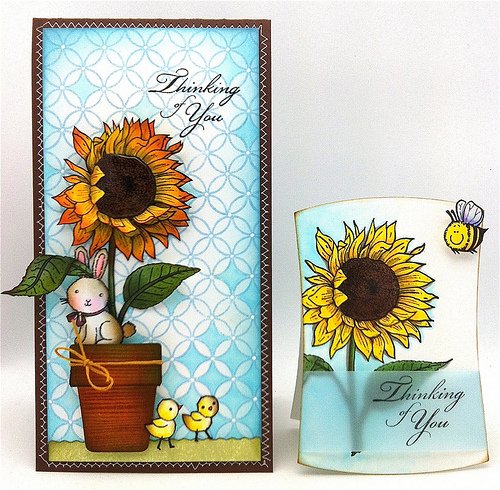
| Hello…hello my friends, How are you today?? Are you experiencing wacky weather in your part of the world. We are expecting a record 70 degrees today …so … in that theme I have two spring cards to for you today that are on the Penny Black blog today. I also am sharing how I changed a organized background stamp and turned it into a random pattern. |
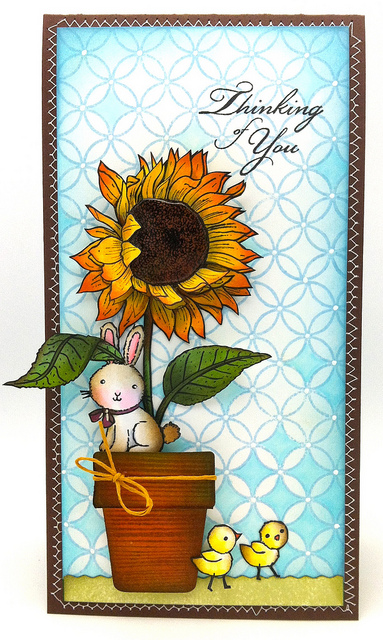 |
| I love flower stamps and this new 2012 Penny Black “Sunshine” stamp is on my favorite list. I just had to play gardner and pot it in this Spellbinder die. Can I tell you?? I LOVE this particular die … and some of my favorite cards are potted plants. You can see here & here. I used PB’s new woodgrain stamp with some distress inks to decorate the flower pot. |
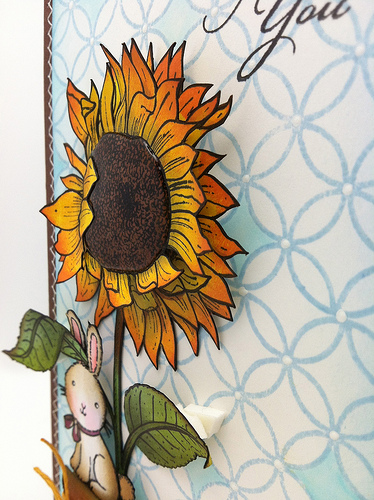 |
| The center of the flower has Glossy Accents and this time I applied it differently. See below. |
 |
| Rather than applying the GA around the petals I cut them off instead so I could layer them on top of the Glossy Accents after it was dry. When I finished coloring I realized that I needed more color on my flower therefore, I went for more of an artistic sunflower instead of a more realistic one. I love the distress ink called Ripe Persimmon. The color is so rich and it finished my sunflower off by adding it to the edges of the flower with a dauber . (refer to the card on the left) |
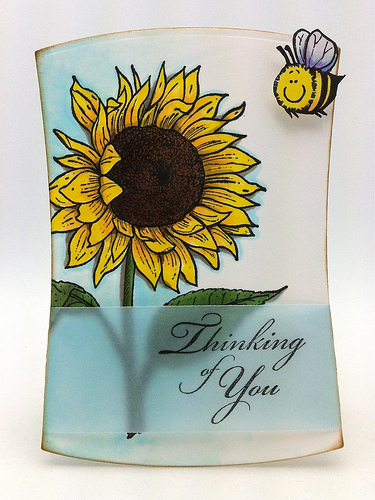 |
| Both cards flowers and critters (here) are colored with Copic makers. I added this little bee to add some whimsey to my simple card. The sentiment is stamped on blue vellum and attached with good ole’ tape on the back. If you wrap vellum you don’t have to attach it with anything. I like how the vellum isn’t flat on the card when you wrap it. |
 |
| I LOVE to add color to backgrounds with an organized pattern. This is one of PB’s new 2010 stamps called “All over Pattern” and soon you will be able to purchase in the stores. On my card I used this ink and Boo instead because I wanted it to be more subtle. For explaining this mini tutorial I used a blue chalk ink instead because it’s brighter. |
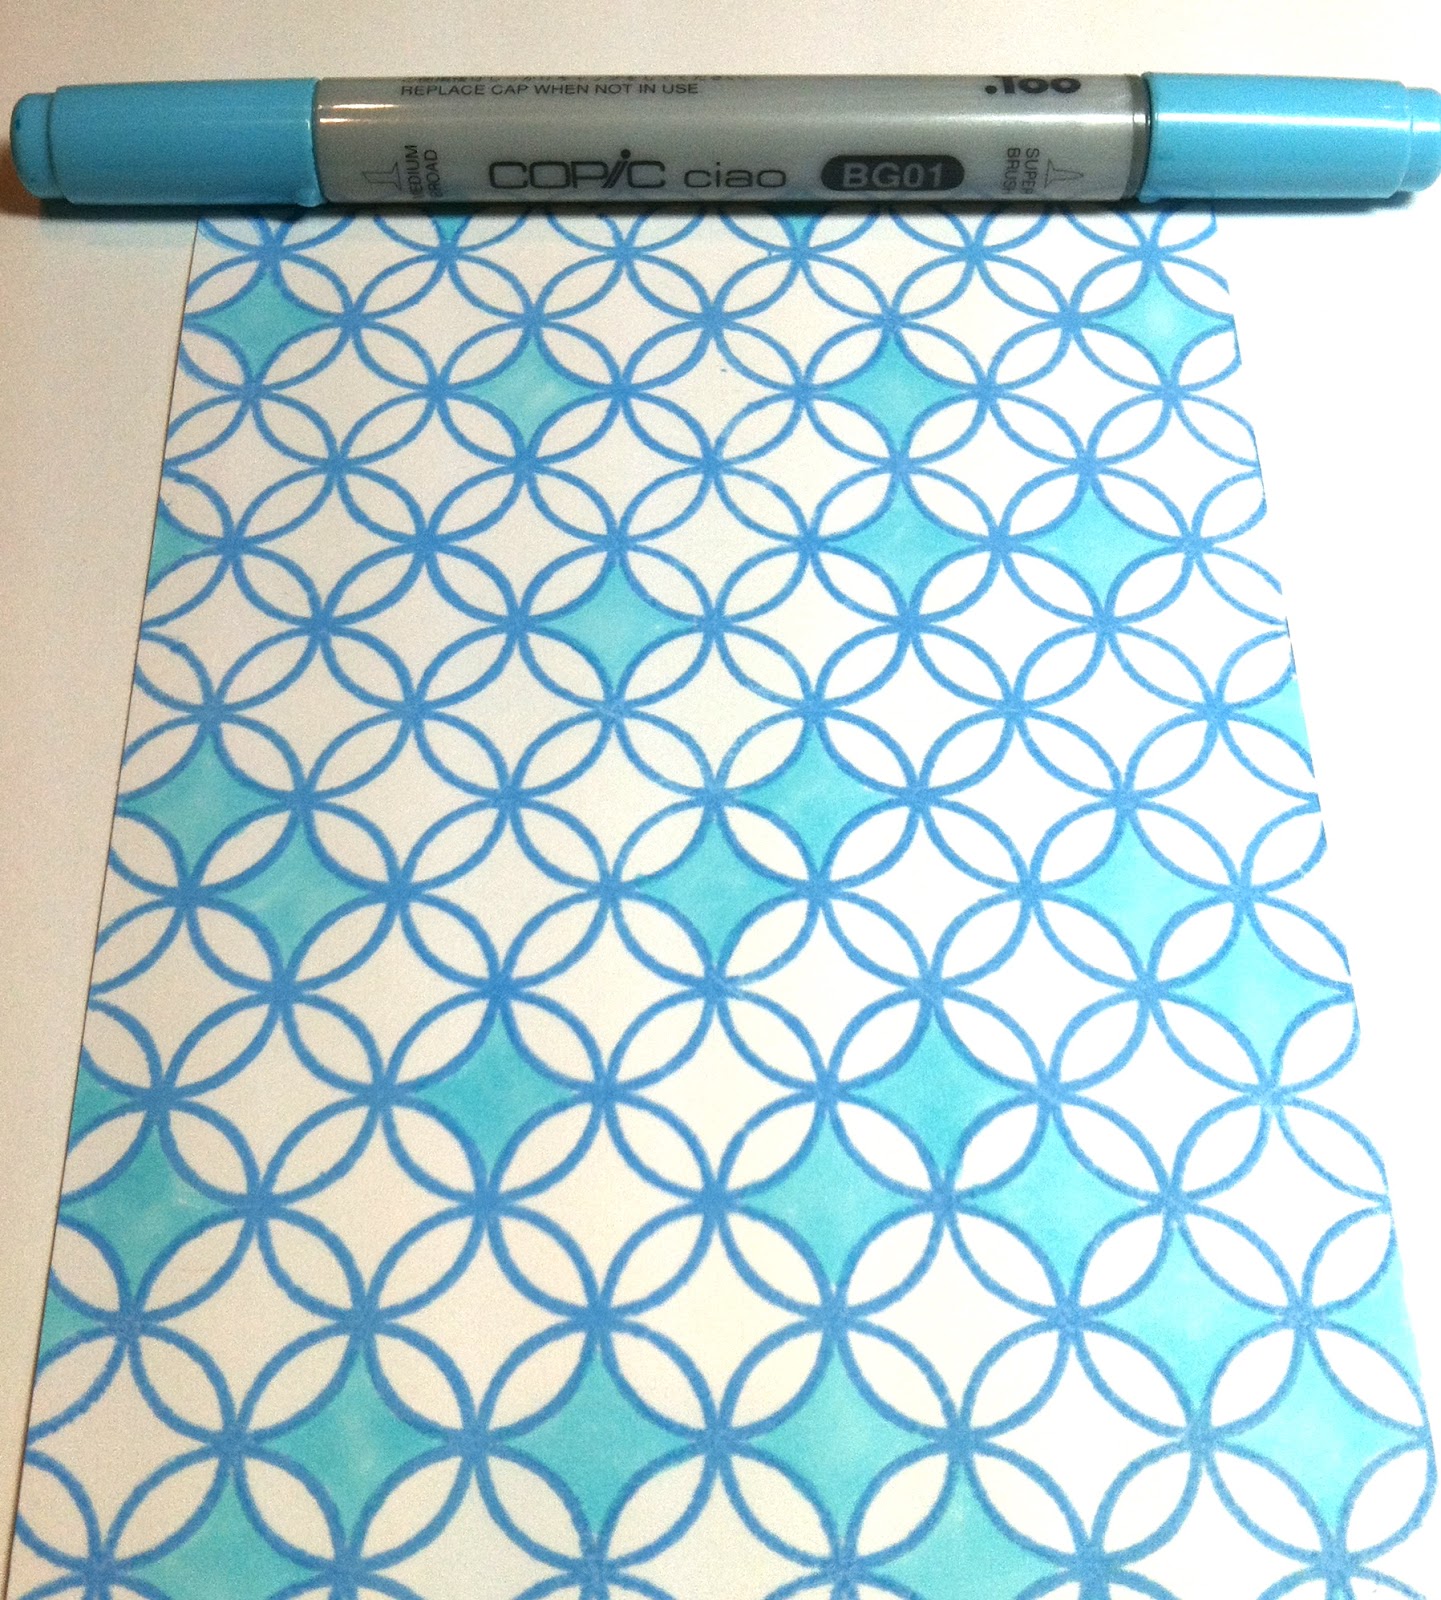 |
| After stamping I colored the insides of the circles in a random pattern with a Copic marker. Any marker will work and you dont’ have to shade…quick and easy. This changes the look of the background stamp from an organized pattern to a random one. Love how the new random pattern is great for different applications. |
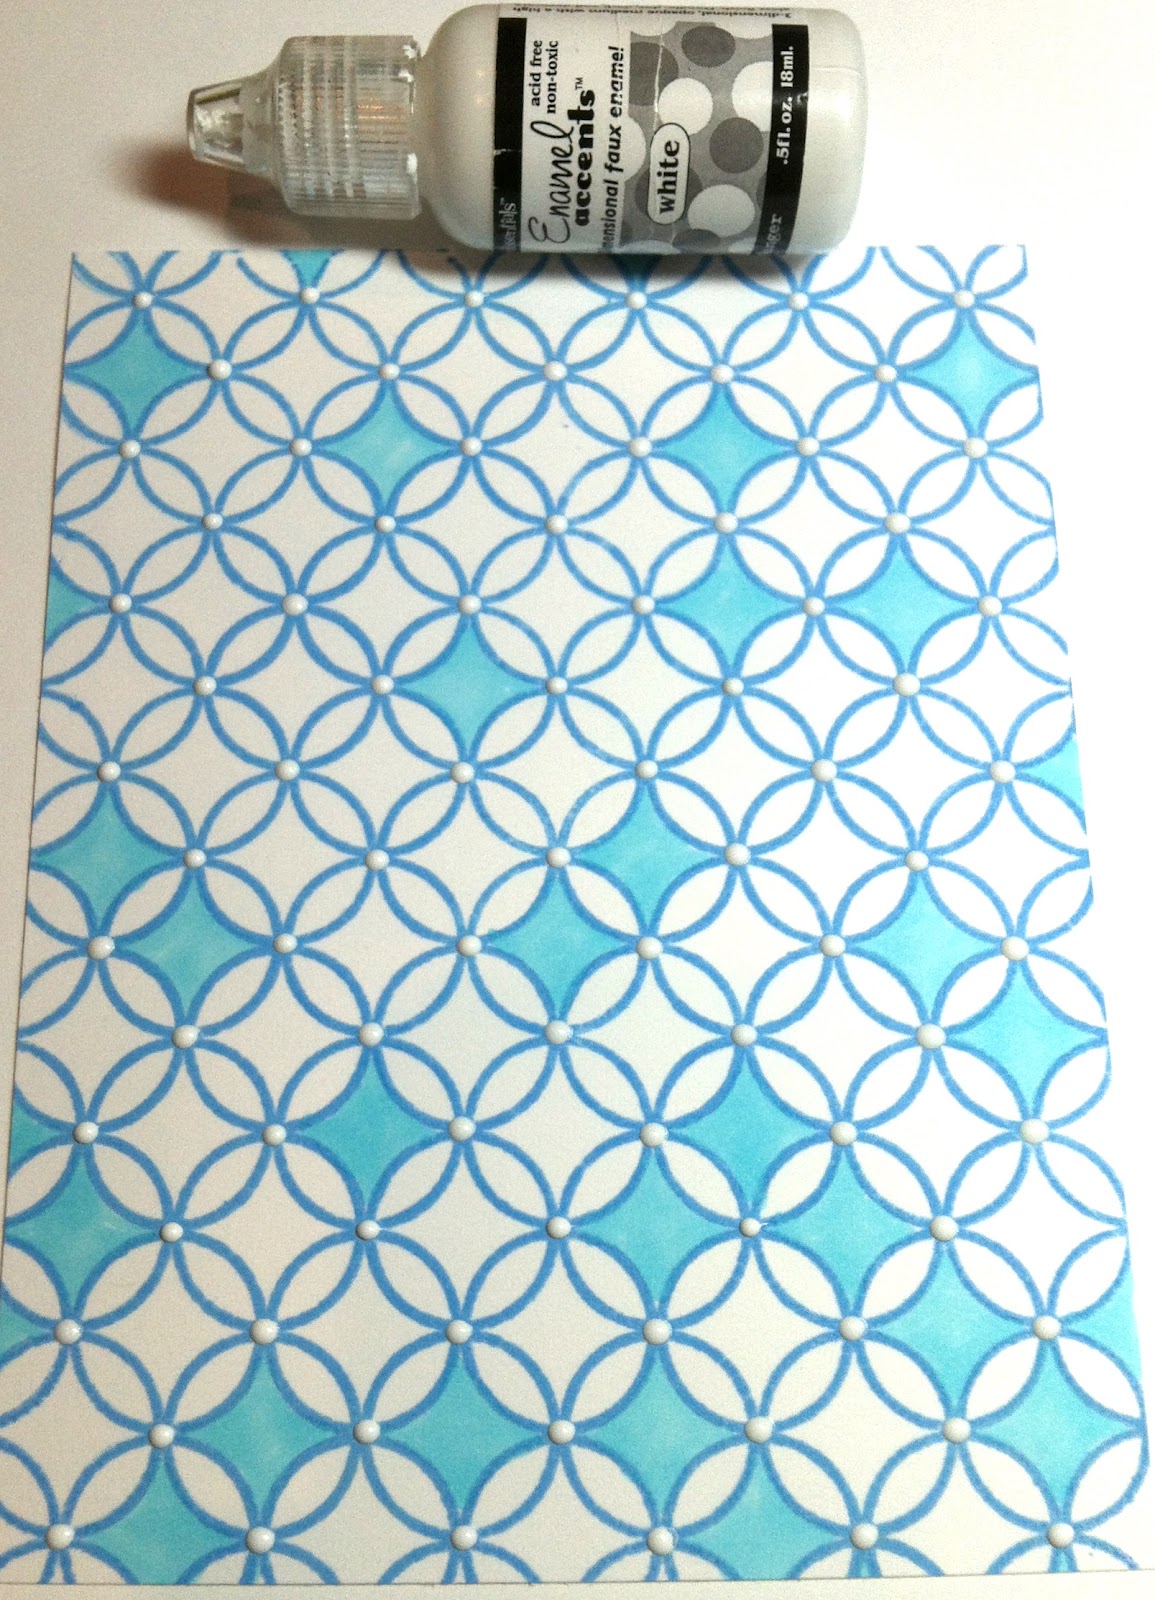 |
| The insides of the circles are begging to have a white dot and you know I love to dot things. For the card I used this gel pen and above I used Enamel Accents (which I like better for this). |
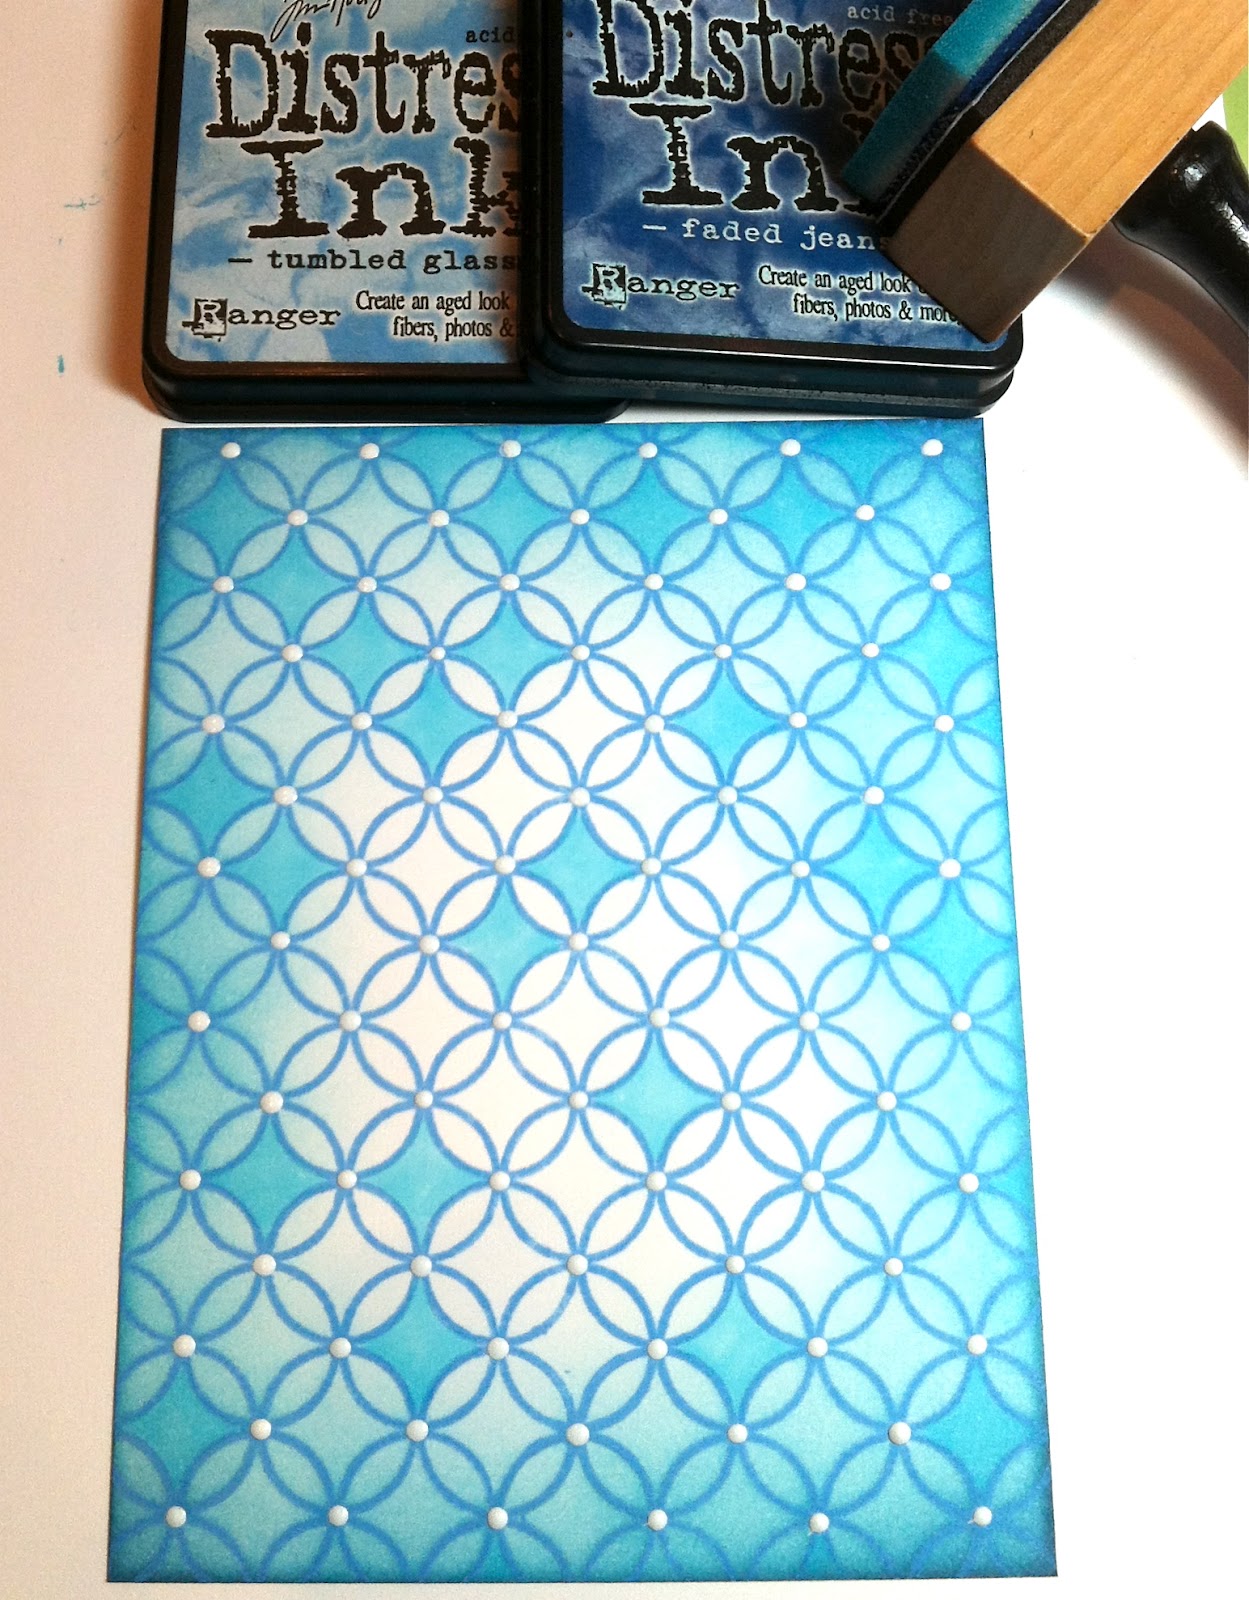 |
| Throw on some distress ink and you are finished. For some reason I find this so therapeutic and I hope you do too. This is an older blog post where I describe how I like to layer distres ink for backgrounds.
If you made it to the end I am impressed 🙂 thank YOU! Last chance to put your name on this list to win Simon Says March card kit. Check it out here. |
Card Supplies:
|
|
|
|
|
|
|
|
|
|
|
|
|
|
|
|
|
|
|
|
|
|
 Day 2. Pop Up Challenge
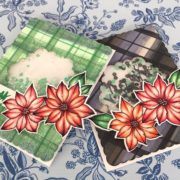 Make Your Own Plaid Paper with Markers -Video & Hop
 background stamping-card kit GIVEAWAY & winner announced


Kathy, what a BEAUTIFUL background you’ve created, from that stamp!! You turned that rather simple stamp image to such a gorgeous one!! Not only the background but luv the sunflower you did it with the petals & the bunny!! So cute & so summer like which i luuuv!! Thanks for the tutorial! 🙂
Love the background with the random colouring – looks just gorgeous. Beautiful cards!
Beautiful card! My compliments!!
I like the colours, hugs Monica
The cards are just gorgeous! I absolutely love them. Thanks for sharing how you did the card.
Two beautiful cards, love your colouring.
Beautiful cards, Kathy! I love how you created that backgroud. Thanks for sharing!
This is so beautiful Kathy! Thx for the fabulous tips and I can’t wait til this stamp is actually out!! Love that bg!
Beautiful! Love the touch of persimmon on the edges of the petals, and the background is fab! Thanks for the tutorial.
amazing. Love the background the shading on the flower, the dimension.. Just fabulous art work!
Another amazing card, Kathy! Your background is so fun and your potted sunflower is gorgeous! 🙂
Beautiful card and I love the background. Thanks for sharing the process.
Beautiful card 🙂 Sandra H
This is absolutely stunning!!!!!
Love your cards and thanks for sharing on how to do the random technique. It really made me take a second look at that background stamp.
Hey K! Your backgrounds are simply amazing! Thanks for the tut! And that sunflower is now on my wish list! Thanks for enabling–my credit card thanks you, too! xoxo
Love your cards! Thanks for the great tutorial too.
Gorgeous, love both these cards Sista!
Lovely card Kathy and great tutorial!
Your creativity is amazing! Gorgeous cards.
This is stunning!!! Not just the flower and all of the dimension, but that background is beautiful!!! Totally in awe!
Lisa
Such beutiful cards Kathy! Your work is always so inspiring 🙂
Love this!!
Cute, cheerful and full of happy!
Kathy, I have thoroughly enjoyed browsing your blog today. Such gorgeous creativity is very inspiring, and I cananot thank you enough for sharing yourself this way. I’m your newest follower! (wow – you have so many, and it is easy to see why). Thanks again, Donna
Both cards are awesome. I love your background. So cleverly done and it really enhances the stamp with the colouring and distressing.
The dimension created by the layering & extra inking of the sunflower is very effective indeed. The orange tones of the petals really ‘pop’ off the blue of the background & I love the way you have added shading by picking to colour more of the patterned area towards the base of the card. Your stitched edge really accents that background pattern too & I love the little creatures & how that rabbit just sits in the pot. Goodness there is so much here to look at.
I have to agree with you about the vellum on the simpler version – it is so much better wrapping it than trying to fix it with something which invariably makes it buckle. I love the sense it created here of the blue extending across the card from the shading around the flower.
Hope you are managing with all the packing.
Paula (PEP)
Stunning – adore the background you created. FAB FAB FAB
Love how you enhance the background!
Kathy what a great card. I love your background it’s amazing xoxoxo
Saw your cards on the Penny Black Blog and just had to comment! I love this new stamp! The background you created and the tutorial are awesome, very inspiring! And those little animals are so cute! Also, like the new woodgrain on the pot, easy to miss, but as always love your added level of detail! And love, love your second card with the blue vellum and blue shading! I love the coloring of the flower! Thanks for sharing.
Katie B.
Circle patters are look so beautiful.Sunflowers designs look so innovative and creative on the cards.Thanx to share with us creative blog.
Fabulous tips, thanks for sharing!
This is stunning!!! Not just the flower and all of the dimension, but that background is beautiful!!! Totally in awe! Lisa