 |
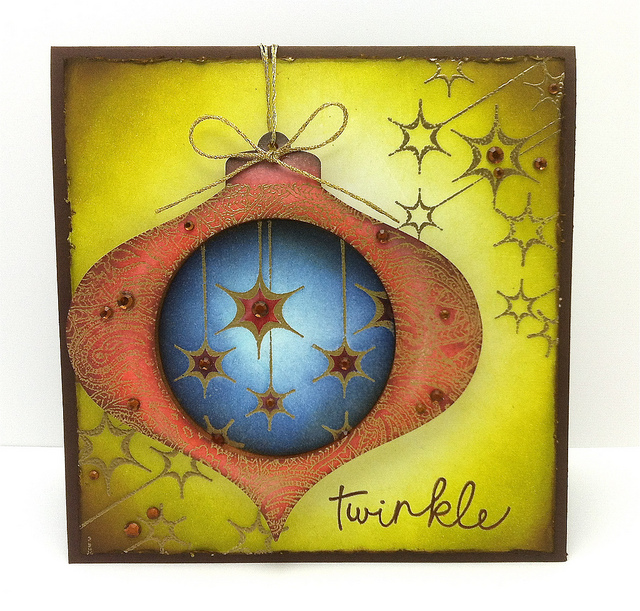
| Hello Friends, How are you today?? Have you started on your Christmas cards yet? I really need to pace myself so I don’t get in panic mode. I have a removable ornament card to share with you that I created for the Penny Black blog today. |
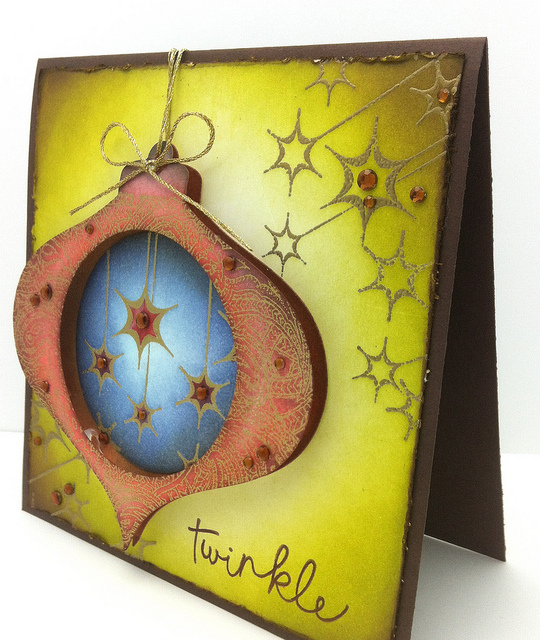 |
| The ornament is attached to the back of the card with tape so it can be easily removed. I rubbed Glossy Accents on my gold embroidery thread so it’s nice and stiff and feels like wire. There is a photo in my tutorial below that shows the glimmer and shine on the ornament. |
 |
| I love the shape of this NEW Spellbinder ornament and I used this festive stamp called “Sparkle” by Penny Black. If you want to see a ornament I created earlier this fall you can click here. |
 |
| Tape down your Spellbinder dies with drafting dots before die cutting & you can reuse them over and over. Mine were purchased at an art store that carries architectural supplies. |
 |
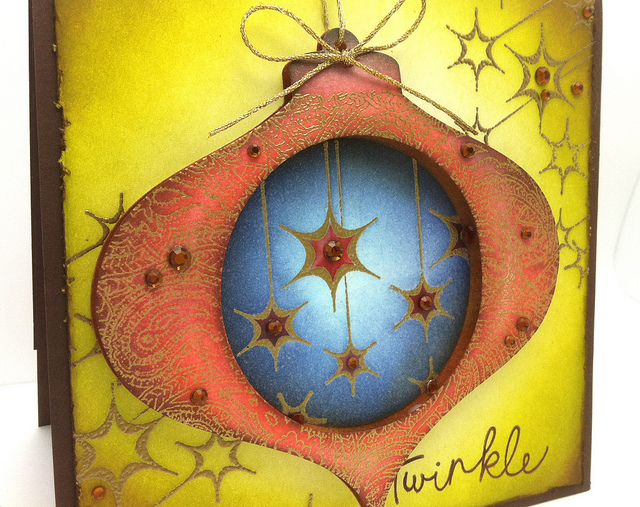
| Stamp your ornament with this paisley background stamp with gold embossing powder. Distress it starting with your lightest color first. |
 |
| Add more color with some daubers. you have more control with fragile areas) Note the light areas?? Try to keep the darker colors on the outer edges so you have a highlight on your image. |
 |
| Stamp, die cut and distress your center circle. Add chipped Sapphire to the outer edges. |
 |
| This shimmer spray will transform your ornament…promise! Add some gathered twigs or any brown to the outer edges. |
 |
| I love how the shimmer spay leaves a nice and crisp, clear sparkle unlike perfect pearls. |
 |
| Paint the insides of the stamped ornaments with distress ink. Mist a little water on your craft mat so the ink will pick up easily and paint with ease. |
 |
| Paint the inside of the ornament and add your gems. |
 |
| Don’t forget to add gems to the outside of the ornament too. |
 |
| Since this is a gift I like to use Scrap Dots on the back because they disappear and give you more lift and dimension then any foam dots. |
 |
| Stamp the ornaments at an angle and distress with Shabby Shutters first. |
 |
| Add Crushed Olive on the edges and stamp the sentiment with Rich Coco ink. (Sounds yummy) |
 |
| Let me know if you have any questions. I can’t thank you all enough for you taking the time to leave comments and stopping by. If there is something you would like for me to share, color or perhaps a tutorial on something specific please let me know. Have a happy day and here is the link to the PB blog just in case you might want it. Many thanks, Kathy |
CARD SUPPLIES:
|
|
|
|
|
|
|
|
|
|
|
|
|
|
|
|
|
|
|
|
|
|
|
|
|
|
|
|
|
|
|
|
|
|
|
|
 Lil Pad Color challenge
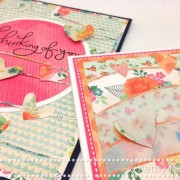 giveaway
 switching it up


Love the elegance of this card Kathy! Does seem like a lot of steps to be done but all worth it! 😀
Really stylish! Thanks for the tutorial too, Jo x
Gorgeous Kathy! Love the effect of the shimmer spay. Thanks for the tutorial 🙂
Just absolutely amazing Kathy. Thank you so much for this tutorial.
Smiles:)
So pretty, and what a fab idea! Thanks for the tutorial. Ger x.
fantastic idea Kathy. Love your ornament
Beautiful Kathy, what a gorgeous creation and thanks once again for sharing it with us!!!
Enjoy the day, Irene
fantastic card!:)
Beautiful card, so elegant,
Ruth x
What a gorgeous card u made!!!!….so pretty…
Cheers,
Prasanthi
http://creativecrafts-arts.blogspot.com/
THis is beautiful = ) Loooove it !
hiya sweetie
this is amazing hunni
thanks for the tutorial sweetie
hugs angelique
Pain in chin after jaw hit the floor… would you please stop creating jaw dropping stuff…. !! hahaha – another stunner. Thanks for sharing the step by step. Hugs, Dee
Wonderful….and once again…such terrific steps and photos. Thanks so much.
You are one amazing artist my friend, how darn creative is this, I love it!!! hugs!!
Absolutely stunning!
Kerry x
Love all the wonderful details you put this ornament card. I also checked out some of the other ornaments you have decorated in the past. Beautiful! Excellent tutorial. Thanks!
Wonderful card Kathy – I love all your attention to detail as ever!!!
Rx
Another amazing post! This is so beautiful! I love when you share tutorials too. Your details are always so creative – gorgeous work, Kathy! 🙂
Beautiful card, I love the sentiment.
Hi, Wow just so beautiful love the distressing and the bauble is just gorgeous and the tutorial was amazing:) Sandra H
What a wonderful gift! Anyone would be thrilled to hang that on their tree, it’s beautiful. I love the sparkle – I will have to try some of that Shimmer Spritz, I really like the effect.
really beautiful…
cheers Khusboo
http://wwwpile-of-craft-khusboo.blogspot.com/
Wowzers! This is gorgeous Kathy!!
Gorgeous card Kathy! Beautiful shimmer… Thanks for the great tutorial!
This is fantastic Kathy! I love that the ornament is removable and the shimmer is amazing. You really know how to rock to Distress Inks.
Beautiful card,thanks for sharing it with us.
Tina
such an elegant card-but it still maintains your usual fun charm!
wow I love it. Thank you for the tutorial. It is so pretty and the embossing and colours are just gorgeous.
Simply Gorgeous Kathy!!
gorgeous ornament!! thanks for the instructions!
oh wow Kathy this is fab!!! It’s lovely that you can acutally use it too, a great idea
Anne x
I love your card. Thanks for the instructions.
Wauw and thanks!!!
Sparkle was one of the first PB stamps I owned . I love the way you have used Sparkle for the background & added your amber gems with the russet colouring of the ornament itself. The gold embossing with the browns & olivey greens are quite stunning & I really love the way that deep blue brings the whole design to life. The reinforced gold twine palced where you have really picks up on the gold star hanging below inside the blue bauble too – a lovely piece of positioning to trick the eye.
Paula (PEP)
wow. havent really experimented with distress inks, but want to now!
It looks great! Very good Idea!
Gorgeous ornament Kathy! That shimmer spray really makes it sparkle! So brilliant – love the fact you can remove the ornment and hang it on the tree!
Everytime I visit with you Kathy, I am awed by your talent! I don’t know where you get your wonderful inspiration (I’d love to know!)but I am grateful that you are so generous and willing to share.
I love the G-Accents on the thread idea (fab!), love that paisley stamp (still – now I ‘need’ it) and love how your colouring is always spot on. In fact, you make colours pop the way my Mom makes pastry flake 🙂
WOWSERS!! is this not breath taking or what??!! I’m sure if I made this it would never leave my hands….you’re such a tease to share such detailed cards, as I want to dig right in & get wasted away in paper, inks, PB stamps music & more…! Thank you ever so much for sharing your creativity..
SUE (xx
this is cool I never thought to cut out the middle of the ornament. I need to step up my game! lol
Soooooo Pretty!!! Such a perfect creation Kathy…!!
Wonderful artwork!
greetings Sabine
Wow this is awesome Kathy, love the embossing and the distressing, looks so rich… I just got me my first distress inks and can’t wait to try them out xxx
luv how you made this gorgeous ornament!! esp. around the circle; gold embossing & red ink! Stunning! 🙂
have been stampin for quite some time and so pleased to have learned some NEW things from your post! love it…am now a follower!
now off to find some of your supplies – this is so gorgeous (-:
Kathy, this card is stunning – amazing. Thanks for the tutorial for these fab techniques!! ~ Blessings
http://gracescraps.blogspot.com/
ELEGANT ornament card!
Absolutely gorgeous!