Hello Friends, How was your weekend?? I was lucky enough to get crafty with some amazing ladies … it was bliss in every way!! Before I left I stamped some of these Spellbinders flowers but, wanted to create some new ones . You will see the other stamped flowers below 🙂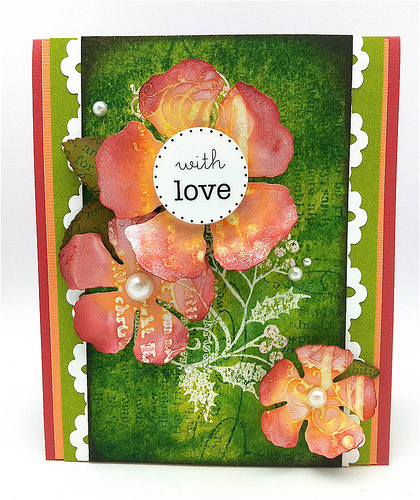
This week we are featuring Penny Black’s collage stamps this week on the Penny Black blog.
I have to mention the orange papers they are “Tim Holtz Core’dinations DISTRESS ColorCore“The best part is they MATCH the distress inks…genius!! Once you have inked it’s a slam dunk to match your papers when you are layering up your card!! I highly recommend this pad of paper if you love to get inky.
After die cutting some flowers & leaves from water color paper gather your distress inks and perfect pearls.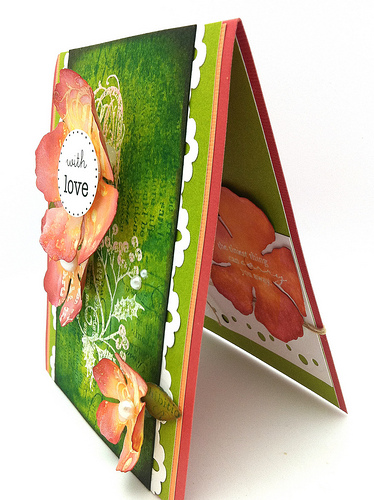
Use any extra flowers on the inside …this particular one has a sentiment embossed on it. You might notice I used the new Spellbinder Edgeabilities again. I find myself reaching for them all the time. The trim below is a different one. The sentiments on the front of the card and tag are from SRM stickers.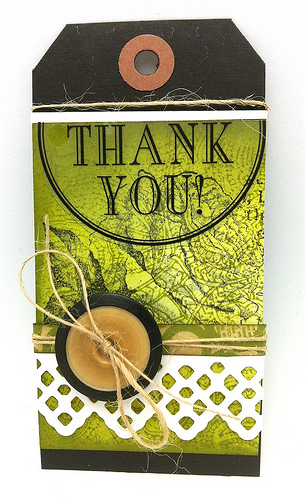
Before we get back to flowers I created this tag with left over materials. The effect of the flower in black only was appealing and oh so simple. (antique button)
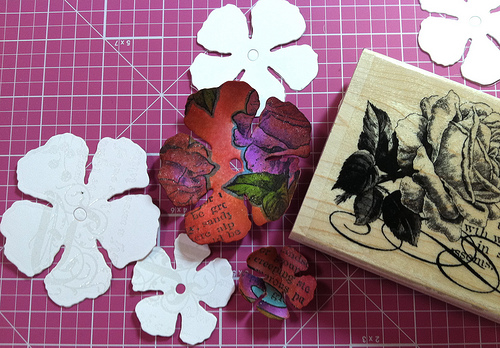
The colored flowers are the ones that I used as my inspiration. I stamped them with Memento and colored them with Copic markers. To the left the white flowers are distressed with clear embossing powder just begging for some color. The embossed ones are what you see on the card.
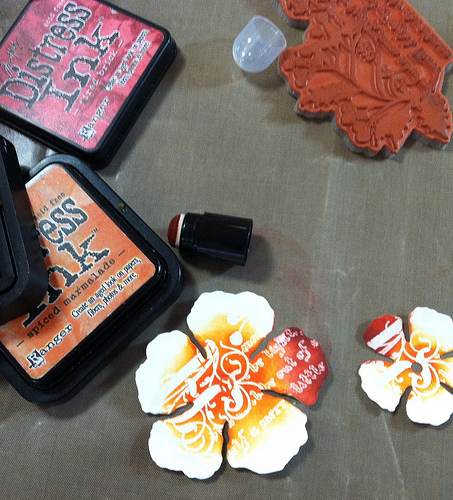
Emboss your stamped flowers in clear powder on water color paper. Start adding your color to the center with the Spiced Marmalade. I have more control with daubers on smaller images or shapes like this because I can highlight between the petals. A dauber for each color is a great goal and comes in handy. This is what works great to organize me.
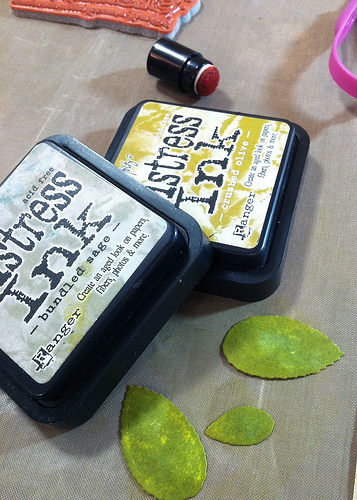
After distressing spray your flowers & petals with Perfect Pearls and set aside to dry. Once the petals are dry stamp them with this Penny Black stamp called Rosa. The background on your card base will be embossed & inked just like the flowers. Line up your flowers onto the background. Don’t look close my second flower is slightly off. Let me know if you have any questions and be sure to check out the other projects this week on the PB blog 🙂 Thanks for your visit I am happy you find the time to stop in. Hugs, Kathy
Sorry I almost forgot!! Please congratulate Cathy P!! She won the $30.00 gift certificate to Simon Says Stamp Superstore. This was the post that InLinkz and Simon Says offered up the prize.
SUPPLIES:
|
|
|
|
|
|
|
|
|
|
|
|
|
|
|
|
|
|
|
|
|
|
|
|
|
|
|
|
|
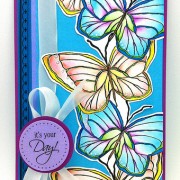 Summer Butterflies
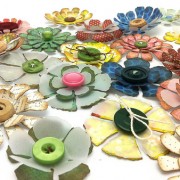 DAY THREE with vellum …flowers accents
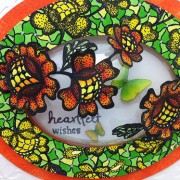 Lil Pad Color challenge


your card and tag are lovely Kathy. Those Spellbinder flowers are lovely. I must try this with the Rose creations I have.
GORGEOUS!!! WOW!!! =)
Love how you did those flowers! Simply gorgeous! And the background is delectable!! 🙂
Great idea for the flowers and such a gorgeous card, Kathy!
I’m saying it again – WOW! So beautifully inked! Love this gorgeous card, Kathy! Glad you had a fun weekend! 🙂
I just love your card and tag Kathy! Stamping and distressing watercolor paper are some of my favorite techniques and you did this one just beautifully! Thanks so much for sharing and the step-by-step directions!
This is really a big WOW, Kathy!
I love the flowers…Just Gorgeous!
thanks for sharing with us 🙂
hugs
kathy, you rock!
Wow just fabulous:) Sandra H
another beautiful project! All your cards are a work of art!!! Keep inspiring us!
how pretty!
Absolutely gorgeous Kathy!
The emboss resist of the flowers is striking & very pretty with the matching cardstock. I love the way you stamped the flower on the inside & then added the twine there rather than on the front. Those Edgeabilities look quite superb.
Your tag is a real beauty – the black & green beautifully accented with the white – what a super idea to use the white in that manner.
Paula (PEP)
Gorgeous flowers Kathy!
STUNNING card, sista! The tutorial is FAB!! Love ya! ( From your #1 fan )
Wow these are so gorgeous Kathy! Love the embossed resist techniqe and your flowers are stunning! 🙂
Love your card and that tag is pretty sweet too! The colors are terrific.
LOVE this….so glad you had a great time!! Your inking is just perfect….<3<3<3…..
You are really talented!!! Beautiful work!
What a lovely card and a gorgeous tag.
Marie-Anne
OMG! This flowers are awesome!!! 0.0
have to try it!
this is absolutely stunning. i looove the deep , rich colours.
GORGEOUS! Thanks for the tutorial on making the flowers!
So pretty, Kathy. Even prettier in real life. It was so nice to meet you last week! Hugs.
Wow, this is SO GORGEOUS!!!!
This is really a big WOW, Kathy! I love the flowers…Just Gorgeous! thanks for sharing with us 🙂 hugs
LOVE this….so glad you had a great time!! Your inking is just perfect….<3<3<3…..