 |
Hello Friends, I hope it’s a happy day for you. Today is an exciting day for me because I was invited to participate in Two Peas Stamping from A to Z!! Welcome to day three letter “C” I bet you can figure out what “C” stands for?? Yes…Copics!! |
 |
| I have a tutorial on coloring with Copic’s to share with you and a bonus card so shall we get started? Also, I might add that Two Pea’s is giving away some Penny Black stamps!! |
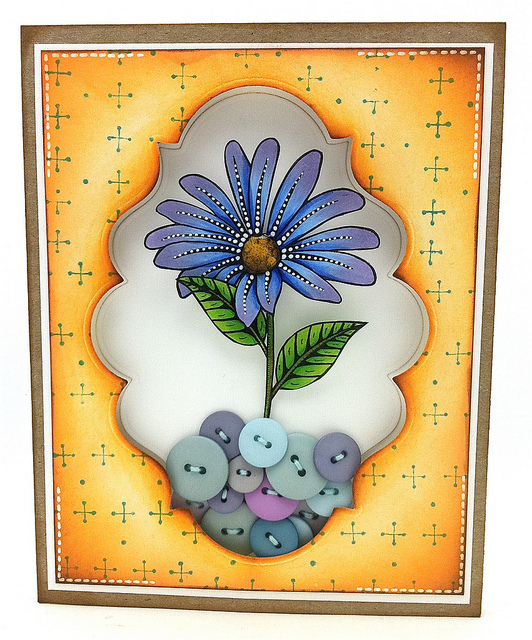
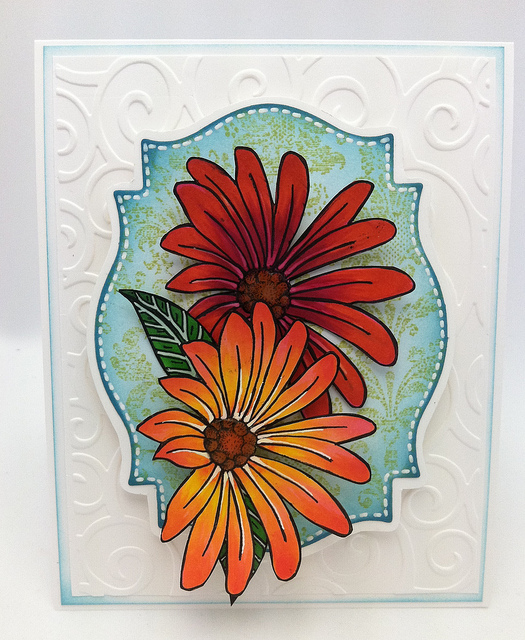
The frame was created with a Spellbinder die “Labels 20″& on the card below the die below is “Labels 18”. Can you tell I love creating frames from these dies?
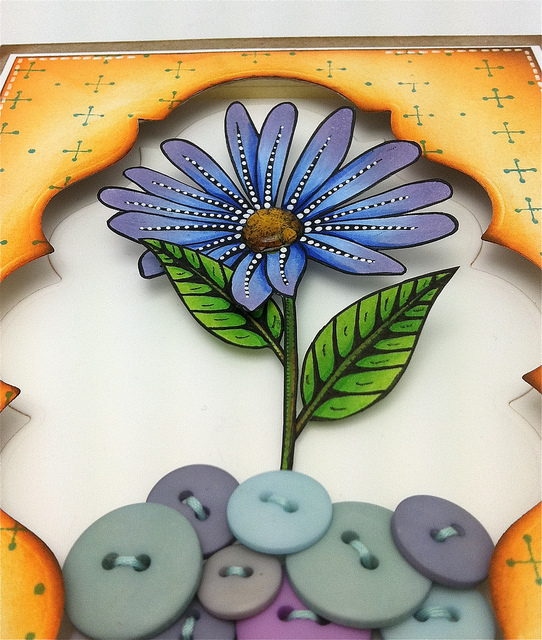
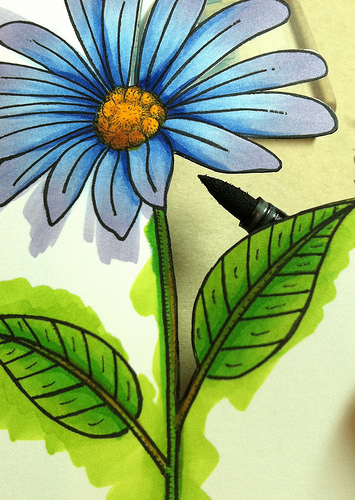
The beautiful flower stamp is from Penny Black and it’s called “Cheerful” All of the flowers in today’s post were colored with Copics . On both cards I cut off the leaves from their stems and repositioned them to create balance within my frames.
 |
| Before you get started plan your colors in advance you will save time. Copic has a “swatch book” that you can record all of your colors in and it’s super handy so you don’t buy duplicate markers when shopping. Always have a scrap piece of paper to test your colors or in my case if I over fill the marker…well that’s not good to have ink drip on your image.There are two kinds of papers that I like to use when coloring with Copic markers. The Copic X-Press paper or a super smooth paper called Nennah Classic Crest. The Copic paper has a ever so slightly different look to the paper when it’s saturated with color but, it really is easier to blend your colors.Always stamp your image with a fade resistant dye ink such as Memento Tuxedo Black. |
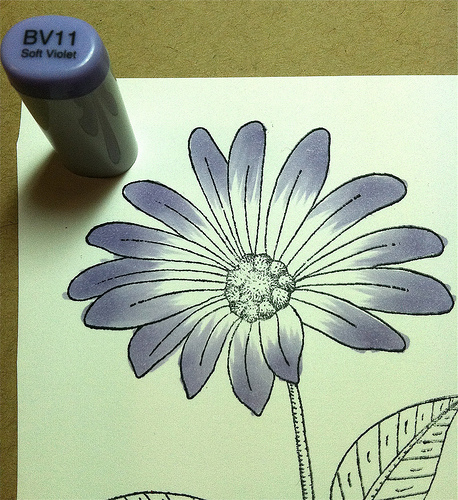 |
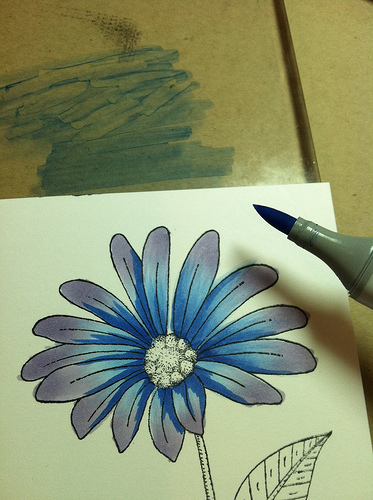
| I always like to start with my lightest color when starting with an image. The pressure of how you place the tip of the marker on the paper …. I like to call it sweeping. ( When you sweep with a broom you push down your broom and as you being to sweep you lift the broom up.) This is the motion that works best with your marker. The effect you get when you sweep your marker is referred to by Copic as “Feathering” but, the motion is what give you the feathering look and makes it easier for your colors to blend together. |
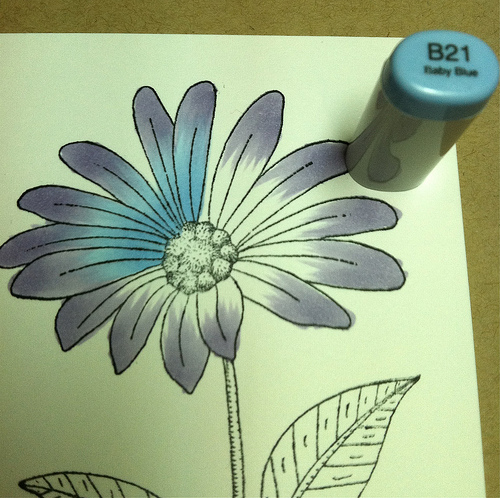 |
| I like to mix colors in different fields. When adding your second color start slightly before the center line and sweep or feather your color pulling it down into the violet “feathers” . |
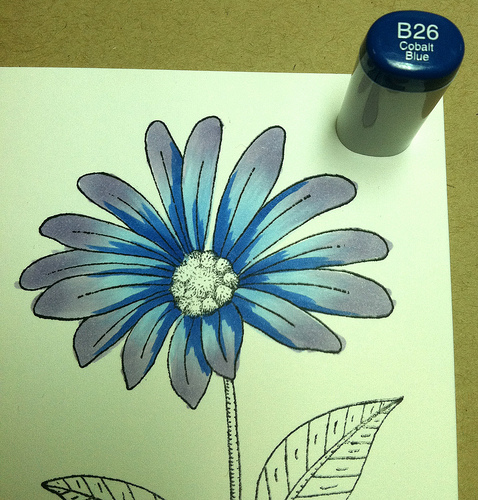 |
| Once you have added your second color I am ready to add my dark highlight color as I have today. (sometimes I add it last) Add the shading where ever you like and don’t worry to much about it being “correct”. Coloring is supposed to be relaxing and shouldn’t be stressful or cause you angst. |
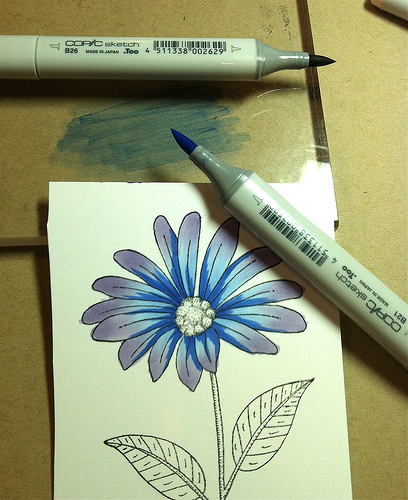 |
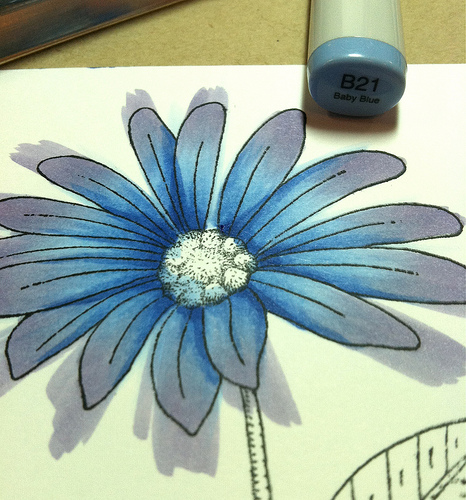
| Have you heard of “palette blending” To palette blending you can use a palette , acrylic block , plastic lid or anything slippery. Scribble your darker color (B26) down on your “palette” and use your lighter color (B21) to pick up the color off the palette…. like a paint brush would do. You will continue to re-load your marker to place the color where you want it. This technique makes it easy to blend because you are putting down less of a color. Does this make sense?? The marker tip becomes the brush on the palette and it’s as if you are painting…but, with a marker. |
 |
| On the right side of this flower you can see where I used the palette technique to blend my colors. The highlights aren’t so harsh. Using this technique gives you more range of your colors. For the flowers petals I only used three colors. |
 |
| This is when you can call it a day or add a little more baby blue or violet. Often I start my feathering outside my images. Try to see what works best for you… experimenting is what will yield you better results. If you want to see a tutorial on coloring hedgehogs click here. |
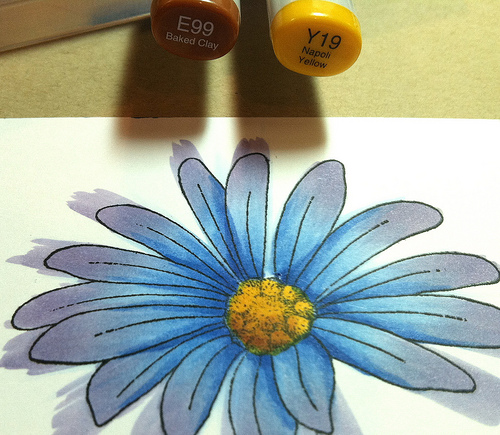 |
| The center can be a button, ultra fine flower soft, a sentiment or flocking. For this flower I colored it with E99 & Y19. For the dimension I added Glossy Accents three times. Here is a flower with ultra fine flower soft. |
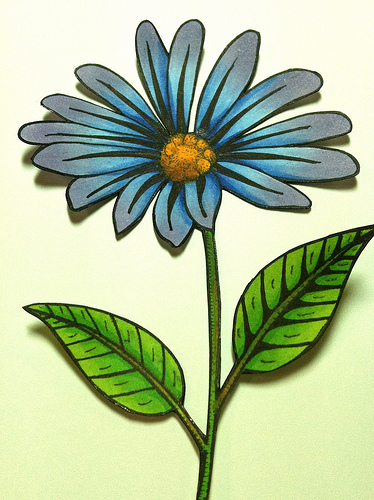 |
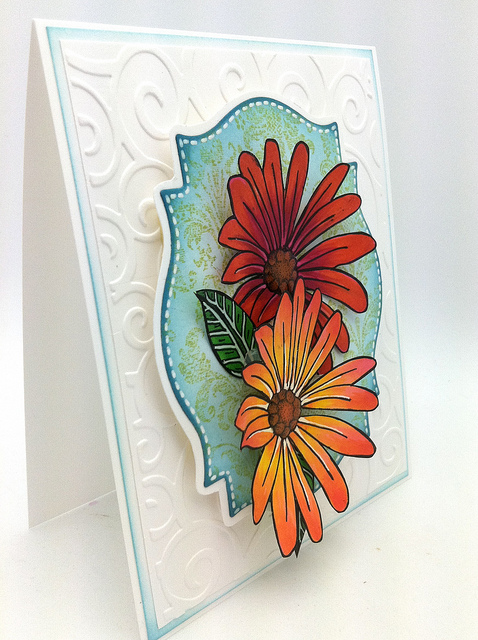
| I’m sorry the color on these photos are a little off but, I decided to go with them because you can see the shading. You might notice this flower looks different if you look close. I used a ultra fine tip Sharpie marker to outline the image and add some darker lines to the insides of the petals. The right leaf show what I did to it compared to the leaf on the left. |
 |
| Do you outline your images with a marker after you cut them out?? I always use black but, you run a risk of smudges. Any color will do to cover up the white edge and finish off your image nicely. What I do now to avoid any smudge or finger print…… is cut around the image a quarter the way, outline, and cut another quarter and repeat…this way I smudge less. HERE is the link again to Two Peas…aren’t you curious what day four will bring at Two Peas?? Don’t forget Two Peas has some Penny Black stamps for you to win so click here for the details. Thanks for making it all the way to the bottom of this post! I hope you found the information useful and if there is something you would like for me to share with you please let me know. Have a great day and a big thanks for your visit today! Hugs, Kathy P.S. If you are new to my blog you might want to check out some amazing blog candy here. P.S.S. Here is a photo of the distressing of the frame I created with the die cut. |
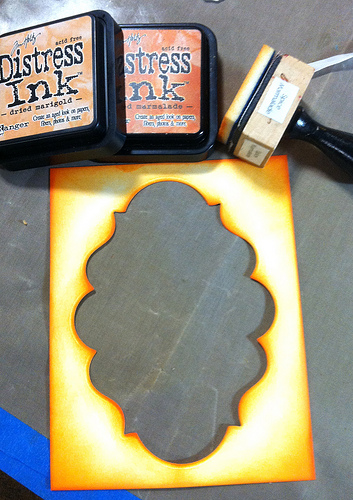 |
| A little distressing and stamping is an easy way to make a framed card. |
SUPPLY LIST:
|
|
|
|
|
|
|
|
|
|
|
|
|
|
|
|
|
|
|
|
|
|
|
|
|
|
|
|
|
|
 Day 22. Gallie update
 tim holtz stamps
 Another Greeting Farm Contest


beautiful! thanks for this tutorial.
Cheers,
Luanne
Thanks for another fantastic tutorial, Kathy! These cards are so gorgeous! Love them both! I sure hope you know just how talented you are – I’m in awe. . .
Thanks for a great tutorial Kathy! I love the colours you achieved on your cards! So beautiful!
Wow–thanks for the tutorial!
Wonderful!!!!
Hi thank you for a great tutorial xx
What an awesome tutorial, thank you so much. I love the card, you´ve made here with these gorgeous colors, and you´ve just blended them so perfect. Looks absolutely awesome.
AMAZING – as always your colouring and designs are fab. Congrats. Great job.
What a great tip about palette blending! I can’t wait to try it. Thanks for sharing. I always learn something fun at your blog. 🙂
This is gorgeous and the tutorial was great too!:) Sandra H
Beautiful 😉
Thanks for your tips. Finished cards are beautiful!
Wonderful tutorial from the master Copic lady! Lovely cards!
thanks Kathy. I’m always looking for tips on using Copics. I’m slowly adding to me pens. but they are rather expensive here. Ciao’s are $7.50 and Originals nearly $10 ~ so just one or two at a time. You continue to inspire me.
Thanks for the step by step tut! It’s great to see how you do it so that I can give it a try.
Thanks for such a great tutorial. That flower image was perfect to teach shading.
Thanks for the fab tutorial. You’re amazing!
Gorgeous cards Kathy! Love your colouring tips and techniques, thanks so much for sharing!
I LOVE those frames – they are awesome!!!
Fab Tutorial too – thanks a lot 🙂
Carol x
Gorgeous! Miss you!
Thank you for such a detailed post – very helpful indeed. I love how you have used both the positive & negatives of the die-cuts. This is one of my favourite Penny Black images & I’ve just managed to order it together with some other PB flower stamps.
Each of these cards is so distinctive because of your additional details. A joy to behold.
Paula (PEP)
Forgot to say how interesting I found your button embellishment – it really adds such super dimension.
Paula (PEP)
Soooooo Pretty!!! Love your Tute! I just love your use of Penny Black Flowers…Might have to get a few to play with!! xoxoxo!
HUGE HUGE HUGE CONGRATS on the feature over Two Peas!! You are a ROCK star when you comes to coloring and all things stamping!!
stunning. Love the layering too!
Thanks for the tutorial. I love my Copics and am always happy to learn how to use them better. I love the Sharpie tip, too.
Thank you for the wonderful tutorial.
Kathy I am loving your copic tutorials. Thanks so much for sharing them xoxoxo
PS your cards are amazing xoxoxo