Hello Friends, Its day two of my frames and boarders at the Penny Black blog this week . I have to tell you how grateful I am for the support you show me by taking the time to leave a comment at the Penny Black blog…thank you!!
Let’s get started with my first card for today. I used the “Sundial” flower stamp to create my frame. I combined Copic & Tombow markers and I didn’t spend to much time adding highlights on the flower since I wanted the image to stand out.
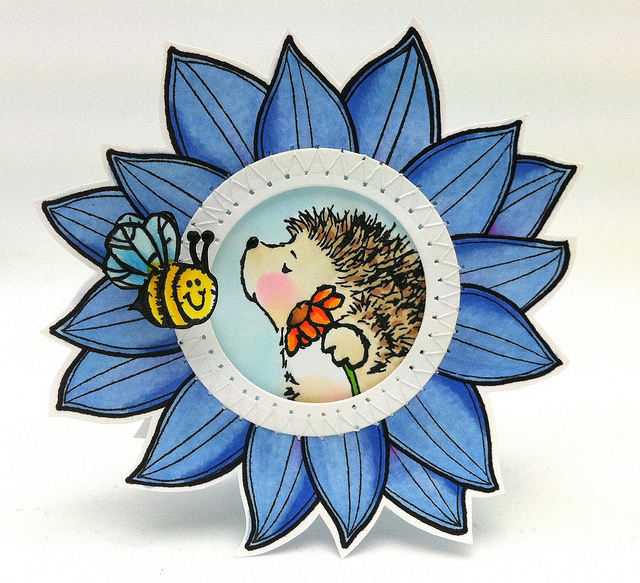
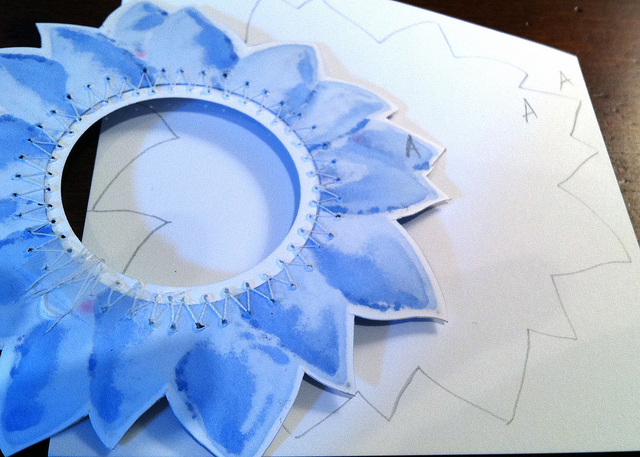
I cut an extra pair of wings & added Glossy Accents on the bee. I flipped the flower over & traced it with pencil for the back of my card. Notice in order to save time I labeled the two of the petals so it’s super fast to line up the image with the white backing.
For my second card I wanted to make a fun and whimsical frame so I took the corner of this stamp (see below) and repeatedly stamped it onto a circle.


See the stamp in the left hand corner…with the branch. I used the corner of the branch to stamp on the circle. The boarder part of the frame on the stamp is what gave the circle a geometric look. After stamping I colored with Copic markers and added lots of white dots with a gel pen & Enamel Accents.
(Here are two baby card I recently created with this transparent set. Love these hedgehogs. Baby card one and card number two.)
One of my favorite Spellbinders dies is the “Lacey Circles”
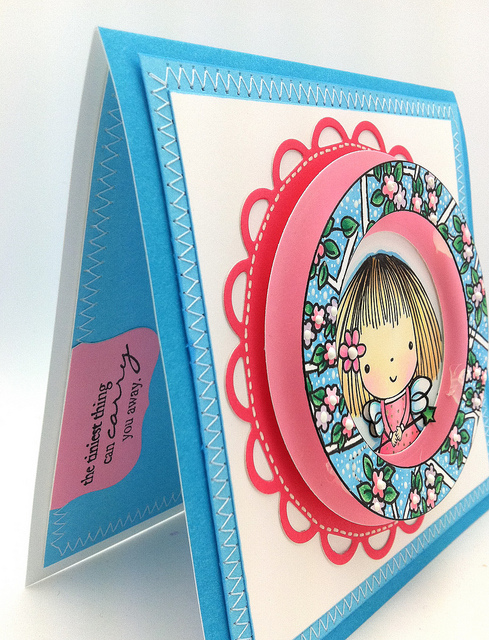
I added lots of layers to create a dramatic and dimensional frame. You might notice I used Enamel Accents on each flower on the frame. On special cards I use Scrap Dots instead of foam dots. I love how it’s clear and barely noticeable.
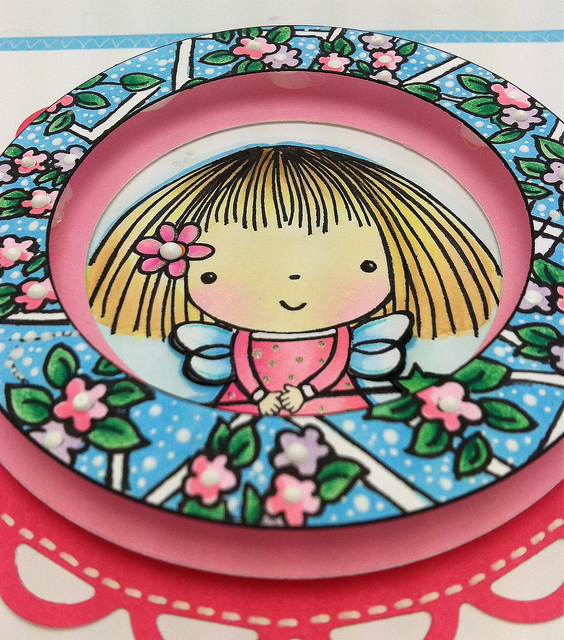
My two favorite Copic colors for the face are E50 and RV10. Let me know if you have any questions and I will be back with two masculine cards tomorrow. A few of you asked where I purchased the wood floor stamp in this card. Here is a link for you. Have a great day and thanks again. Hugs, Kathy
SUPPLIES:
|
|
|
|
|
|
|
|
|
|
|
|
|
|
|
|
|
|
|
|
|
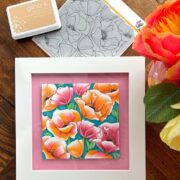 Day 10. Poppies
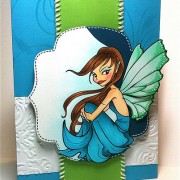 Just a quick post
 Day 29. Giveaway & Crafters For A Cause


you are just amazing, girl! you alway awe me with your attention to details and these are no exception! i also adore all the dimensions you gave. gotta get myself some Scrap Dots!! fantabulous work as always, sista! you ROCK!! big hugs! =)
very clever to make your flower a frame Kathy. It is totally awesome and I adore your second card. Such innovation. Those scrap dots look wonderful. Never heard of them before but like the idea.
A-MAZING cards, Kath! Your cards are always sooo specially crafted! I’m always blown away……xx
Another set of stunning cards! Oh how creative are you and the colors are always so bright and happy! And I looooove your layouts and shapes you are using, so unique!
Kathy these are so amazing…why don’t I think of things like labelling the petals, fabulous tip you have no idea how much time I have wasted in the past trying to line things up!
These are wonderful projects Kathy especially love the hedgy in the flower. Hugs Heidi x
These are so sweet! I especially love the hedgie in the flower!
Oh my goodness, sista, these blow me away! How do you come up with these ideas? LOVE the flower frame, must see how I can adapt that one! Beautifully done, Kathy!
These are beautiful! I love how you used the corner of the stamp, so clever!
Gorgeous cards, Kathy! Love the blue and over all design of the first one and the 2nd one is just adorable!
Wowie!!! Your creativity amazes me every single time – every time!
Your work is always so gorgeous! I love your tutorials and step by step instructions not to mention the photos.
Everytime i see the cards on PB blog which i subscribe with e-mails, i can tell that’s your turn if i see YOUR cards, without looking at the name, Kathy!:-) Luuuuuv both cards!! Luv those zigzag stiches around the frame! Niiiice! 🙂
How fun! These cards are super cute and very clever! TFS!
Wow oh WOW I am SPEECHLESS. These cards are AMAZING – every detail is FABULOUS. I can’t stop looking at them – absolutely adorable in EVERY way! 🙂
gorgeous cards, love it, beautiful colours.
Tooo cute Kathy!
Perfection, totally gorgeous creations,
Liz x
Wow – these two cards are amazing! Even my husband who is frankly quite bored of me showing things other people have made was impressed!! x
Both these have so much creativity packed into them I don’t know where to begin with commenting – you’ll have an essay from me – so I’ll try to be brief: the first is my favourite – the idea of the stitchinga round the centre & the little bee just make this special for me. The way you’ve used blue for the main shape of the card & it’s complementary colour orange for the daisy shape Hedgie is holding just works & clicks in my brain. Your technique using the edge of the stamp from the transparent set just proves how birlliantly versatile the PB stamps are – have been concentrating on my colouring course so getting PB withdrawal symptoms at present.
Paula (PEP)
Simply stunning….enough said:)
Love love these….gosh…..just absolutely adorable! Xoxoxo….
Hi Kathy,
You once again went beyond expectations and I adore your cards! The hedgehpb is so cute and the Mimi card is beyond words. I kept looking at the baby hedgehog set, but since I dont have a need for baby cards, I didnt think I needed it. After seeing your frame for Mimi, it has moved way up on my wish list! Fantastic pattern you created with just the corner of a stamp. Amazing!!
*Hugs*
~Andrea
Goodness those cards are beautiful and so detailed! You seem to think of everything and don’t miss a thing. I am, as always, humbled and amazed at your Copic coloring ability.
Absolutely beautiful!!
Oh my gosh… I LOVEEEEEE your coloring!!!!!
Totally Beautiful………brilliant idea for a frame and your colouring is magnificent. You are a clever girl!
Mary Mac (mwah)