Hello Friends, How are you doing?? Happy Father’s Day to the men in your life 🙂
I just discovered that Gallery Idol is well underway so I thought I would submit a card. I hope that you all can tell the story of the card?
The theme for the contest is a Congratulatory card. You can read all the rules and regulations here.
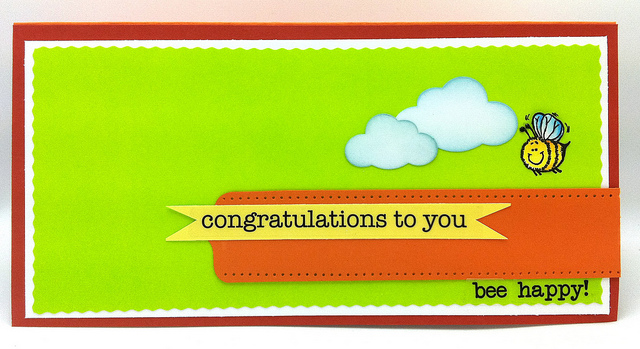
For the inside I use the “Sew Easy” mat for easy and fast pierced holes. Again my SRM Sticker sheets had the perfect sentiments for this card. Thank YOU Susan!! Want to shop for SRM Stickers just click here.
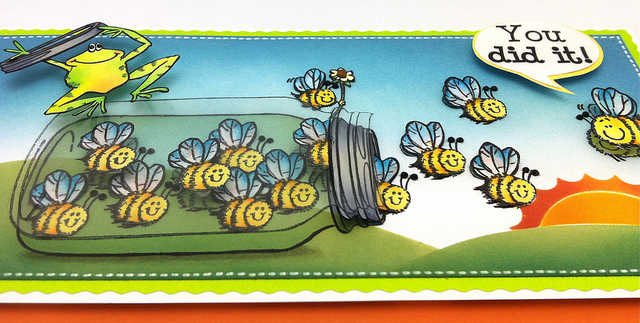
I am going to show you lots of angles of this card and below you will find a tutorial for the background too.
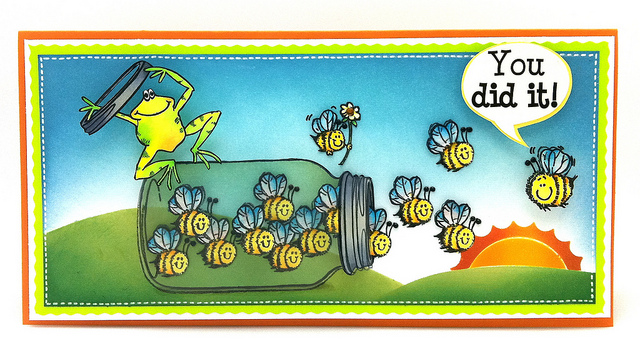
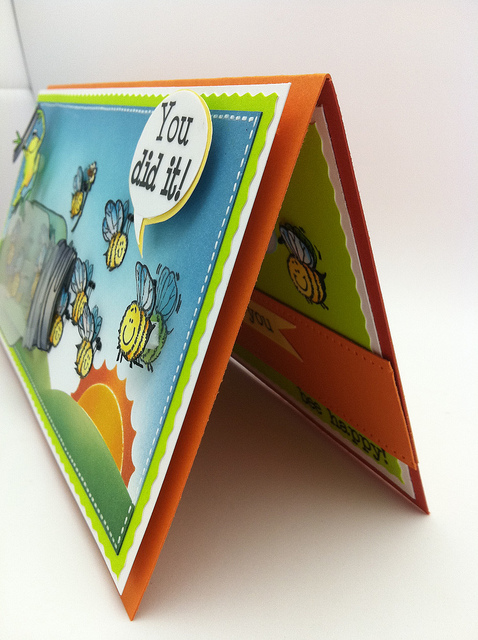
These happy bees are so BEElighted that they are beeing let our of the mason jar. By the way I bought this stamp years ago at A.C. Moore and there isn’t any information on the wood mount stamp.
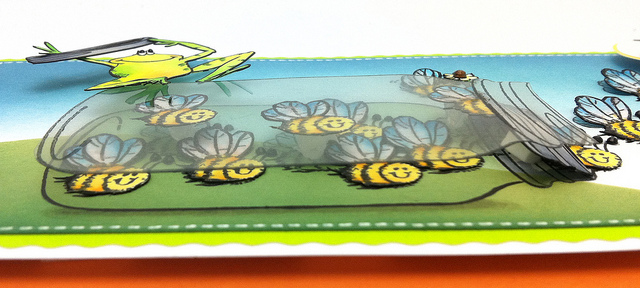
I was thrilled that I figured out how to get this 3D effect on the bees flying out of the jar. Details below.
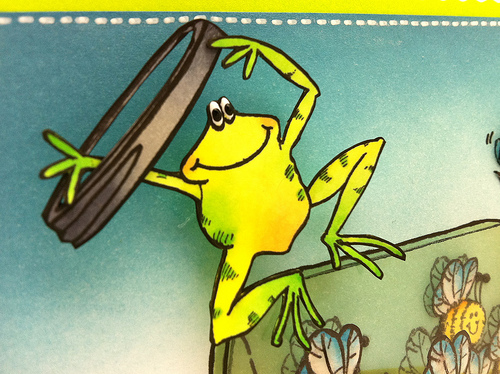
Just got this frog stamp… love him. Did you get that he took the lid off of the jar to let the bees out?? Notice the eyes ..One layer of Enamel Accents first white, then when dry add black on top of the white. This layered enamel really makes the eyes pop and gives them lots of dimension.
I am hoping that the photos below are pretty self explanatory? I will give brief instructions on creating this background but, if you go here first this will guide you for the grass and sky. Please let me know if you have questions.

I used Spellbinders “Inverted Circle” (LOVE this die) to create the sun. Die cut the inverted circle & from that cut out the middle so you will have two pieces. Tape the outside down of the inverted circle protecting your background. This way you will be distressing the inside of the sun.

Distress with Mustard Seed. I have a template of the exact shape of my hill protecting the hill. Shade with some Spiced Marmalade on the inside edges going over the yellow.

Once you take off the inverted circle you can see what you have just accomplished.

Now place down your circle covering up what you just distressed as you see below.

Begin with Spiced Marmalade, add Rusty Hinge in the corners to draw your eye into the sun.

This is what you will have left. You can complete the die cuts and save them for another project. For the bees I used some masking paper listed in the supplies below.

Here is a photo of all the distress inks I used for the background.

I stamped with StazOn onto a transparency that you can purchase at an office supply store if you don’t have any acetate.

Color all your bees with markers. I used Copics and Tombow then outlined most of the bees with a Copic Multiliner Pen from Copic. I use the 0.5 & the 0.3 Multiliner all the time.

These are the colors I used on the frog. I like to color over my image because I find it easier to blend this way.

I adhered three of the happy bees onto my jar with Glossy Accents. Then I added Scrap Dots to the back of the bees so I would get lots of 3D layering in the jar. The bee on the right shows how I added Rock Candy distress stickles to all of the wings on the bees.
Let me know if I missed something please. Thank YOU for stopping I am always grateful.Hugs, Kathy
SUPPLIES:
|
|
|
|
|
|
|
|
|
|
|
|
|
|
|
|
|
|
|
|
|
|
|
|
|
|
|
|
|
|
|
|
|
|
|
|
 A Little Bird Told Me……
 Rolling along
 stamptember


so cute and lots of details. i hope you win! 🙂
This is too cute, love all the little details. Thanks for sharing!
Wow. I think you deserve gallery idol.
What a super fun and totally impressive card it’s absolutely brilliant and you make it look so easy too thanks for sharing both your card and how you did it.
Totally awesomely jaw dropping amazing Kathy….and thanks for sharing how you did it…. You are SO CLEVER with all your fabulous ideas.
One of my dreams is to sit and watch you make a card like this some day. Do you realize how talented and creative you are? This is so fabulous! I just love the dimension of the bees, that fabulous sun and your adorable frog! The attention to detail on your cards is amazing, Kathy, and we are all so lucky to be able to see that. Thank you for sharing! Hugs to you!
i always love your cards… but this one is just really really lovely.. thanks for sharing!
greetings
Anita
http://alle-mooie-dingen.blogspot.com/
Love it!!
Your talent is out of this world, girl!! WOW, the work which went into this project! Totally amazing! Thanks for the beautiful tutorial pictures.
Good luck with the Gallery Idol!
Wonderful colourful card – I love all your attention to detail with the layering and colouring 😉
Rx
This is absolutely magnificant!!
WOW!! what else can one say?!! The
coloring alone is perfection! Thanks for sharing.
Sooooo cute!!! Love all the bees there!! It’s perfect, Kathy! You truly are the queen to me of coloring with Copics!! love, love, love it!!
Hugs, Wendy
This is awesome! Love all the info you give! Supe cute card! Good Luck on the contest!
You are amazing Kathy! So creative! The card is stunning and I can’t imagine all the work involved in this project! This card deserves to be framed and display it proudly! WOW GIRL!!! I AM SPEECHLESS! HAVE FUN THIS WEEK!!!!
Your card is amazing and so much work. WOW.
Oh my… a masterpiece!!!!!!!
Love all the details and that you take the time to share your techniques! Fabulous!!!!
OMG!!! Too darn cute Kathy! A lot of work but oh so precious!
Such detail – keeping my fingers crossed for you, my friend!
Oh Kathy, that card is adorable! You are truly amazing. Good luck with Gallery Idol!
Wow Kathy! this card is absolutely delightful! Or I should say beelightful..teehee. Wonderful tutorial too! Hugs
Oh gee what a neat idea, absolutely love it, Luv Sam x
This is totally an idol card! Wonderful tutorial and good luck!
Cute! cute! hope you win!
another completely jaw-dropping creation!
WOW! Good luck – for all the work you did on this card my fingers are crossed you win! Amazing cutting and end result is just too fun!!
Wooowww!!amazing card!!all the details r stunning.I ♥ ur coloring so much. Hope u win!
What a lovely card.
Marie-Anne
OUTSTANDING! I love this card- So much thought and creative ideas. Loved your tutorial, toO! HUGS!
Fabulous and so fun, love all the details you put into this card, Kathy!
Wow, Kathy this is awesome! Brilliant coloring. Good luck with Gallery Idol. It was fun & stressful at the same time, but so worth it. 🙂
Wow this is the most amazing card Kathy, you really go to so much deatil your cards are a true masterpiece. Thanks so much for the detailed explanation!!
WOW – I love this card! You are so creative! I have this stamp (a gift from a friend) and have never used it. I will now. Thanks so much for the inspiration!
Hugs, Becky Jo
This is amazing! I was wondering when you would do an idol card, this has got to get through auditions!
So much detail in this – & I love the story with the frog releaseing the bees. The Sun tutorial is great – thanks for that & I’m still astonished at the effects that can be achieved by masking. Hope you’ve had a good Sunday.
Paula (PEP)
Amazing! Love this cute card
Oh my goodness! This is sooo fabulous! What a card! Love the 3-d effect!
Amazing! Amazing! Amazing! Kathy!
A-M-A-Z-I-N-G!!!! Most definitely, a sure win for the Gallery Idol competition! I am so in awe of this card!!!!!!!!! TFS
Kathy, I am out of words. I can only say good luck with the Gallery Idol and I hope and wish you win.
Holy crap! I’m still working on shading with Copics and applying a few pop dots here and there! Amazing project! You deserve to win!
what a fun card!! Luv it! Thanks for the tutorials!
Wow oh WOW Kathy – this card is just AMAZING, clever, adorable and worthy of Idol status! 🙂 You are one talented designer – LOVE THIS CARD!!!
Fabulous, Kathy..absolutely fabulous!!
This card gives me the same jaw dropping experience now has it did when I first saw it in the Gallary for the Gallory Ideal Contest. Wow! This is drop dead gorgeous. The layering is extraordinary and the tutorial is just amazing. Love all that you do! Hugs.
AAAAAAAAMMMMMMMAAAAAZZZZIIIINNNNGGGG!!!! xoxoxo!
Best of luck on the Gallery Idol! Your card deserves to be there! It is fabulous!
One question, what did you use to attach the acetate jar to the card?
DeniseB
Jaw-dropping fabulous!
Wow Kathy…this is amazing!!!
Wow – such a lot of work has gone into the card – and it shows, it’s bee-utiful! (sorry!)
Jaw-dropping!! You are one amazing artist! Another MASTERPIECE, bc!!
I wanted to go back and find this post. This is really fantastic! My kids adore the card you made. It is amazing what you have come up with. Bravo!