Hello, Hello Friends…. me again :)… and with two more cards but, this time masculine cards. I am continuing the theme “frames and boarders” today on the Penny Black Blog. I hope you have time to play along. Today I will be using the negative & positive parts of the die cuts just like I did on Tuesday with these two cards.
I wanted to create a special 21st B.D card for my nephew who loves to play cards.

That’s why I incorporated the playing cards for a different spin on the numbered Birthday card. Using backgrounds is a great starting point when you need to create a masculine card and lots of distress inks. After I inked up my background with this stamp I cut them into panels, mounted them on white cardstock and played around with how I would position them for color and balance on my card.

Layers is the best way to that something extra on cards for the men in our lives. I mounted all of my panels to some thick watercolor paper that I inked up big time. I had so much fun inking and stamping on Tim Holtz’s die called “Movers and Shakers” perfect for the hedgehog on the cycle. (don’t miss my second card if you scroll down) I couldn’t resist adding money as a prop for the smoke coming from the exhaust pipe. I told myself it was ok to tear a one dollar bill because I didn’t pay anything for the card.

The sentiment is from SRM stickers and I mounted it onto a “Wonky Rectangle” from Spellbinders. I decided to add some white dots to the bursts on the background. It was quick and easy and pulled all of the elements together.
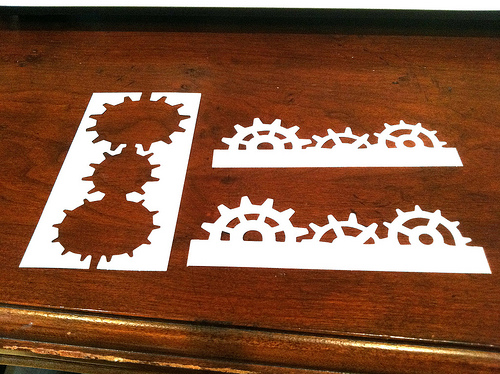
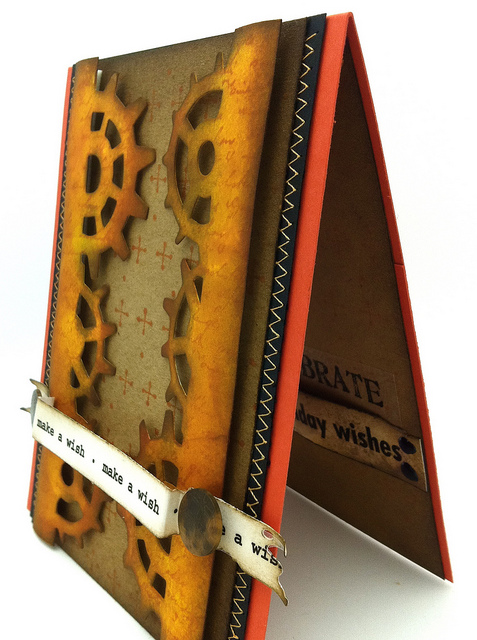
For the first card I used two of these die cuts as you see below. I inked one of them and the other one I placed behind the one I inked up. The bits of white really highlighted the inked die cut. I was left with two negatives that were to cool to toss.
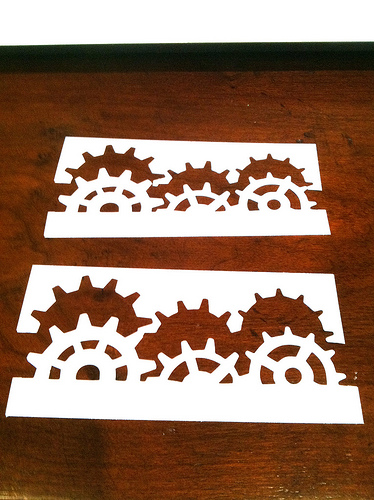
I turned the negatives towards each other and another card was born.
As you can see all you need is a few die cuts, background stamps and some distress ink. Create some layers and you are finished.
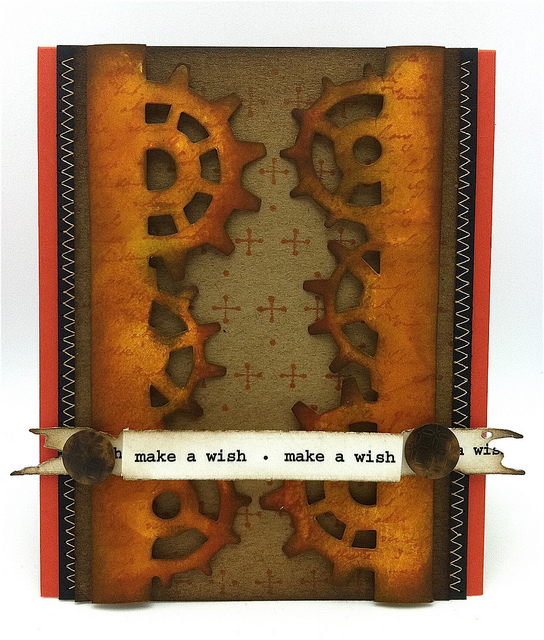
I am in love with these “Tattered Banners”. After distressing the banners I added my SRM sticker, scored the two ends and fastened them with some antique buttons.
All of my sentiments I used for this card are from SRM stickers. I say it over and over but, it’s true. These stickers save me so much time that I was able to finish off the inside of this Birthday card for my husband.
The yellow strip of paper on the left was distressed and stamped multiple times with Penny Black’s “Zen” background stamp.

I “attached” the banner with some Enamel Accents in black. Usually I do a better job but, I was finished and wasn’t going to change that little element. Sometimes I have to learn when to quit.
Thanks for taking the time to stop by and if you left a comment at the Penny Black blog I have a bigger THANK YOU!! I will be back tomorrow with a color challenge from Lily Pad.
Happy Stamping! Hugs, Kathy
SUPPLIES: Just click on the photos for more details etc.
|
|
|
|
|
|
|
|
|
|
|
|
|
|
|
|
|
|
|
|
|
|
|
|
|
|
|
|
 Mama Elephant Stampede #celebrating6years
 Day 5. Quick Shading w/Distress Ink
 Yup another Butterfly


Jaw dropped – looking with mouth open your stunning cards. Thanks for another great tutorial with lots of tips and great photos!
HOW COOL is he sitting on his motorbike and all the gorgeous details, you are amazing!!
Hug, Iree
WOW – these are so stunning….
Hehe, your cards are so cool! Love the hedgie on the bike!
Edith
This is so pretty! i loved the dash of colors 🙂 thanks for sharing!
Awesome!! Your cards should be displayed in a museum for the exceptionally creative!!
These are awesome, I struggle making “manly” cards, and love all the elements you have used on yours!
What a bunch of interesting elements! Love the money coming out of the exhaust pipe!!
Wow, these are gorgeous! Love all the sponging and your use of those fab dies! That hedgehog card is really just too cute!
I agree with what Judkajudi said, Kathy! 🙂 Numbers for the cards & money from the pipe!! Perfect cards with lots of details! 🙂
Unbelievable creativity! You blow me away every time I visit! WOW!!
Those cards are just amazing. Love them both.
wow! genius! I have the same die, but didn’t think of using it that way. wow! Thanks for great inspiration always!
These are awesome!
For me the top card is my most fave of your creations for at least the last 6 months. I simply adore it, flaberghasted is a good word for it. Everything hangs together on it perfectly. Love it. Hugs from heidi x
Just in case you have not heard it enough, damn what an awesome card.
Jackie
That Hedgie card – AMAZING!!! The other birthday card for Hubby – AWESOME!!! You are the QUEEN of popped up layers and clever scenes! 🙂 Really truly FABULOUS.
Your Hedgie on the motorcycle card is so darn cute, love it! I like your other cards too, great ideas. Thanks for sharing your awesome creativity with us here 🙂
I cannot choose between these – both brillaintly inventive again & I love that exhaust from the motorbike plus the numbering with the playing cards – this is just so personal a card. The way you offset those die-cuts is masterful & I’d never have thought of that. The banner on the second with all the dimension is great too & there is that about knowing when to call it a day.
You often make me think.
Paula (PEP)
Kathy, don’t know how you do it, each and every card I see from you just wows me even more!
Wowzers Kathy, amazing creations!!!
All of the cards are AWESOME! The hedge hog card just blew me away. So creative. TFS your amazing masculine cards.
Truly amazing, so love that dollar bill tucked in there!
I just can’t get enough of your talent this week! Simply incredible! And that exhaust from the motorcycle- only YOU would come up with something so special! HUGS!
So nice cards! Thanks for sharing 🙂
wow – well done 🙂 very cute
hugs
Betty Bake x
great masculine cards. Love the hedgehog with the money coming out. very clever. lvoe the dimension!
Kathy I am going to check to see if there is money coming out of my tailpipe on my car!! Loved all your inspiration this week on the Penny Black blog. You are so talented!!
Loved all of your cards this week, kathy!Stunning!!
Plastic Playing Cards
AMAZING as always!
Holy moley, Kathy! These are works of art.
Okay now that I haved wiped up the drool hanging off my mouth and placed my mouth back in its closed position I can say that this is extraordinary! Wow Wow Wow! I am so in love with the idea that you can take something that is ordinary like a diecut and turn it into a masterpiece, something EXTRAORDINARY! Wow you have been blessed with so much talent. So happy to say “I know that lady!” You blow me away each time with your cleverness, thinking outside of the box and your colour makes me swoon! WOW! Hugs.
Jaw dropped – looking with mouth open your stunning cards. Thanks for another great tutorial with lots of tips and great photos!