Hello Friends, It’s been a busy week of posting and I can’t think of a better way to begin the weekend with “Kathy’s Lily Pad Palette”! Once a month I am fortunate enough to host the color challenge at Lily Pad. You might remember that we were calling it the “Color Throw Down” but, discovered there is already a “Color Throw Down”. So from now it will be called
There is a prize up for grabs and the DT has created some beautiful cards. All the details are at the Lily pad.
Before you begin with a color challenge it’s good to round up your colors. Pull our your markers, pencil’s and some papers. In this case I wanted to pull the colors into my card with my scrap paper stash. As you can see the colors are not exact and I added one. It’s a loose challenge to spark your creativity.

These six colors are what I am working with for my background. I will show you how easy and quick it can be to make a fun background full of monochromatic colors after I share the card details.

The “Lily Pad Color Palette” Challenge this month is sponsored by Karber Digital Images.
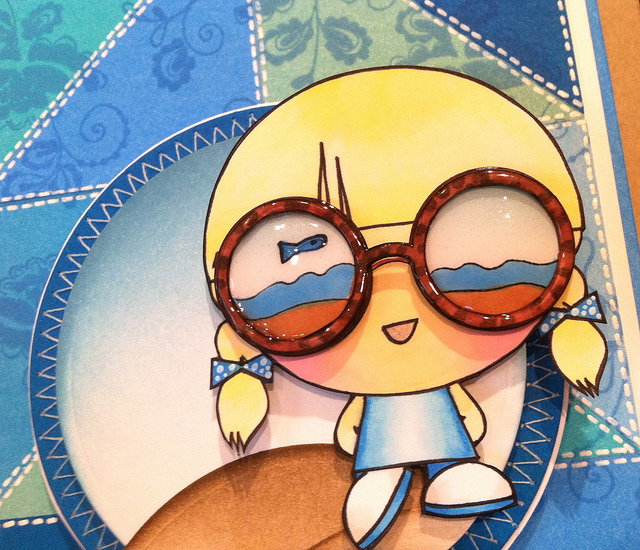
I hope she doesn’t mind that I altered the glasses. I wanted the sunglasses to reflect the beach. Click here to see the image “Thinkier Leslie”. You might want to check out this other card where I altered the sun glasses too. It’s one of my all time favorite cards.
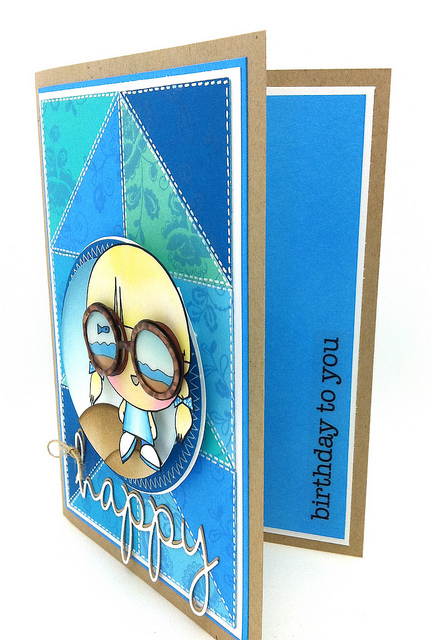
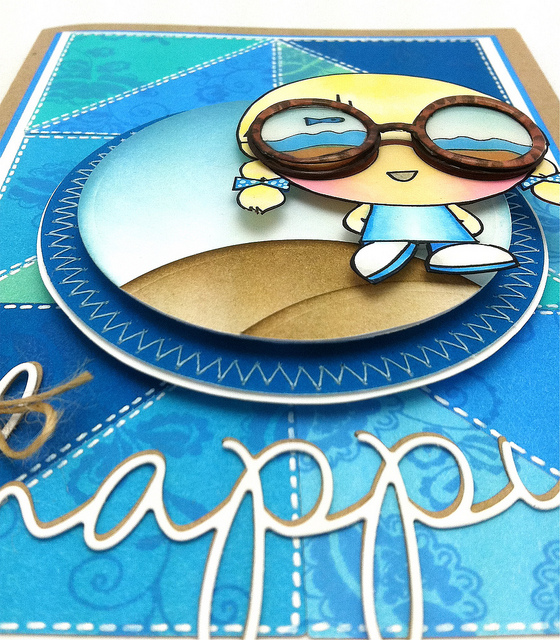
The inside sentiment is from SRM stickers. The “happy” is from PapertreyInk that my sister purchased for me. I cut all of my circles with Spellbinders and used the sand dunes from the same circle dies. All of the paper is Penny Black’s Mix and Match papers. See the supply list at the bottom of the post for links etc.
Lots of Glossy Accents on the glasses. Sorry for the bad photo it’s the only way the GA shows up.
Ready to create?? Grab your punched squares. ( I used a Spellbinder die to cut mine)
Line up two corners on your paper cutter. Slice each square into a triangle.

Now mix them up and recreate new squares. I added tape to the backs of each square. Easy!

Create a rectangle with the squares…. play around until you are happy with the colors. I made sure to have the darkest color at each end for balance. ( the bits of brown and yellow are my cropped work surface in case you were wondering )

You all know me by now so that means I have to add some white right? In lieu of dots I added faux stitching. I purposely did some single stitching and some double stitching on my lines.

I used some blue chalk ink and this “Lace Edged” stamp from Penny Black to add a touch more color to my background.

This is the finished background with the sentiment. Please send me an email if you have any questions.
Thanks as always for clicking on my blog. Have a happy weekend. Hugs, Kathy
SUPPLIES:
|
|
|
|
|
|
|
|
|
|
|
|
|
|
|
|
|
|
 wishing you
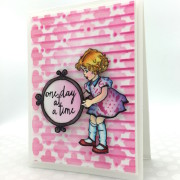 Day 21. Video-Layered Stencils
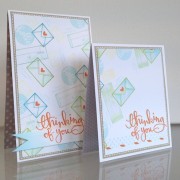 giveaway plus two cards with a stamped background


Love how you cut up the little squares to make your background! I really admire the amazing effort you put into this little simple cute girl image to come up with awesome results such as this card! Thx for sharing how you made it too!
Uhooi,,
Waw,, This card is very nice, beautiful and creative,,
Uhooi.blogspot.com
what a fab card ! lovely done ! great result !
sunny greetings, martina
x
Way cool!
Kathyk
You rock Kathy, this is just adorable!!!
fantastic card Kathy. Great tutorial on how it’s made.
You are so clever…this is such a wonderful effect and I so love what you did with the image.
Love this card! The altered glasses are a great idea and the background is perfect! Will do this in one of my cards! Great way to use scraps with perfect results! Thanks for another great tutorial.
Great card. Thanks for sharing how you made it!
I LOVE this, Kathy, are you sure you didn’t used to be a quilter? :))
Such a fun background, just beautifully done!
Wow, wow, wow! Kathy, this is so cool! Such an amazing card! Love it! These colors are so fun too!
Wowzers Kathy – this gets my creativity flowing! 🙂 I love the background paper idea – FABULOUS. The glasses with the reflection of the beach – SO CLEVER. This adorable card makes ME happy! CUTE cute CUTE.
So cool card! Love Leslie glasses 🙂
WOW! I love your card….the glasses are wonderful! I instantly thought of a reflection in the glasses. Kudos! Hugs
That is just frighteningly good! Fabby!
Rx
Major cuteness here! 🙂
Well – that is a background and a half – love those stitches & the mixing & chalk stamping. The glasses are just something else – they do look like horrimmed ones & I love the shadow.
Paula (PEP)
Seriously? What you did with the reflection in the glasses is just brilliant!
Hehe!! What a super fun look on this card, I’m still smiling big! Love it!
You are so creative, Kath! The background, the sunglasses…totally awesome! You are my idol….I ♥ you! xx
Awesome card! Love that you showed how you made it. Love the detail on the sunglasses and the glossy accents! Thank you for sharing.
Katie
I couldn’t get past the fab Mr. Magoo glasses… Love this! SO creative!
wow! you are just amazing, girl! love love that fab background and LOVE what shee sees!! =) fabulous work as always, Kathy! love this! hope you have a beautiful Sunday! =)
Gorgeous Girl, love the Happy, wish PTI wasn’t so expensive to ship over here otherwise I would be ordering that die along with others too.
This is all kinds of fun!!
Kathy this is such a neat idea and a great way to use some of those scraps we all have. I can’t wait to try it!
Wow! Help me to pick my jaw up please because this is a killer card. Wow! The dimension on this is incredible and the layering is just fantastic. I can’t believe the reflection in the glasses. Your such a smarty pants to do it that way. That is what I love about your creations always “Over The Top!” Hats off to you sweet lady on another gem of a card!! Hugs.
Gorgeous intricate card and great coulours, it was fun playing.
Thank you for pointing out i missed to mention lily pad in my post, so sorry but it’s there now!
hugs
zahreen
xxx