Hello Friends, Last week was really fun sharing my vellum tips with you all week. I can’t thank you enough for showing your support on the Penny Black blog! All of the time and effort really was worth it because of you all! THANK YOU 🙂 In case you look back at my previous posts & things look different don’t think you are crazy because I edited the posts to condense them. I still have to pick the winners so I hope you understand I’ll be a day late and announce them on Monday.
This is my tutorial on what I call “reverse embossing” on vellum.
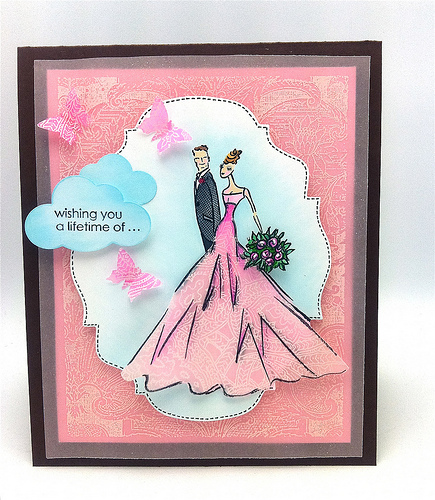
Using Versa Mark stamp onto your pink vellum with a steady hand. Emboss with white embossing powder and set aside. Stamp the dress onto another piece of vellum with Staz on ink. Heat set it for a quick dry and flip your paper over. Emboss the back of your stamped dress with a background stamp for a lacy effect using your white powder again. Cut out dress and set aside. Now you want to stamp your image onto a die cut with Memento Tuxedo Black ink and color your images. I like to add black lines to the tuxedo and some white highlights to the flower bouquet.
Use a butterfly punch to cut from your embossed vellum scraps. Use a Tombow marker to color a portion of the sentiment ONLY and stamp on some white paper. Punch out with a cloud punch and color the could with some markers. Assemble your card. Place tiny dots of glue in the corners of the vellum and some in the middle of the vellum that will be covered. Use dimensional foam for a more dramatic effect.
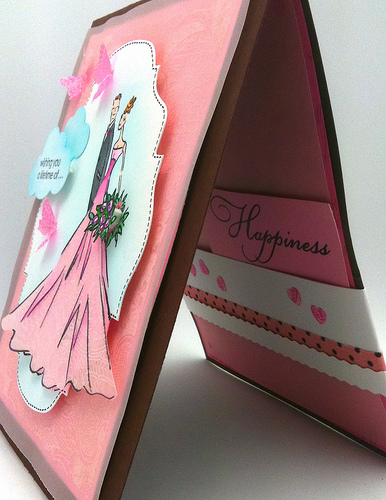
Use your scraps to layer up the inside. Use your Tombow marker to color directly on the “happiness” portion of the stamp. Stamp on some scrap card stock.
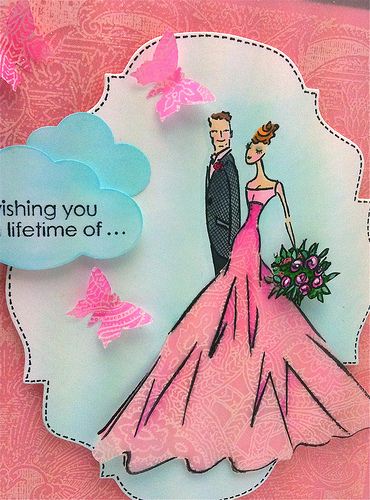
I just had to add some eye lashes and a little bit of cleavage.
This stamp is from “To You” 330-067 Copic markers and Tombo markers.
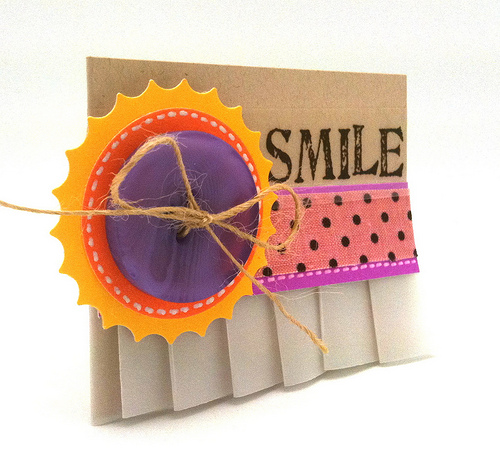
For this I used my paper scraps from the Penny Black’s new mix and match papers with an SRM Sticker (purchasehere). See you Monday with five winners. Hugs, Kathy
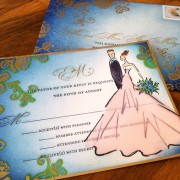 a bride’s response card
 questions answered & a challenge
 bee happy


Thanks for showing these tips again, Kathy! Love the reverse embossing on vellum. . .amazing results! You did such a fabulous job on the PB blog this week! I really enjoyed each day! 🙂
hi Kathy, your tips were amazing. I am truly inspired and enjoyed all your projects. The results you have achieved are really impressive. I enjoyed your week on PB. I found myself heading there every day to see what you and the team create next. The reverse embossing on vellum = is such an excellent idea.
Hi Kathy, I am already a BIG fan of your coloring skills. You have the talent of converting a simple image into something magical with colors. I totally enjoyed your vellum tips. I look forward to more tips in future 🙂
Thanks fore showing how you did… its just so beautiful. I think i will try whit vellum one day ,,
Jayne
wowie what a great card you’ve made, so sweet!
Wow, I like the inside of the card as well as the outside. I did not see that on the PB blog. You did a great job on your vellum cards for the blog last week. I was excited to see what you came up with each day! You are an amazing artist. By the way, I love your vellum folds, so subtle yet sophisticated (I don’t know how to describe it, but seeing it for the second time, I like it even more, seems like this would be a great technique for a wedding invitation). Have a great rest of the weekend!
Katie
Wow…that is a fantastic button on that bottom card. Love how you think to add such little detail to the second card. And I really enjoyed reading how you embossed the vellum…thanks so much.
Thanks for the tutorial. Those cards are really lovely.
Marie-Anne
I love using vellum and you have shared some great techniques! Thanks so much – your cards are just lovely!!!
Love the pleating info – not confusing at all. This week has so encouraged me & I’ve loved reading your tutorials & posts – I’m very new to using vellum but so excited by the possibilites of combining it with stamping & colouring. And to see that featured by one of the major Stamp Companies really made my week. Thank you so much for all your hard work & also for your lovely encouragement personally.
Paula (PEP)
Hi Kath! I’m a big fan of ur cards!! Thanks for a lovely week full of tips. Didn’t get a chance to get vellum this week. I have a housewarming party to prepare and I’m not in best condition this week.
Have a lovely weekend!
Cathy
Amazing! Great tip.
Great tutorial here. Love your tips.
Jaw droppingly gorgeous cards Kathy! Jo x
Hi Kathy, you made my Jaw hot the floor big time, esp. with the reverse embossed dressed. Thanks for sharing one week full of inspiration.
Your tips and tricks, well, what can I say? world class!!! These cards are just way too outstanding!
What a wonderful technique. Thank you for sharing. Can something besides StazOn be used? I am a severe asthmatic and that ink really flares my wheezing.
Kathy thank you so much for sharing the techniques. Vellum is such a fine and elegant supply to work with and I really appreciate all the tips and the hard work you put in all your posts this week!!!
Just superb Kathy. I love the look of the reverse embossing on that gorgeous pink Vellum. I really must try some. Love the wonderful tutorials on all your techniques. You are so generous with your time.
Wow these are stunning cards Kathy and thank you so much for all the amzing tips! 🙂
So pretty, love all the soft and luscious pink colors!
The card with the dress is amazing – thanks for the tutorial! x
Amazing cards, Kathy! ♥ Thank you so much for all useful tips. :))
Hugs,
ⓂⒶⓃⓊⒺⓁⒶ
I have just read your Masterclass Using Vellum in the Nov 2011 Papercraft Inspirations mag and popped over to see your blog.I am a parcher so I loved to see what you have done with vellum and parchment.
hugs adie