Hello Everyone, I can’t believe it’s Wednesday already. I hope you are enjoying my vellum tips this week on the Penny Black Blog.
Here is a more detailed description of embossing on parchment paper & using parchment as an accent. My goal yesterday was to show you an alternative to vellum in case you don’t have any…then you can run to the kitchen instead for your LLS. In our house I always cook our food on unbleached parchment paper. I have always loved the look of it and wanted to use it on a card. So I am here to tell you that embossing on parchment works beautifully! Layering the parchment & velum can give you a that unique twist that you might look for in your card designs.
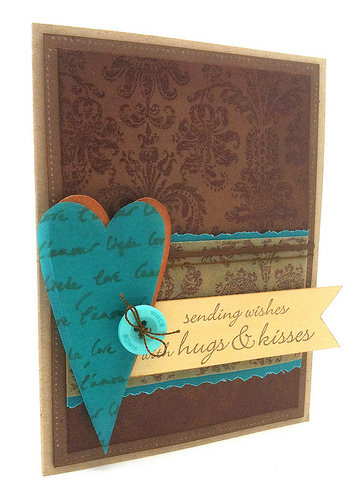
For this card I am using the new Mix & Match “Sticks & Stones” Penny Black’s new paper.
I stamped some PEARLustre GARNET opaque embossing powder on the brown card stock and onto the parchment paper. Cut a strip from the embossed parchment and save the other pieces for quick card some other time. (When embossing on the parchment move your heat tool more than normal around the area so the paper doesn’t burn. ) Distress the edges with Walnut Distress ink.
I used a Sizzix die “Primitive Hearts” to cut the heart from some scrap paper. You can stack the parchment & your scrap paper to cut both at the same time. Stamp your love background on the turquoise vellum. I loved the look of the Memento “Rich Cocoa” on the colored vellum. Rich Cocoa is used for the sentiment as well.
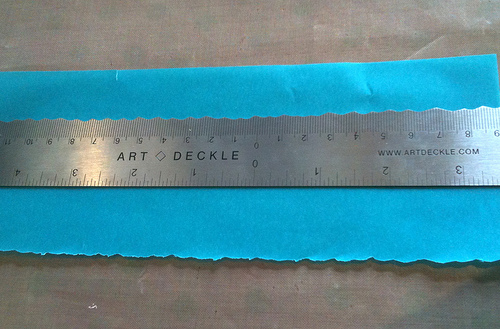
I knew this ruler would come in handy one day. I wanted a more uniform tear and remembered I had this deckle ruler. You can get a softer look from a regular ruler. I find it works best if you tear the paper towards you.
Now that you have all of your elements it’s a snap to layer your card.
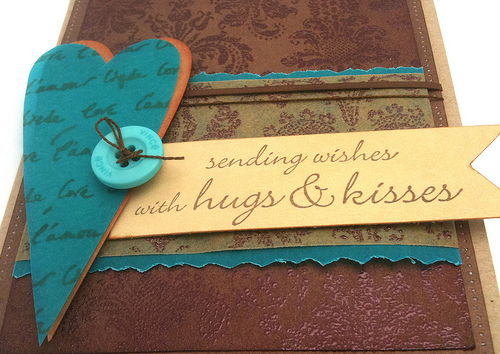
Did you notice that I matched up the pattern of the stamp on the parchment with the pattern on the brown paper? I’m sure you would have done that any way?
Is paper piercing to much work for you? If you have a sewing machine you have an instant way to add the homespun look of paper piercing. I simply sewed my paper and then used a seam ripper to take the thread out. Super speedy!
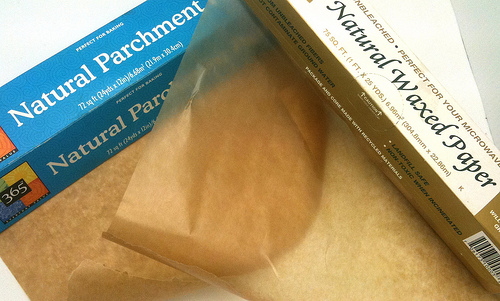
(here is a visual if someone doesn’t know what unbleached parchment and wax paper looks like)
SUPPLIES: Stamps available soon – Delicate Pattern #40-047, Love, love, love #2277K (background on heart), and the sentiment “Sending Wishes with Hugs and Kisses” #40-040. Memento “Rich Cocoa”, Walnut distress ink, Sizzix die “Primitive Hearts”, PEARLustre GARNET opaque embossing powder, heat gun, vellum and parchment paper.
 a sweet treat for you
 Spot Coloring with Penny Black
 paper smooches


what a lovely card!
Tremendous & thanks so much for doing such detailed tutorials – a mine of information & very exciting.
Paula (PEP)
Love the look of the natural parchment paper Kathy. As usual a superb tutorial
Hi Kathy!
You’ve been creating such gorgeous cards!!! Love all the cards that I’ve missed when I was on my week of vacation in Portugal. I just had a lot of fun looking back. But I do think this card here is my fave! The colors are so pretty, love the brown and gorgeous blue and that teared edge is perfect! Good thing you had that ruler! 😉 So pretty, dear Kathy, you are so talented!!
Hope you’ll have a wonderful day!
Hugs, Wendy
Thanks for a great tutorial Kathy…I really love the brown/teal colour combo…so elegant x
Jenny xx
Great cards 😉 I’m loving your vellum how-tos! Thanks!
I was so sad that i thought i cant be part of this challenge. tomorow im going to use wax paper in my house! yay!! thanks for another great tutorial,kathy.
love the colour combo.
cathy
Thank you for the tutorial! I read it on the Penny Blog yesterday but you definitely shared more information here! Have a wonderful day!
Katie
Hi Kathy! i thought i left “my luv” on either your blog or PB’s blog but can’t find it, so i’m leaving them on both blogs today (please check PB blog too cuz i explained a bit more):-) Just Amazing color combination!! You make me to luv Vellum AGAIN… i haven’t used it for several years now! lol!!Thanks for the tutorial!! Just GORGEOUS!!! 🙂
I can’t wait to try this technique. I wasn’t quite sure what parachment paper was, so Thank You for including the picture. Lovely card.
Thank you for the tutorial! Must try this!
Gorgeous, gorgeous card, Kathy! I never thought of using parchment paper on a card – I’ll definitely be raiding the kitchen presses in future!